Marbled Candy Apples
The Ultimate Guide to Glossy Marbled Candy Apples: A Swirled Masterpiece
There is a certain nostalgia associated with candy apples—the crunch of the hard sugar shell giving way to the tart, crisp bite of a Granny Smith apple. It brings to mind state fairs, autumn festivals, and Halloween parties. But today, we are elevating this classic childhood treat into something truly spectacular. We aren’t just dipping apples in red dye; we are creating Marbled Candy Apples (sometimes called Galaxy Apples) that look like edible glass art.
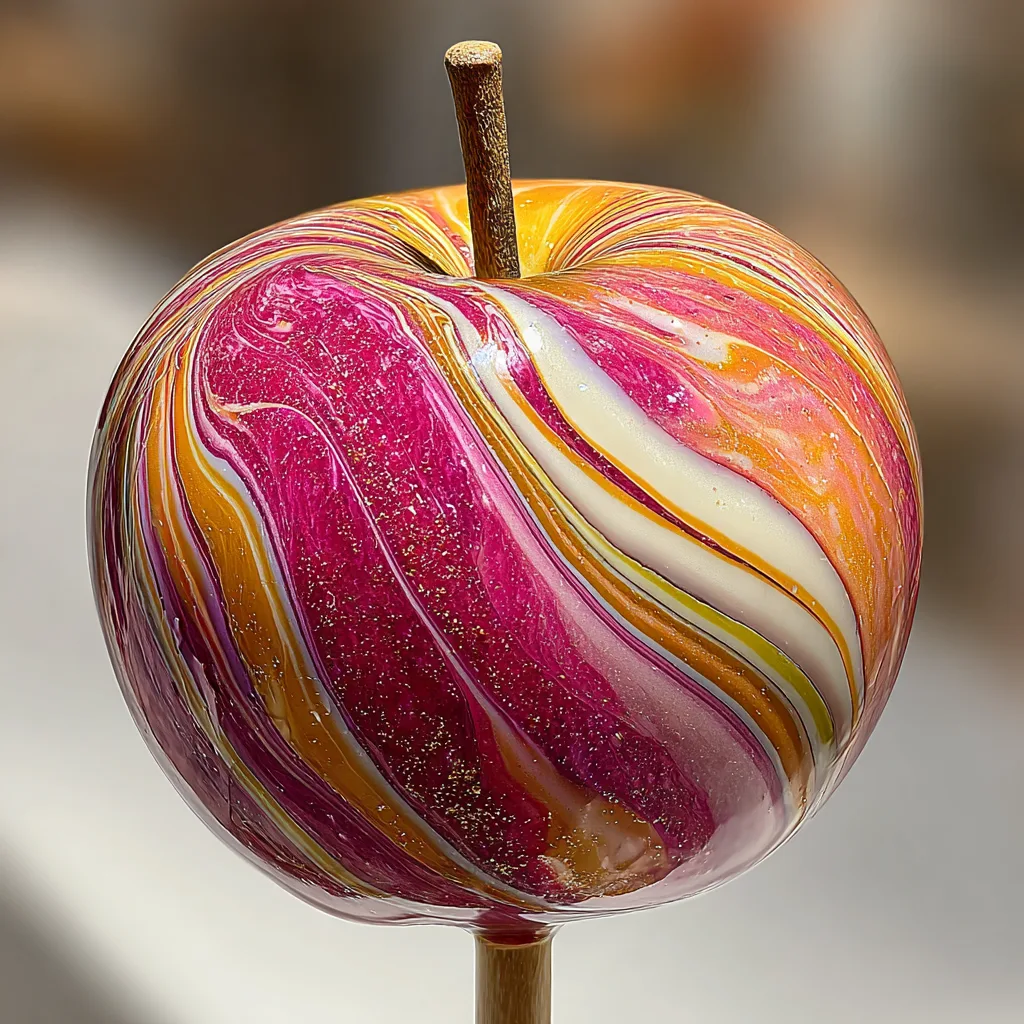
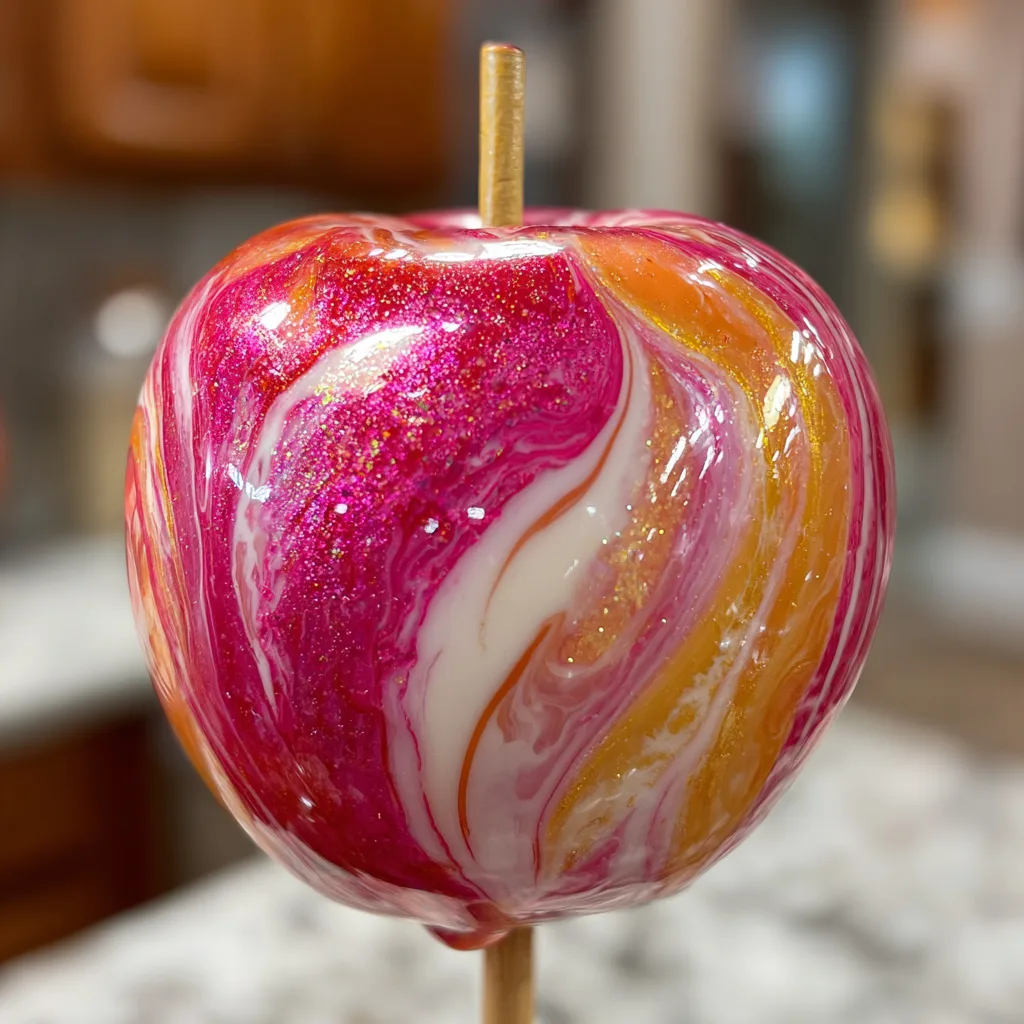
These stunning treats, featuring swirling ribbons of hot pink, vibrant orange, and creamy white, dusted with edible gold glitter, are guaranteed to be the showstopper of any dessert table. While they look incredibly complex, achieving this high-gloss, mirror-like finish is entirely possible in your home kitchen with the right technique and a little bit of patience. This comprehensive guide will walk you through the science of sugar work, the art of the swirl, and how to get that perfect, bubble-free shine.
Why This Recipe Works
The magic of this recipe lies in the contrast—both in flavor and texture. The tartness of the apple cuts through the intense sweetness of the hard candy shell, creating a balanced bite. Visually, the use of white food coloring is the secret weapon. Standard food coloring is transparent; by adding an opaque white base to the sugar syrup, the other colors (pink and orange) pop vividly against the apple instead of looking dark or translucent.
Furthermore, this recipe utilizes the “hard crack” stage of candy making. This ensures that the coating doesn’t stick to your teeth like caramel but shatters pleasantly like a lollipop, protecting the apple inside and providing that signature “glassy” appearance seen in the photo.
The Science of the Perfect Apple
Before we even touch the sugar, we must talk about the canvas: the apple. Not all apples are suitable for candy coating. The gold standard is the Granny Smith. Its firm texture holds up to the heat of the syrup without turning mushy, and its sour profile provides necessary relief from the sugar.
The Wax Factor: Grocery store apples are coated in edible wax to keep them shiny and fresh. This wax is the enemy of candy apples. If you dip a waxy apple into hot sugar, the coating will slide right off. You must remove this wax. The most effective method involves a quick dip in boiling water followed by a vigorous scrub with a rough towel. This reveals the porous skin of the apple, giving the candy something to grip onto.
Ingredients
To recreate the vibrant, glittering apple in the photo, you will need specific ingredients. Precision is key in candy making.
The Apples & Prep
- Granny Smith Apples – 6 to 8 medium-sized apples. Avoid massive apples; they are heavy and harder to dip.
- Wooden Skewers or Dowels – Thick, sturdy sticks are necessary to hold the weight of the apple.
- Baking Soda & Lemon Juice – For cleaning the apples (optional but recommended).
The Candy Glass
- Granulated White Sugar – 3 cups. The base of the glass.
- Light Corn Syrup – 1/2 cup. This interferes with sugar crystallization, ensuring the coating stays smooth and doesn’t turn grainy.
- Water – 1 cup. Dissolves the sugar to start the cooking process.
- White Gel Food Coloring – 1-2 teaspoons. Essential for the opaque, marble look. Do not use liquid food coloring; it adds too much water.
- Gel Food Colors – Hot Pink (Magenta) and Electric Orange.
- Edible Gold Glitter – Fine edible dust for that magical sparkle.
- Flavoring Oil (Optional) – 1 teaspoon. Cotton candy, vanilla, or raspberry work well. Make sure it is an oil-based flavoring to avoid seizing the sugar.
Step-by-Step Instructions
Phase 1: Apple Preparation
1. De-Wax the Apples
Bring a large pot of water to a boil. Remove it from the heat. Dip each apple into the hot water for exactly 5–10 seconds. Remove quickly and dry immediately with a rough kitchen towel, rubbing vigorously. You will feel the texture change from slippery to “squeaky.” That squeak means the wax is gone.
2. Stem and Stick
Remove the apple stems. Push your wooden skewer through the top of the apple, aiming for the core. Ensure it is secure. Place the prepped apples on a baking sheet lined with a silicone mat or lightly greased parchment paper.
Phase 2: The Sugar Syrup
3. Combine Ingredients
In a medium, heavy-bottomed saucepan, combine the sugar, water, and corn syrup. Stir gently over medium-high heat until the sugar has dissolved. Once it starts boiling, stop stirring. Stirring at this stage can cause crystallization.
4. The Boil
Insert a candy thermometer into the mixture (make sure the tip isn’t touching the bottom of the pot). Boil the mixture until it reaches the Hard Crack Stage, which is exactly 300°F (149°C). This can take anywhere from 15 to 25 minutes depending on your stove.
Pro Tip: While it boils, use a wet pastry brush to wash down the sides of the pan. This prevents rogue sugar crystals from falling into the syrup and ruining the texture.
Phase 3: The Marble Swirl
5. Color and Cool
Once the temperature hits 300°F, immediately remove the pot from the heat. Let the bubbles subside—this is crucial for a smooth finish. Stir in your white gel food coloring first. The mixture will bubble up violently; be careful. Stir until smooth and opaque white.
6. Create the Galaxy
Working quickly (the sugar hardens fast), drop a few drops of pink gel color on one side of the pot and orange on the other. Sprinkle in the gold glitter. Do not stir! Take a skewer or a chopstick and gently swirl the colors through the white base just once or twice to create a marbled pattern.
7. The Dip
Take an apple by the stick. Tilt the pot so the sugar pools to one side. Dip the apple in, twisting it once in a circular motion to coat it and catch the swirl. Lift it out and let the excess drip off for a few seconds. Do not over-swirl or the colors will mix into a muddy brown.
8. Cool and Set
Place the dipped apple onto your prepared silicone mat or greased parchment. Let it cool completely at room temperature. The candy will harden within minutes.
Troubleshooting Common Issues
Bubbles in the coating:
If your apples look rough or bubbly, you likely dipped them while the mixture was still too hot and active. After reaching 300°F, you must let the syrup sit off the heat for about 1-2 minutes until the boiling stops and the surface is glass-smooth before adding color.
The candy is sliding off:
This is a wax issue. If the apple wasn’t scrubbed thoroughly, the sugar has nothing to grip. Another culprit is moisture. Ensure the apple is 100% dry, especially around the stem area, before dipping.
The coating is sticky/chewy:
You didn’t reach the hard crack stage. The thermometer must hit 300°F-310°F. Anything lower (like 280°F) results in “soft crack” which will be tacky and stick to your teeth aggressively.
Variations and Serving Ideas
- Cosmic Blue: Swap pink and orange for dark blue, purple, and teal to create a “Deep Space” apple.
- Flavor Infusions: Add a teaspoon of cinnamon oil to the sugar syrup for a “Red Hot” flavor profile that matches the spicy look.
- Toppings: While the candy is still wet (immediately after dipping), you can press crushed nuts or sprinkles onto the bottom rim for added texture, though this hides the marbling.
Storage Instructions
Candy apples are best eaten the day they are made. Moisture is the enemy of hard candy. If you must store them, place them in a cool, dry place. Do not refrigerate them! The humidity in the fridge will cause the candy coating to become sticky and “weep” (melt). If you want to package them as gifts, wrap them loosely in cellophane bags and tie with a ribbon, but ensure they are kept at room temperature.
Creating these Marbled Candy Apples is as much an art project as it is a culinary endeavor. The result is a stunning, glossy, sweet-and-sour treat that looks like it came straight from a high-end confectionary. Enjoy the crunch!
Glossy Marbled Candy Apples
Ingredients
Equipment
Method
- Clean apples by dipping in boiling water for 10 seconds, then scrubbing dry to remove wax.
- Remove stems and insert wooden sticks firmly into the top of each apple. Place on a silicone mat.
- In a saucepan, combine sugar, water, and corn syrup. Bring to a boil over medium-high heat.
- Cook without stirring until the mixture reaches 300°F (Hard Crack Stage).
- Remove from heat immediately. Let bubbles subside for 1-2 minutes until smooth.
- Stir in white food coloring carefully. Then, drop in pink and orange coloring and glitter. Swirl gently with a stick (do not overmix).
- Dip apples one by one, tilting the pot to coat, and lifting straight up to let excess drip.
- Place on the silicone mat to cool and harden completely (about 10 minutes).