Nacho Cheese Sauce
Homemade Nacho Cheese Sauce: The Ultimate 5-Ingredient Recipe
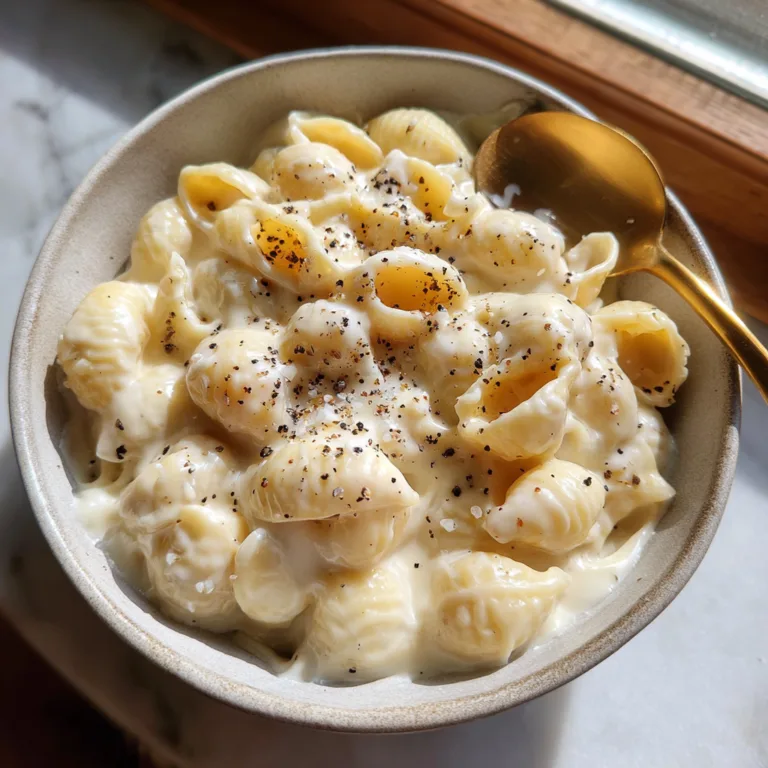
There is a specific, undeniable magic to a perfectly smooth, rich, and creamy nacho cheese sauce. It brings to mind the bustling excitement of a baseball stadium, the cozy nostalgia of a late-night movie theater trip, or the lively atmosphere of a weekend tailgate party. For decades, many of us have relied on store-bought jars, cans, or microwaveable plastic cups to satisfy this craving. However, once you discover how incredibly simple it is to make an authentic, luxurious nacho cheese sauce from scratch using only five basic ingredients, you will never wander down the snack aisle for pre-made dip again.
This foolproof recipe yields a deeply savory, velvety sauce that cascades perfectly over a mountain of tortilla chips. The beauty of this recipe lies in its elegant simplicity. By relying on fundamental culinary techniques—specifically the creation of a roux and a classic béchamel—you can transform ordinary butter, flour, milk, and cheese into a culinary masterpiece in under fifteen minutes. Say goodbye to artificial preservatives, unpronounceable stabilizers, and the metallic taste of canned cheese. Welcome to the golden era of homemade snacking.

The Science of a Smooth Cheese Sauce: Understanding the Roux
To master the art of homemade nacho cheese sauce, one must first understand the foundational sauce it is built upon. In classical French cooking, a white sauce made from a roux and milk is called a béchamel. Once you add cheese to a béchamel, it officially becomes a Mornay sauce. While “Mornay” might sound intimidatingly fancy for a plate of nachos, the science behind it is wonderfully straightforward and easy to master.
A roux is simply a mixture of equal parts fat (in this case, butter) and flour, cooked together over heat. When you melt the butter and whisk in the flour, the flour granules become coated in fat. This is a crucial step. If you were to dump raw flour directly into hot milk, the outside of the flour clumps would cook immediately, creating a gelatinous seal that traps dry flour inside, resulting in a lumpy, unappetizing sauce. By coating the flour in butter first, the granules are kept separate. When the milk is eventually added, the starch in the flour can swell and absorb the liquid evenly, creating a flawlessly smooth, thickened base.
Cooking the roux for a minute or two before adding the liquid also cooks out the raw, pasty flavor of the flour, leaving behind a subtle, nutty, and rich background note that enhances the overall flavor of the final cheese sauce.
Why Your Choice of Cheese Matters
With only five ingredients in this recipe, the quality and type of cheese you choose will dramatically dictate the final flavor and texture of your nacho cheese sauce. While the recipe simply calls for “grated cheese,” navigating the dairy aisle requires a bit of strategy.
The Golden Rule: Grate It Yourself
If there is only one rule you follow when making homemade cheese sauce, let it be this: never use pre-shredded cheese from a bag. Commercially shredded cheeses are coated with anti-caking agents, such as cellulose or potato starch, to prevent the shreds from clumping together in the package. While this is great for sprinkling on a cold salad, these starches prevent the cheese from melting smoothly. Instead of a glossy, liquid gold sauce, pre-shredded cheese will result in a grainy, separated, and clumpy texture. Always buy a block of cheese and use a box grater.
Flavor Profiles: Choosing Your Cheddar
For a classic, vibrant nacho cheese experience, cheddar is the absolute go-to. However, the age of the cheddar matters significantly.
Mild or medium cheddar cheeses have a higher moisture content and are generally younger. Because they haven’t aged as long, their protein structures break down more easily under heat, resulting in a wonderfully smooth, stretchy, and silky melt. If texture is your top priority, mild cheddar is your best friend.
Sharp and extra-sharp cheddars have been aged longer. They pack a massive punch of tangy, complex flavor, which is delicious, but they possess a lower moisture content and a tighter protein structure. This makes them slightly more prone to breaking or becoming grainy when melted. For the ultimate balance, many home chefs like to use a 50/50 blend of mild cheddar for maximum meltability and sharp cheddar for a robust flavor profile.
Alternative Cheeses for Variations
While cheddar is traditional, you can easily experiment. Monterey Jack or Pepper Jack are phenomenal melting cheeses that add a creamy texture and, in the case of Pepper Jack, a lovely kick of heat. Gouda can add a sophisticated smokiness, while a touch of American cheese (which is heavily emulsified) can act as an insurance policy to guarantee a perfectly smooth texture.
Ingredients
- – 2 tablespoons butter (unsalted or salted works fine, adjust final salt accordingly)
- – 2 tablespoons all-purpose flour
- – 1 cup whole milk (warm or room temperature works best)
- – 1 cup freshly grated cheese (mild or medium cheddar recommended)
- – 1/2 teaspoon salt (or to taste)
Instructions
- Melt the Butter: Place a medium-sized saucepan over medium heat. Add the 2 tablespoons of butter and allow it to melt completely until it begins to gently bubble and foam. Keep an eye on it so it does not brown.
- Create the Roux: Sprinkle the 2 tablespoons of all-purpose flour directly over the melted butter. Immediately begin whisking the mixture together. Continue to whisk constantly for about 1 to 2 minutes. The mixture will look like a thick, golden paste and should smell slightly nutty. This step cooks out the raw flour flavor.
- Incorporate the Milk: Slowly pour the 1 cup of milk into the saucepan while whisking continuously. Pouring the milk in a slow, steady stream prevents lumps from forming. Once all the milk is added, continue to cook the mixture over medium heat, whisking frequently.
- Thicken the Base: Allow the milk mixture to come to a very gentle simmer (do not let it come to a rapid boil). As it simmers, the starches in the flour will swell, and the sauce will begin to thicken. Cook for about 3 to 5 minutes, or until the mixture coats the back of a spoon. You have now created a classic béchamel sauce.
- Remove from Heat: This is a critical step. Remove the saucepan entirely from the hot burner. Cheese is delicate, and exposing it to direct, boiling heat will cause the proteins to curdle and the fats to separate, leading to a greasy, grainy sauce.
- Melt the Cheese: Add the 1 cup of freshly grated cheese into the thickened hot milk mixture. Stir gently with a whisk or a wooden spoon until the cheese is completely melted and the sauce is smooth, glossy, and uniform in color.
- Season and Serve: Stir in the 1/2 teaspoon of salt. Taste the sauce carefully and add more salt if desired. Serve immediately while warm and fluid.
Expert Troubleshooting and Consistency Tips
Even with a simple recipe, things can occasionally go awry. Here is how to ensure your sauce is perfect every single time, and how to fix it if it isn’t.
Controlling the Thickness: The thickness of your cheese sauce is entirely up to your personal preference. If you find the final sauce is too thick for your liking, simply whisk in an additional tablespoon of warm milk at a time until you reach your desired dipping consistency. Conversely, if your sauce feels too thin, allow it to cool for a few minutes; cheese sauces naturally thicken as their temperature drops. Do not be tempted to add raw flour to a finished sauce to thicken it, as this will create irreversible lumps and a raw flour taste.
Avoiding the Dreaded Grainy Texture: The most common complaint when making cheese sauce is a gritty or grainy texture. This happens for two main reasons. The first, as mentioned, is using pre-shredded cheese. The second is overheating the cheese. Always remember to take your saucepan off the heat *before* adding the cheese. The residual heat of the thickened milk base is more than enough to melt the finely grated cheese gently.
The Emulsion Rescue: If your sauce accidentally separates (meaning you see pools of oil floating on top of clumpy cheese), it means the emulsion has broken due to excessive heat. Sometimes, you can save it by vigorously whisking in a splash of cold milk or a tiny pinch of sodium citrate if you happen to have it in your pantry, though prevention by managing heat is always the best method.
Delicious Variations and Bold Mix-Ins
The beauty of this 5-ingredient nacho cheese sauce is that it acts as a phenomenal blank canvas. Once you have mastered the base, you can customize it to fit any theme or palate.
Spicy Tex-Mex: For a classic spicy nacho dip, stir in a handful of finely diced pickled jalapeños and a splash of the jalapeño brine right at the end. You can also add a pinch of cayenne pepper, smoked paprika, or a dash of your favorite hot sauce.
Chili Cheese Dip: Transform this simple sauce into a hearty appetizer by folding in half a cup of your favorite chili (homemade or canned, without beans) after the cheese has melted. This creates a robust, meaty dip that is incredibly satisfying.
Pico de Gallo or Salsa: For a fresher, chunkier profile, stir in a quarter cup of drained salsa or fresh pico de gallo. The acidity of the tomatoes and lime juice cuts through the richness of the cheese beautifully. Just ensure you drain excess liquid so you don’t thin out the sauce too much.
Garlic and Herb: Step away from traditional nachos and turn this into a sophisticated dip for bread or vegetables by whisking in half a teaspoon of garlic powder, a pinch of onion powder, and some finely chopped fresh chives or parsley.

Serving Suggestions for Every Occasion
While pouring this glossy liquid gold over a massive tray of salty tortilla chips is the most obvious and beloved choice, this versatile sauce has a place in countless other culinary applications.
Soft Pretzels: There is arguably no better pairing for a warm, chewy, salted soft pretzel than a rich cheese dip. Whether you are baking homemade pretzels or heating up frozen ones, this sauce elevates the experience to pub-quality levels.
Vegetable Enhancer: Struggling to get your family to eat broccoli or cauliflower? A generous drizzle of homemade cheddar cheese sauce over steamed or roasted vegetables will instantly transform them from a chore into a highly requested side dish.
Gourmet Burgers and Hot Dogs: Skip the standard slice of American cheese and ladle a spoonful of warm nacho cheese sauce over your next grilled burger or hot dog. It creates a messy, indulgent, and unforgettable meal.
Baked Potatoes and Fries: Pour this sauce over a mountain of crispy french fries or use it to smother a loaded baked potato alongside bacon bits, sour cream, and green onions.
How to Store and Reheat Leftover Cheese Sauce
If you happen to have any of this delicious sauce left over, it stores remarkably well. Transfer the cooled cheese sauce to an airtight container and store it in the refrigerator for up to 4 days. Because it contains no preservatives, it will solidify into a firm block when chilled—this is completely normal.
To Reheat: The key to reheating cheese sauce without breaking it is to use gentle, slow heat.
Stovetop (Recommended): Place the cold, solidified cheese sauce in a small saucepan over medium-low heat. Add a splash of milk (about a tablespoon) to help loosen it up. Stir constantly until it is fully melted, smooth, and warm.
Microwave: Place the sauce in a microwave-safe bowl. Heat it in 15-second intervals on 50% power, stirring vigorously after each interval, until warm and smooth. Do not blast it on high power, or the oils will separate.
Making your own Nacho Cheese Sauce at home is a culinary skill that yields incredibly high rewards for very little effort. With just butter, flour, milk, cheese, and salt, you have the power to create a stadium-worthy snack right in your own kitchen. Enjoy the rich, creamy, and undeniable satisfaction of homemade liquid gold!
Nacho Cheese Sauce
Ingredients
Equipment
Method
- Melt the butter in a medium saucepan over medium heat.
- Whisk in the flour and cook for 1-2 minutes until it forms a smooth, bubbly paste.
- Slowly pour in the milk while whisking constantly to prevent lumps.
- Continue to cook and whisk over medium heat for 3-5 minutes until the mixture thickens and lightly coats the back of a spoon.
- Remove the saucepan entirely from the heat.
- Add the freshly grated cheese and gently stir until completely melted and smooth.
- Stir in the salt, taste, and adjust if necessary. Serve immediately.