Rainbow Island Float
The Ultimate Guide to Making the Perfect Rainbow Island Float
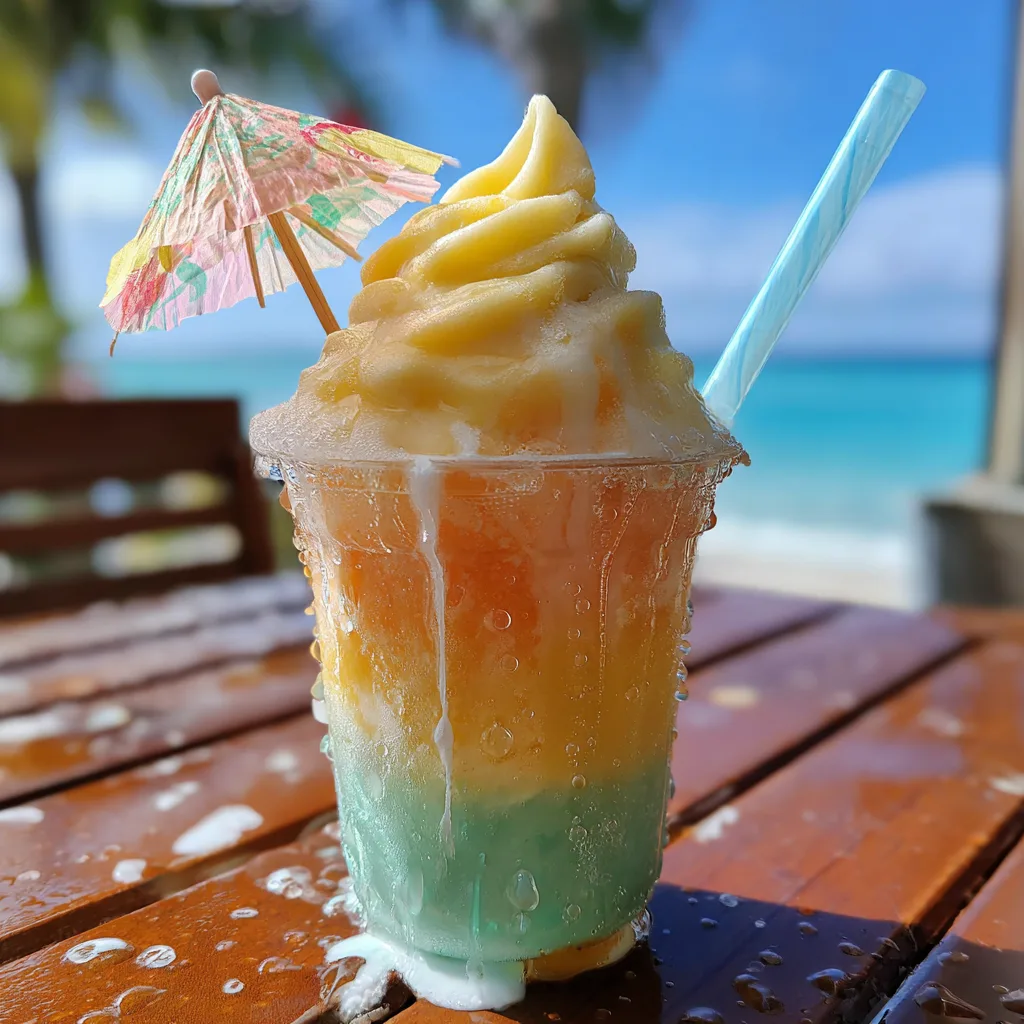
When the summer heat reaches its peak and the sun is beating down, there is absolutely nothing more satisfying than a tall, icy, and incredibly refreshing beverage. But why settle for a standard glass of lemonade or a plain iced tea when you can transport yourself directly to a tropical paradise with a single sip? Enter the Rainbow Island Float, a dazzling, multi-layered masterpiece that is equal parts beverage and dessert. With its vibrant hues of seafoam green, sunset orange, and sunny yellow, topped with a generous swirl of creamy pineapple whip, this drink is essentially a vacation in a cup.
In this comprehensive guide, we are going to dive deep into the art of creating the ultimate tropical slushy float right in your own kitchen. You do not need to book a flight to Hawaii or wait in endless lines at a theme park to enjoy this spectacular treat. We will cover the specific ingredients needed to achieve those stunning colors naturally, the techniques required to keep your layers from muddying, and all the fun variations you can try. Whether you are hosting a backyard luau, a child’s birthday party, or just need a spectacular afternoon pick-me-up, this recipe is guaranteed to impress.
Why You Will Absolutely Love This Recipe
There are countless reasons why the Rainbow Island Float will quickly become your go-to recipe for the summer season. First and foremost is the visual “wow” factor. We eat and drink with our eyes first, and the bright, distinct layers of this float make it incredibly Instagram-worthy and joyful to look at. It instantly sets a festive, celebratory mood the moment you bring a tray of these out to your guests.
Beyond its striking appearance, the flavor profile is phenomenally balanced. Unlike many store-bought slushies that rely heavily on artificial syrups and overwhelming sweetness, this homemade version utilizes real fruit juices and nectars. The tartness of the pineapple, the smooth sweetness of the mango or peach, and the creamy, luxurious finish of the soft-serve topping create a symphony of tropical flavors that dance across your palate.
Furthermore, this recipe is brilliantly customizable and family-friendly. In its base form, it is an elaborate, delicious mocktail that kids will go absolutely crazy for. However, it can easily be adapted into a sophisticated, adult-only frozen cocktail with the addition of a little rum or vodka. It is a versatile recipe that scales up easily for a crowd or scales down for a quiet afternoon on the porch.
The Magic Ingredients
To achieve the distinct layers and vibrant colors of the Rainbow Island Float without relying on heavy artificial food coloring, we use a strategic blend of juices, syrups, and frozen elements. Here is a breakdown of what you will need for each component:
The Teal/Green Layer
- – Pineapple Juice: The tart and sweet base that gives this layer its tropical kick. Always use 100% pure pineapple juice.
- – Blue Curaçao Syrup (Non-Alcoholic): This is the secret to the color! When the bright blue syrup mixes with the naturally yellow pineapple juice, it creates that stunning seafoam green/teal color. You can find non-alcoholic blue curaçao syrup in the coffee syrup aisle or online.
- – Ice: Essential for creating the thick, slushy texture that supports the upper layers.
The Orange/Peach Layer
- – Mango or Peach Nectar: Nectars are thicker than standard juices, which helps give this layer body and a rich, sunset-orange hue.
- – A Dash of Grenadine or Strawberry Syrup: Just a tiny splash added to the yellow/orange nectar will deepen the color into a beautiful, vibrant orange.
- – Ice: To match the slushy consistency of the base layer.
The Yellow Layer
- – Cream of Coconut: This adds a rich, piña colada-like flavor to the top layer of the slush.
- – Fresh or Frozen Mango Chunks: Blending real fruit into this layer gives it a bright, opaque yellow color and a fantastic texture.
- – Pineapple Juice: To help the blender process the fruit and ice.
- – Ice: To thicken.
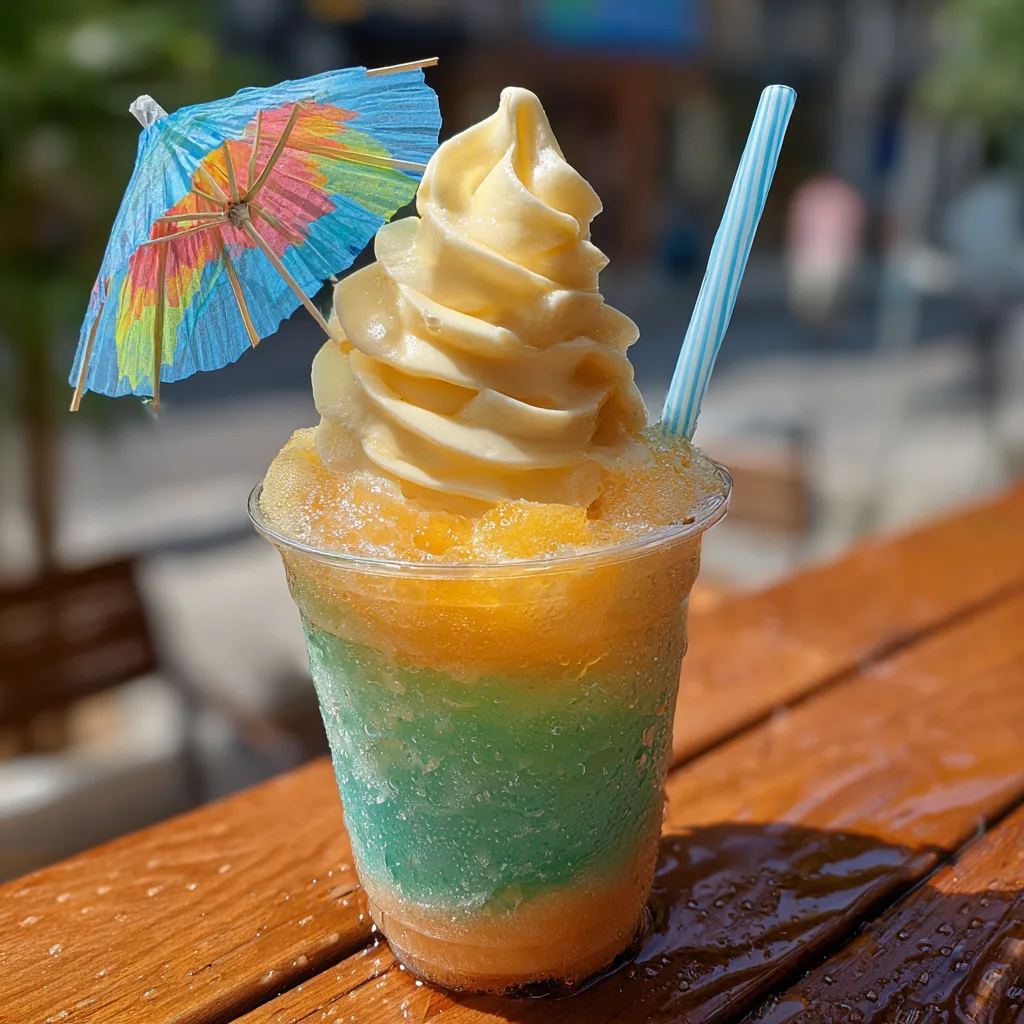
The Crowning Glory (The Float)
- – Pineapple Soft Serve or Vanilla Ice Cream: If you can find a dairy-free pineapple whip (like Dole Whip) at your grocery store, that is the ultimate topping. If not, a high-quality vanilla bean ice cream or even a hefty swirl of stabilized whipped cream works beautifully.
Step-by-Step Instructions
Creating a layered slushy requires a little bit of patience and organization, but the process is incredibly straightforward. Having all your ingredients pre-measured will make the blending process smooth and stress-free.
- Prepare Your Glasses: Choose tall, clear plastic or glass cups (roughly 16 ounces). The beauty of this drink is entirely in seeing the layers, so clear drinkware is a must. Place your empty cups in the freezer while you blend; a frosted glass helps prevent the slush from melting too quickly.
- Blend the Teal Layer: In your blender, combine the pineapple juice, a splash of blue curaçao syrup, and a generous handful of ice. Blend on high until you achieve a thick, smooth, frozen margarita-like consistency. It should not be watery. Pour this mixture equally into the bottom third of your chilled glasses. Place the glasses back in the freezer to let this layer firm up slightly while you prepare the next one. Rinse your blender out quickly.
- Blend the Orange Layer: Next, combine your mango or peach nectar, a tiny dash of grenadine, and ice in the blender. Blend until thick and slushy. Remove the glasses from the freezer. To prevent the orange layer from crashing into the teal layer and muddying the colors, gently spoon the orange slush over the back of a spoon into the glass, creating a distinct second tier. Return the glasses to the freezer and rinse your blender once more.
- Blend the Yellow Layer: Add the frozen mango chunks, cream of coconut, a splash of pineapple juice, and a little ice to the blender. Process until completely smooth. Remove the glasses from the freezer and gently layer this final yellow slush on top of the orange, filling the cup to about an inch below the rim.
- Add the Float: Now for the best part! Using a piping bag with a star tip (for that professional soft-serve look) or a traditional ice cream scoop, add a generous mound of pineapple whip or vanilla ice cream directly onto the top of the frozen yellow slush layer.
- Garnish and Serve: Insert a fun, brightly colored paper straw down the side of the cup, penetrating all the layers. Top it off with a classic paper drink umbrella. Serve immediately and watch your guests’ eyes light up!
Pro Tips for the Perfect Layered Drink
The biggest challenge when making any layered beverage is preventing the colors from mixing together into an unappetizing brown sludge. Here are the scientific secrets to keeping your rainbow perfectly intact:
The Density Rule: In mixology, layering is all about density (the sugar content). The liquid with the highest sugar content is the heaviest and should go on the bottom. When making slushies, however, thickness is your best friend. Ensure every layer is blended to a very thick, almost spoonable consistency. If one layer is too watery, it will bleed into the others.
The Freezer Trick: As outlined in the instructions, popping the glasses into the freezer for 3 to 5 minutes between adding each layer gives the slush time to set on the surface. This creates a temporary “crust” that can easily support the weight of the next layer being added.
The Spoon Pour: Never pour a layer directly from the heavy blender pitcher into the glass. The force of the pour will break the surface of the layer below. Always use the back of a spoon to diffuse the flow, or gently scoop the slush into the glass.
Exciting Variations and Customizations
The Rainbow Island Float is wonderfully adaptable. Once you understand the basic method of blending and layering, you can swap out ingredients to match whatever you have in your pantry or whatever flavor profile you desire.
- – The Adult Island Float (Cocktail Version): To turn this into a boozy summer treat, add 1 ounce of coconut rum (like Malibu) to the yellow layer, and 1 ounce of white rum or vodka to the teal layer during the blending process. The alcohol will make the slush slightly softer, so you may need to add a little extra ice to maintain the thick consistency.
- – The Berry Rainbow: Not a fan of tropical flavors? Change the color palette! Make a red layer with blended strawberries and ice, a blue layer with blue raspberry syrup and lemonade, and a white layer with blended coconut milk and ice.
- – Dairy-Free Delight: Ensure your topping is entirely plant-based. You can make a quick homemade Dole Whip by blending frozen pineapple chunks with a splash of full-fat coconut milk until it reaches a soft-serve consistency, and use that instead of traditional dairy ice cream.
- – Soda Float Hack: If you are short on time and cannot blend three separate layers of slush, you can cheat the system. Fill a cup with ice, pour in a brightly colored soda (like a tropical punch or pineapple soda), and simply top it with a massive scoop of ice cream. It won’t have the distinct layered look, but it will still taste phenomenal.
The History of Tropical Floats
The concept of mixing ice cream or soft serve with fruit juices has roots deeply embedded in American theme park history and Tiki culture. The mid-20th century saw a massive boom in Polynesian-inspired dining and entertainment in the United States. Tropical fruits like pineapple, coconut, and mango became synonymous with exotic vacations and relaxation.
The introduction of the famous Dole Whip at Disneyland in the 1980s solidified the popularity of the fruit-based soft serve. Naturally, people began dropping this magical pineapple soft serve into cups of pineapple juice, creating the legendary “Dole Whip Float.” Our Rainbow Island Float takes this beloved theme park classic and elevates it, adding vibrant colors and complex flavors that celebrate the entire spectrum of tropical fruits.
Storage and Make-Ahead Instructions
Because this recipe relies on frozen, blended ice, it is best consumed immediately after assembly. However, if you are preparing for a party, you can definitely do some prep work ahead of time.
You can pre-blend the individual colored slush mixtures up to two hours in advance. Store each color in a separate, airtight container in the freezer. Because they contain sugar and juice, they won’t freeze into a solid block immediately. When you are ready to serve, take the containers out of the freezer, give each one a vigorous stir to loosen the slush, and then layer them into the glasses as instructed.
If you have leftover assembled drinks, unfortunately, they cannot be saved gracefully. The layers will eventually melt and merge, and the ice cream topping will dissolve into the juice. It will still taste like a delicious fruit punch, but the magic of the presentation will be lost. Therefore, it is best to only blend as many floats as you intend to serve.
Frequently Asked Questions (FAQs)
Can I make this without a blender?
To get the authentic, icy slush texture for the layers, a blender is absolutely necessary. However, if you do not have one, you can make a “liquid” version of this float. Layer heavy syrups (like grenadine) at the bottom, carefully pour pineapple juice over ice, and top with blue curaçao mixed with water. Then add your ice cream. The colors will separate based on density, but it won’t be a slushy.
Where can I buy non-alcoholic blue curaçao?
You can easily find it online, or in the coffee/syrup aisle of most major grocery stores. Brands like Torani and Monin make excellent versions. It tastes slightly of bitter orange, which pairs perfectly with the sweet pineapple.
How do I keep it from melting so fast outside?
Summer heat is the enemy of the float! The best defense is pre-chilling your glasses in the freezer for at least 30 minutes before assembly. Also, ensure your ingredients (the juices and nectars) are refrigerated and ice-cold before you even start blending. The colder the starting ingredients, the longer the slush will hold its form.
Serving Suggestions
The Rainbow Island Float is a show-stopper on its own, but it pairs beautifully with summer fare. Serve these alongside a platter of grilled teriyaki chicken skewers, a fresh mango salsa with tortilla chips, or a classic backyard barbecue spread of burgers and hot dogs. The sweet, cold, refreshing nature of the float provides the perfect counterbalance to savory, salty, or spicy foods.
Whether you are lounging by a pool, sitting on a balcony, or just wishing you were on a beach, crafting a batch of these spectacular layered drinks is the perfect way to celebrate the joy of summer. Gather your ingredients, fire up the blender, and prepare to be transported to your very own tropical island!
Rainbow Island Float
Ingredients
Equipment
Method
- Place two tall, clear glasses in the freezer to chill.
- Make the Teal Layer: In a blender, combine 1/2 cup pineapple juice, blue curaçao syrup, and 1 cup of ice. Blend until thick and slushy. Divide evenly into the bottoms of the chilled glasses. Return glasses to freezer.
- Rinse the blender. Make the Orange Layer: Combine mango nectar, grenadine, and 1 cup of ice. Blend until thick. Remove glasses from freezer and gently spoon the orange layer over the teal layer. Return to freezer.
- Rinse the blender. Make the Yellow Layer: Combine frozen mango, cream of coconut, 1/4 cup pineapple juice, and 1/2 cup ice. Blend until smooth. Gently spoon into the glasses, leaving room at the top.
- Immediately top each glass with a generous swirl or scoop of pineapple soft serve or vanilla ice cream.
- Garnish with a colorful straw and a paper drink umbrella. Serve immediately.