Raspberry Chocolate Lasagna
Raspberry Chocolate Lasagna: The Ultimate No-Bake Indulgence
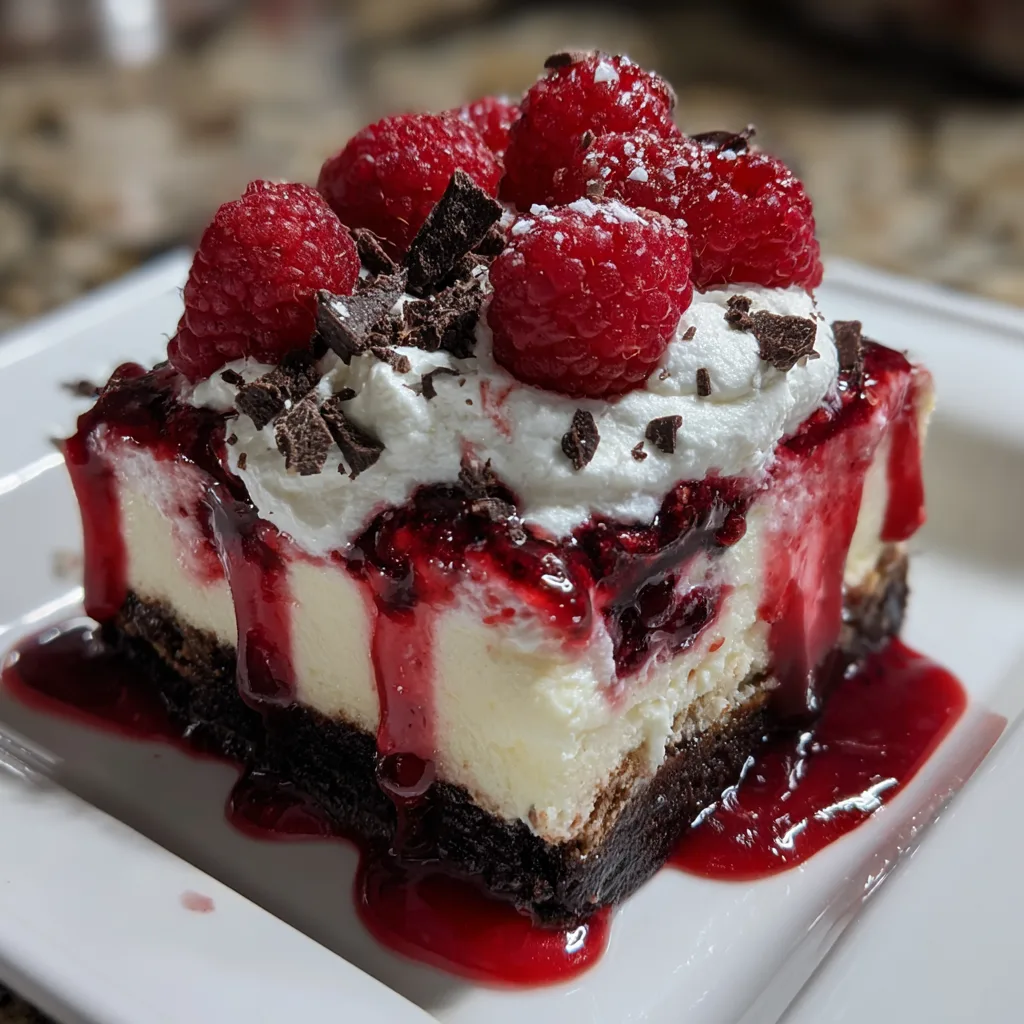
When it comes to desserts that stop conversations and start cravings, Raspberry Chocolate Lasagna is in a league of its own. Imagine a dessert that combines the deep, slightly bitter crunch of a chocolate cookie crust with the airy, cloud-like texture of sweetened cheesecake mousse, all cut through with the tart, bright zing of fresh raspberries and a glossy fruit sauce. This isn’t just a cake; it is an experience. It is a layered masterpiece that looks incredibly professional but is secretly one of the easiest “fake-out” desserts you can make in your home kitchen.
This dish is affectionately termed “lasagna” not because it contains pasta or marinara, but because of its beautiful, distinct layers. It follows the tradition of the famous “Chocolate Lasagna” or “Lush” desserts, but elevates the standard recipe by introducing fresh fruit. The combination of chocolate and raspberry is timeless—a culinary marriage that balances rich, earthy cocoa notes with sharp, acidic sweetness. Whether you are hosting a summer barbecue, looking for a romantic Valentine’s Day treat, or simply need a cool, no-bake fix for a Tuesday night, this recipe delivers on every front.
In this comprehensive guide, we will walk you through every step of creating this stunning dessert. We will cover the science behind the perfect crust, how to stabilize your whipped cream layers, and why fresh berries make all the difference. Prepare to become the most popular person at the potluck.
Why You Will Fall in Love With This Recipe
There are countless reasons to add this Raspberry Chocolate Lasagna to your recipe rotation, but here are the ones that truly matter:
- No Oven Required: In the heat of summer, or when your oven is occupied with a main course, this dessert saves the day. It requires zero baking, relying instead on the refrigerator to set the layers into sliceable perfection.
- Texture Contrast: Food fatigue happens when a dish is one-note. This dessert offers a symphony of textures: the grainy, buttery crunch of the crust, the smooth density of the cream cheese layer, the liquid gloss of the raspberry sauce, and the bursting pop of fresh berries on top.
- Make-Ahead Magic: This is actually a dessert that improves with time. Making it 24 hours in advance allows the crust to soften slightly (becoming cake-like) and the flavors to meld, making it the perfect stress-free party host option.
- Visually Stunning: The contrast between the black Oreo crust, the stark white cream, and the vibrant red berries makes for a dramatic presentation that looks beautiful on any table.
Ingredients Overview
To achieve the perfect balance of flavors, we use specific ingredients for each layer. Here is what you will need:
The Chocolate Crust
- Chocolate Sandwich Cookies (Oreos): You will need a standard family-size package. We use the whole cookie, cream filling and all. The filling helps bind the crust together, reducing the amount of extra butter needed.
- Unsalted Butter: Melted butter acts as the glue. We prefer unsalted to control the sodium, as the cookies already have a bit of salt.
The Cheesecake Mousse Layer
- Cream Cheese: Use full-fat brick-style cream cheese. Tub spreads have too much air and water content and will result in a runny filling. Ensure it is softened to room temperature for lump-free mixing.
- Powdered Sugar: This dissolves instantly into the cream cheese without leaving a gritty texture. It also contains a tiny bit of cornstarch which helps stabilize the filling.
- Heavy Whipping Cream & Vanilla: Used to lighten the cheese mixture and add aroma.
The Raspberry Layer
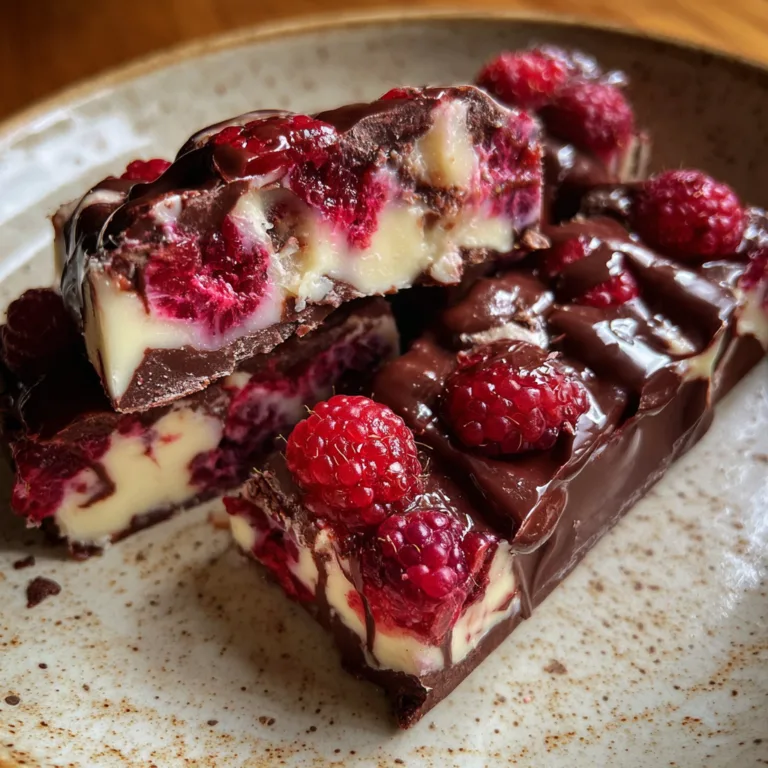
- Raspberry Preserves or Pie Filling: For the saucy ribbons shown in the photo, a high-quality seedless raspberry preserve or a homemade coulis works best. It provides that “oozing” effect.
- Fresh Raspberries: You cannot substitute frozen berries for the garnish, as they will weep water and turn mushy. Fresh berries provide the structural integrity and visual pop.
The Topping
- Whipped Topping or Fresh Whipped Cream: You can use a stabilized whipped cream or a tub of Cool Whip depending on your preference for sweetness and stability.
- Chocolate Shavings/Curls: Use a semi-sweet chocolate bar and a vegetable peeler to create professional-looking curls.
Step-by-Step Instructions
Follow these steps carefully to ensure distinct layers and a dessert that holds its shape when sliced.
1. Prepare the Crust
Place your chocolate sandwich cookies (entire cookies) into a food processor. Pulse until they are fine crumbs. If you do not have a processor, place them in a zip-top bag and crush them with a rolling pin. Transfer the crumbs to a medium bowl and pour in the melted butter. Stir with a fork until every crumb is moistened and looks like wet sand. Press this mixture firmly into the bottom of a 9×13 inch baking dish. Use the bottom of a measuring cup to pack it down tight. Place in the freezer for 15-20 minutes to set while you make the filling.
2. Create the Cheesecake Layer
In a large mixing bowl, beat the softened cream cheese and powdered sugar together until completely smooth and creamy. Add the vanilla extract and a splash of milk or cream (about 2 tablespoons) to loosen it slightly. Fold in about 1 cup of your whipped topping (or whipped cream) to aerate the mixture. Spread this white layer gently over the chilled crust. Be careful not to pull up the crumbs; dropping spoonfuls all over the surface and then connecting them works best.
3. Add the Raspberry Swirl
If your raspberry preserves are stiff, microwave them for 10-15 seconds to loosen them up. Drizzle or spread the raspberry preserves over the cheesecake layer. For the look in the photo, you can swirl it slightly into the white layer using a knife, or create a distinct thin red layer.
4. The Final Cream Layer
Top the raspberry layer with the remaining whipped topping. Spread it to the edges of the pan, creating a smooth, snowy surface. This is your canvas for the toppings.
5. Garnish and Chill
This is the fun part. Generously cover the top of the cake with fresh raspberries. Don’t be shy—abundance looks appetizing! Take your chocolate bar and vegetable peeler and shave curls of chocolate over the berries and cream. Cover the dish with plastic wrap and refrigerate for at least 4 hours, preferably overnight.
Expert Tips for Success
Even though this is a simple recipe, a few professional tricks will take it from “good” to “gourmet.”
- The Temperature Rule: Ensure your cream cheese is truly at room temperature. If it is cold, it will curdle or remain lumpy when you mix it with the sugar. Conversely, ensure your heavy cream (if whipping from scratch) is ice cold.
- Clean Slices: To get that perfect square slice where the layers are visible (like in the photo), place the lasagna in the freezer for 30–45 minutes before serving. Use a sharp knife dipped in hot water and wiped dry between each cut.
- Drying the Berries: Wash your raspberries gently, but ensure they are completely dry before placing them on the cream. Wet berries will dissolve the whipped cream and create red pools of liquid that ruin the pristine white look.
Variations and Substitutions
Make this recipe your own with these creative twists:
1. Gluten-Free Option:
Simply swap standard Oreos for Gluten-Free Oreos. The rest of the ingredients (cream cheese, sugar, fruit) are naturally gluten-free. Always check labels on pudding mixes or thickeners if you deviate from the recipe.
2. White Chocolate Raspberry:
Fold melted and cooled white chocolate into the cream cheese layer for a richer, truffle-like consistency. Garnish with white chocolate curls instead of dark for a “peaches and cream” aesthetic.
3. The “Black Forest” Twist:
Substitute the raspberries for cherry pie filling and use fresh pitted cherries on top. Add a splash of almond extract to the whipped cream for that classic cherry-almond flavor profile.

Storage and Shelf Life
Because this dessert contains dairy and fresh fruit, proper storage is essential.
- Refrigerator: Store covered in the fridge for up to 3-4 days. Note that the fresh raspberries on top may start to soften after day 2, so it is best eaten fresh.
- Freezer: You can freeze this dessert! Prepare it up to the point of adding fresh fruit. Wrap tightly with plastic wrap and foil. Freeze for up to a month. Thaw in the fridge overnight before adding fresh berries and serving.
Serving Suggestions
This Raspberry Chocolate Lasagna is rich, so small squares often suffice. However, if you want to elevate the plating:
- Plating: Serve on a dark plate to make the white cream pop, or a white plate (as shown) to emphasize the red and black elements.
- Drink Pairing: This dessert pairs beautifully with a dark roast coffee or an espresso, which cuts through the sweetness. For an adult twist, serve with a glass of Prosecco or a dessert wine like a Ruby Port.
Whether you call it a lasagna, an icebox cake, or a lush, this Raspberry Chocolate Lasagna is a testament to the fact that you don’t need a culinary degree—or even an oven—to create a spectacular dessert. It brings together the nostalgia of cookies and cream with the sophisticated flair of fresh fruit tartness. Enjoy the process of layering, and enjoy the compliments even more!
Raspberry Chocolate Lasagna
Ingredients
Equipment
Method
- Crush the Oreo cookies into fine crumbs using a food processor. Mix with melted butter until combined.
- Press the crumb mixture firmly into the bottom of a 9×13 inch baking dish. Freeze for 10-15 minutes to set.
- In a medium bowl, beat softened cream cheese, powdered sugar, and vanilla until smooth.
- Gently fold in the whipped heavy cream (or cool whip) into the cream cheese mixture until combined.
- Spread the cheesecake mixture over the chilled crust.
- Drizzle or spread the raspberry preserves over the cream cheese layer. Use a knife to swirl slightly if desired.
- Top with the remaining whipped topping, smoothing it out edge to edge.
- Cover and refrigerate for at least 4 hours (or overnight) to allow layers to set.
- Before serving, top generously with fresh raspberries and shaved chocolate curls.