Red Velvet White Chocolate Brownies
The Ultimate Decadent Red Velvet White Chocolate Brownies
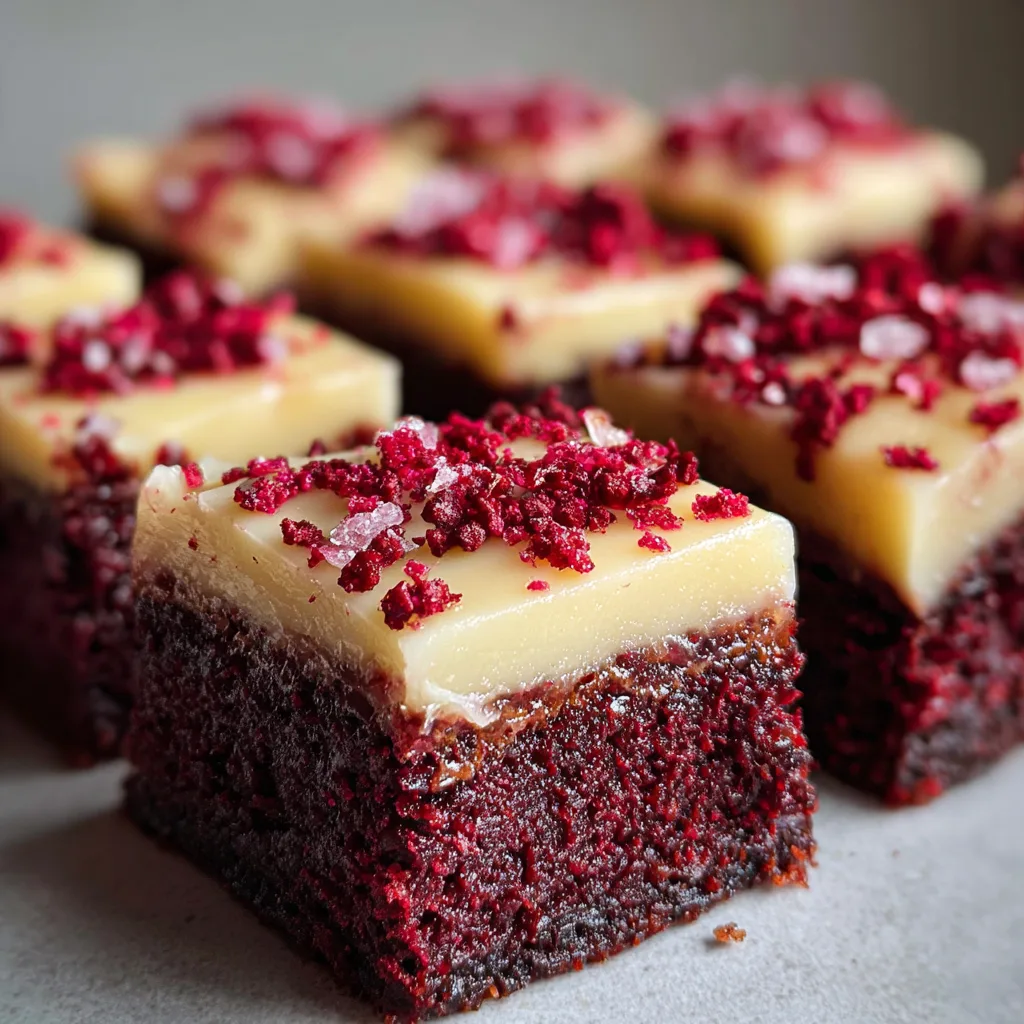
When it comes to indulgent desserts, few things can rival the intense satisfaction of a perfectly baked, incredibly fudgy brownie. But what happens when you take that classic brownie texture, infuse it with the iconic, slightly tangy flavor of red velvet, top it with a luscious blanket of white chocolate ganache, and finish it with a tart sprinkle of freeze-dried raspberries? You get a dessert that is nothing short of a culinary masterpiece. These Decadent Red Velvet White Chocolate Brownies are visually stunning, boasting a deep crimson interior that contrasts beautifully with the stark white topping and bright red raspberry jewels. More importantly, they deliver a complex, harmonious flavor profile that will have your friends and family begging for the recipe.
In this comprehensive guide, we will explore every single detail required to master these spectacular treats. From understanding the unique science behind red velvet to achieving the ultimate fudgy texture without underbaking, we will cover it all. Whether you are baking for a special occasion like Valentine’s Day, bringing a show-stopper to a holiday potluck, or simply treating yourself on a cozy weekend, this recipe is designed to be foolproof, impressive, and utterly delicious. Let us dive into the wonderful world of high-end home baking.
The Magic and Science of Red Velvet
Red velvet is often misunderstood. Many people mistakenly believe it is simply white cake or chocolate cake dyed red. In reality, authentic red velvet has a distinct flavor profile and a fascinating history. The traditional reddish hue originally came from a chemical reaction between natural, non-alkalized cocoa powder and acidic ingredients like buttermilk and vinegar. This reaction revealed the anthocyanins (red pigments) naturally present in the cocoa.
Today, to achieve that vibrant, signature crimson color, we rely on a touch of food coloring, but the foundational flavor remains the same. A true red velvet dessert features a mild chocolate flavor, a subtle tanginess from buttermilk or white vinegar, and a luxurious, velvety texture. In these brownies, we amplify the fudgy aspect while maintaining that crucial tangy-sweet balance. The acidity not only tenderizes the crumb, making the brownies melt in your mouth, but it also prevents the dessert from becoming cloyingly sweet, perfectly priming the palate for the rich white chocolate topping.

Fudgy vs. Cakey: Achieving the Perfect Texture
The great brownie debate has raged for decades: fudgy or cakey? For this particular recipe, fudgy is the undeniable champion. The visual appeal of these bars relies on a dense, tight crumb that looks almost wet—a characteristic perfectly captured in the ultimate indulgent brownie.
To achieve this, we manipulate the ratio of fat to flour. Cakey brownies rely on more flour and baking powder for lift and a lighter crumb. Our fudgy red velvet brownies, however, use a higher proportion of butter and egg yolks relative to the flour. We omit chemical leaveners entirely. The result is a dense, rich, and intensely chocolatey base that holds its shape beautifully when sliced, yet gives way to a soft, truffle-like consistency when bitten into. The secret lies in not overmixing the batter once the flour is added; overmixing develops gluten, which leads to a tough, bready texture rather than the melt-in-your-mouth fudginess we desire.
The Essential Layers: From Base to Topping
These brownies are a study in contrasts, featuring three distinct layers that work together in perfect harmony. Understanding the role of each layer is key to appreciating the final dessert.
The Red Velvet Base: This is the anchor. It is dense, slightly chewy at the edges, and incredibly soft in the center. The deep red color provides the visual drama, while the hint of cocoa and vanilla offers a comforting, familiar base note.
The White Chocolate Ganache: Red velvet is traditionally paired with cream cheese frosting, but for a modern, elegant twist, we are using a thick layer of white chocolate ganache. White chocolate provides a creamy, milky sweetness that complements the subtle tang of the red velvet base. By creating a ganache (melting the chocolate with heavy cream), we ensure the topping sets firmly enough to slice cleanly, but remains soft and luscious on the tongue, never brittle or waxy.
The Freeze-Dried Raspberry Crown: This is the secret ingredient that elevates the entire dish from good to unforgettable. White chocolate and red velvet are both quite rich. The freeze-dried raspberries provide a crucial hit of bright, fruity acidity that cuts through the richness, cleansing the palate and making you want to go back for another bite. Furthermore, they add a delightful, crispy textural contrast to the otherwise soft and fudgy dessert.
Ingredients You Will Need
Gathering high-quality ingredients is the first step toward baking perfection. Here is everything you need for these show-stopping brownies:
For the Red Velvet Brownie Base:
- – 1/2 cup (1 stick) unsalted butter, melted and slightly cooled
- – 1 cup granulated sugar
- – 2 large eggs, room temperature
- – 1 teaspoon pure vanilla extract
- – 1 teaspoon white vinegar
- – 1 tablespoon red food coloring (liquid or gel)
- – 3/4 cup all-purpose flour
- – 1/4 cup unsweetened natural cocoa powder
- – 1/4 teaspoon salt
For the White Chocolate Ganache:
- – 8 ounces high-quality white chocolate, finely chopped (do not use chocolate chips, as they contain stabilizers that prevent smooth melting)
- – 1/4 cup heavy whipping cream
For the Topping:
- – 1/4 cup freeze-dried raspberries, lightly crushed
Step-by-Step Instructions
Follow these detailed steps carefully to ensure your brownies turn out perfectly dense, vibrant, and incredibly delicious.
- Prepare Your Pan and Oven: Preheat your oven to 350°F (175°C). Line an 8×8 inch square baking pan with parchment paper, leaving an overhang on two sides. This parchment “sling” is absolutely critical; it allows you to lift the entirely cooled block of brownies out of the pan for perfect, clean slicing. Lightly spray the parchment with non-stick cooking spray.
- Mix the Wet Ingredients: In a large mixing bowl, combine the melted butter and granulated sugar. Whisk vigorously for about a minute. This step helps dissolve the sugar slightly and creates a slightly crackly top on the brownie base. Add the room temperature eggs one at a time, whisking well after each addition until the mixture is smooth and pale.
- Add the Flavor and Color: Stir in the vanilla extract and the white vinegar. Next, add the red food coloring. If using gel coloring, you may need less than a tablespoon; add it gradually until you reach a deep, vibrant crimson hue. Be careful, as the color will darken slightly as it bakes.
- Incorporate the Dry Ingredients: Sift the all-purpose flour, natural cocoa powder, and salt directly into the bowl with the wet ingredients. Sifting the cocoa powder is essential, as it often contains hard lumps that will not break down during mixing. Using a rubber spatula, gently fold the dry ingredients into the wet batter just until no streaks of flour remain. Do not overmix! The batter will be quite thick.
- Bake the Base: Pour the thick red velvet batter into the prepared baking pan. Use an offset spatula or the back of a spoon to smooth it into an even layer, ensuring it reaches all the corners. Bake in the preheated oven for 22 to 28 minutes. A toothpick inserted into the center should come out with a few moist crumbs attached, but no wet batter. Do not overbake, or you will lose that signature fudgy texture.
- Cool the Brownies: Remove the pan from the oven and place it on a wire rack. It is imperative that the brownies cool completely in the pan before you add the topping. If the brownies are even slightly warm, the white chocolate ganache will melt and slide right off the edges.
- Prepare the Ganache: Once the brownies are completely cool, make the ganache. Place the finely chopped white chocolate in a heat-proof glass or metal bowl. In a small saucepan, heat the heavy cream just until it begins to simmer (do not let it boil). Pour the hot cream over the chopped white chocolate and let it sit undisturbed for 3 minutes to gently melt the chocolate.
- Whisk and Pour: After 3 minutes, gently whisk the cream and chocolate together starting from the center and working your way outwards until you have a perfectly smooth, glossy ganache. Immediately pour the ganache over the cooled red velvet brownies in the pan. Use an offset spatula to spread it into a smooth, even layer all the way to the edges.
- Add the Raspberries: While the white chocolate ganache is still wet and sticky, generously sprinkle the lightly crushed freeze-dried raspberries evenly over the top. Press them down very gently so they adhere to the chocolate.
- Chill and Slice: Place the entire pan in the refrigerator for at least 1 hour to allow the ganache to set completely. Once firm, use the parchment overhang to lift the brownies out of the pan onto a cutting board. For the cleanest slices, use a large, sharp chef’s knife. Run the knife under hot water, wipe it completely dry with a towel, and make a firm, confident cut. Wipe the blade clean between every single cut. This technique ensures those sharp, professional-looking layers.
Expert Tips for Baking Success
Baking is both an art and a science. Keep these expert tips in mind to elevate your brownies from amateur to professional bakery quality.
The Importance of Chocolate Quality: When making the ganache, the quality of your white chocolate makes a massive difference. Avoid standard white chocolate chips from the baking aisle. They contain emulsifiers and stabilizers designed to help them hold their shape in cookies, which means they will not melt smoothly into a silky ganache. Instead, buy high-quality white chocolate bars (like Lindt or Ghirardelli) and chop them yourself. Look for white chocolate that lists cocoa butter as a primary ingredient, not palm oil.
Room Temperature Ingredients: Ensuring your eggs are at room temperature before you begin is crucial. Cold eggs will cause the melted butter to seize up and solidify, resulting in a lumpy batter and an uneven bake. If you forgot to take your eggs out of the fridge, simply place them in a bowl of warm (not hot) tap water for 10 minutes before using them.
Do Not Skip the Vinegar: The teaspoon of white vinegar might seem like an odd addition to a dessert recipe, but it is essential for authentic red velvet flavor. The acid reacts with the cocoa powder to enhance its flavor and color, and it tenderizes the flour’s proteins, contributing to that incredibly soft, velvety crumb.
Exciting Flavor Variations
While this recipe is spectacular as written, it serves as a wonderful foundation for culinary experimentation. Here are a few ways to switch up the flavor profile:
Dark Chocolate Drizzle: If you find white chocolate too sweet, you can add a layer of complexity by melting an ounce of dark chocolate and elegantly drizzling it over the set white chocolate ganache alongside the raspberries.
Cream Cheese Swirl: For a more traditional red velvet experience, skip the ganache. Instead, beat 4 ounces of softened cream cheese with 1/4 cup of sugar and an egg yolk. Drop dollops of this mixture over the raw brownie batter and use a butter knife to swirl it in before baking.
Strawberry or Cherry Topping: If you cannot find freeze-dried raspberries, freeze-dried strawberries or cherries make fantastic substitutes. They provide that same necessary tartness and beautiful ruby-red color contrast against the white chocolate.
Serving Suggestions
These brownies are incredibly rich, so small squares are highly recommended. A 2-inch square is the perfect portion size to satisfy a sweet tooth without overwhelming the palate.
Serve these at room temperature to fully appreciate the fudgy texture of the base and the creamy melt of the ganache. They pair exceptionally well with a stark, bitter beverage to cut through the sweetness. A shot of dark espresso, a cup of strong black coffee, or a glass of unsweetened Earl Grey tea are ideal accompaniments. For a truly decadent dessert course, serve a square alongside a small glass of ruby port wine.
Storage and Freezing Instructions
Because of the dairy in the white chocolate ganache, these brownies require slightly different storage than your standard chocolate brownie.
Refrigerator Storage: Store the cut brownies in an airtight container in the refrigerator for up to 5 days. You can eat them cold straight from the fridge (they become wonderfully dense and chewy, like a chilled truffle), but for the best flavor and texture, let them sit at room temperature for 20 minutes before serving.
Freezing Instructions: These brownies freeze exceptionally well. To freeze, do not cut them. Wrap the entire cooled block (with the ganache and raspberries) tightly in two layers of plastic wrap, followed by a layer of aluminum foil. Freeze for up to 3 months. To thaw, unwrap the block and let it sit in the refrigerator overnight. Once thawed, use the hot knife method to slice them into squares.
Conclusion
These Decadent Red Velvet White Chocolate Brownies are a testament to the joy of baking. They combine stunning visual aesthetics with a deeply satisfying, multi-layered flavor profile. The dense, chocolatey, tangy base harmonizes perfectly with the sweet, creamy ganache and the sharp, fruity bite of the raspberries. By following the meticulous steps and utilizing the professional tips provided in this guide, you will be able to create a bakery-worthy masterpiece right in your own kitchen. Enjoy the process, and prepare for the inevitable requests for the recipe!
Decadent Red Velvet White Chocolate Brownies
Ingredients
Equipment
Method
- Preheat oven to 350°F (175°C). Line an 8×8 inch baking pan with parchment paper, leaving an overhang.
- In a large bowl, whisk melted butter and granulated sugar together for 1 minute. Add eggs one at a time, whisking well after each.
- Stir in the vanilla extract, white vinegar, and red food coloring until vibrant.
- Sift the flour, cocoa powder, and salt into the wet ingredients. Fold gently with a spatula just until combined. Do not overmix.
- Spread the thick batter evenly into the prepared pan. Bake for 22-28 minutes until a toothpick comes out with moist crumbs. Let cool completely in the pan.
- For the ganache, place chopped white chocolate in a heat-proof bowl. Heat heavy cream in a saucepan until simmering, then pour over chocolate.
- Let sit for 3 minutes, then whisk gently until smooth and glossy.
- Pour the ganache over the cooled brownies, spreading to the edges.
- Immediately sprinkle the crushed freeze-dried raspberries over the wet ganache.
- Refrigerate for at least 1 hour to set the ganache. Use the parchment sling to remove from pan and slice with a hot, clean knife.