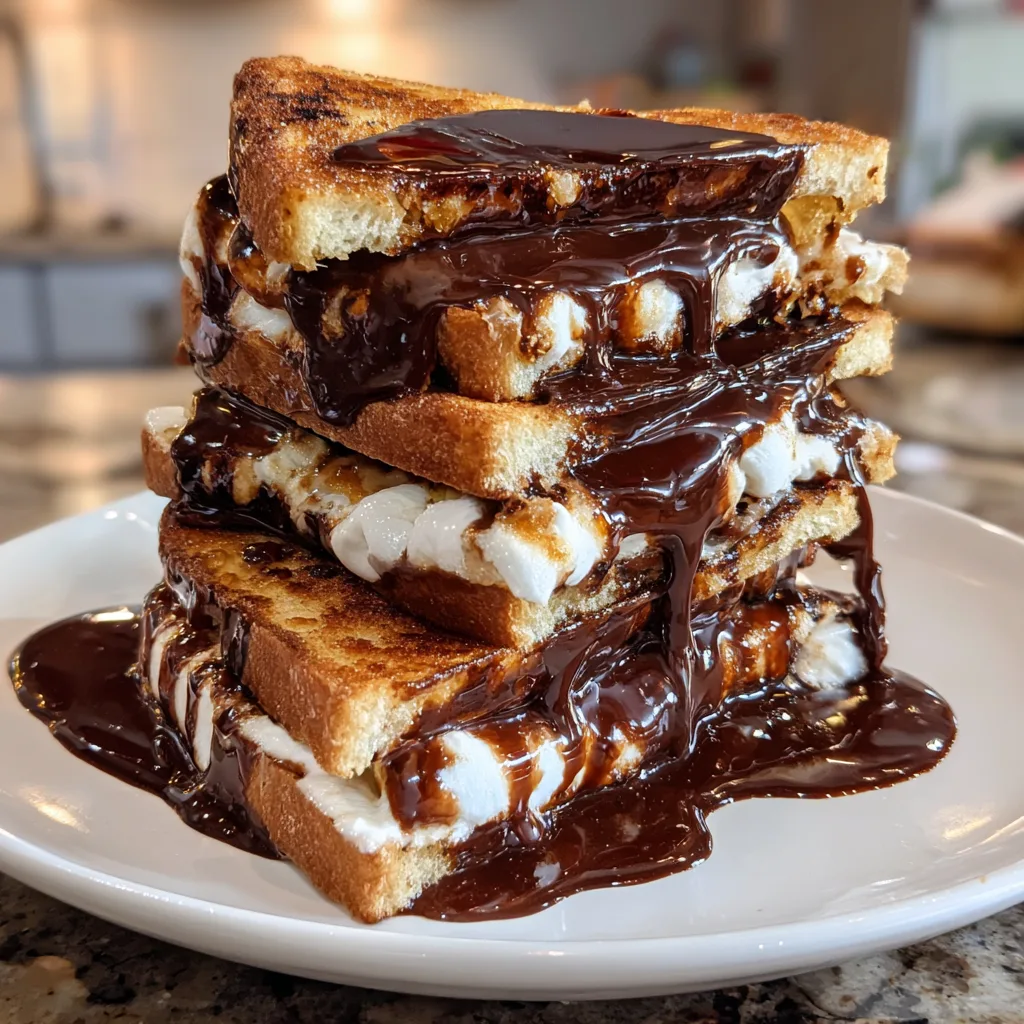
Smores Grilled Cheese
The Ultimate S’mores Grilled Cheese: A Gooey, Crispy Indoor Campfire Classic
There is a universally acknowledged truth in the world of desserts: the combination of toasted marshmallow, melting chocolate, and a crisp, slightly salty exterior is completely unbeatable. For over a century, the traditional s’more has held the crown as the ultimate outdoor treat. But what happens when the craving strikes and you don’t have a roaring campfire, a starlit sky, or even a backyard fire pit? What if it’s pouring rain, snowing, or you simply live in a high-rise apartment? Enter the greatest culinary mashup of the modern era: The S’mores Grilled Cheese.
This ingenious recipe takes everything you love about the nostalgic campfire classic and marries it with the comforting, buttery, golden-brown perfection of a classic grilled cheese sandwich. It is a masterpiece of textural contrast—the satisfying crunch of the pan-toasted bread giving way to an avalanche of warm, gooey marshmallow and rich, liquid chocolate. In this comprehensive guide, we will dive deep into the art of creating the perfect dessert sandwich, exploring the best ingredients, the science of the perfect melt, creative variations to elevate your dessert game, and the fascinating history behind these iconic flavors.
Why the S’mores Grilled Cheese is a Culinary Triumph
At first glance, putting chocolate and marshmallows between two slices of bread might sound like a chaotic sugar rush meant only for children. However, when executed correctly, the s’mores grilled cheese is a beautifully balanced dessert that appeals to sophisticated palates just as much as it delights the young at heart. The secret lies in the butter.
In a traditional s’more, the graham cracker provides a dry, slightly sweet, and grainy crunch. While delicious, it lacks the rich, savory fat that elevates a dessert from merely sweet to truly decadent. By using standard sandwich bread and coating the outside with a generous layer of salted butter, you introduce a crucial savory element. As the butter fries the bread in the skillet, it undergoes the Maillard reaction—a chemical process between amino acids and reducing sugars that gives browned food its distinctive flavor. This crispy, salty, deeply savory exterior perfectly cuts through the intense sweetness of the marshmallow and milk chocolate interior.
Furthermore, the closed-sandwich format solves the greatest flaw of the traditional s’more: the structural integrity. We have all experienced the tragedy of biting into a freshly built s’more only to have the slippery marshmallow shoot out the back and onto the dirt. The grilled cheese method locks the precious molten filling securely between two sturdy, toasted walls, ensuring that every single bite contains the perfect ratio of bread, chocolate, and marshmallow.
Choosing the Ultimate Ingredients
With a recipe that relies on only four ingredients, the quality and type of each component will drastically affect the final outcome. Here is a breakdown of how to select your canvas and your paints for this edible masterpiece.
The Bread: Your Crispy Canvas
While you might be tempted to reach for a dense artisanal sourdough or a nutty whole wheat, restraint is key here. The filling is the star of the show; the bread should be a supportive, crispy vessel.
Standard White Bread: Believe it or not, plain, soft white sandwich bread is often the best choice. It toasts beautifully, absorbs the butter perfectly, and has a neutral flavor that doesn’t compete with the chocolate.
Brioche: If you want to elevate the dish into a truly decadent pastry-like experience, thick-cut brioche is phenomenal. Its high egg and butter content means it toasts to an incredible golden brown and offers a slightly sweet, pillowy texture.
Texas Toast: For those who love a thick, substantial bite and want to stuff the sandwich with maximum fillings, the thick slices of Texas toast provide excellent structural support.
The Chocolate: Finding the Perfect Melt
Not all chocolate is created equal when it comes to melting. You need a chocolate that will turn into a glossy, luscious pool without requiring excessive heat that would burn the bread.
Standard Milk Chocolate Bars: This is the most authentic choice for a classic s’mores flavor profile. Thin milk chocolate bars melt incredibly fast and offer that familiar, nostalgic sweetness. Break them into squares that fit the footprint of your bread.
Chocolate Chips: Semi-sweet or dark chocolate chips can add a more complex, slightly bitter cocoa note that balances the sugary marshmallow. However, chips contain stabilizers meant to help them hold their shape in the oven, meaning they take slightly longer to melt in a skillet.
Chocolate Hazelnut Spread: For a guaranteed oozy texture from the very first second, smearing one side of the bread with Nutella or a similar spread is a fantastic “cheat” that ensures a wet, saucy interior.
The Marshmallow: Fluff vs. Solid
Getting the marshmallow right is the trickiest part of the indoor s’more.
Marshmallow Fluff (Crème): This is arguably the easiest and least messy route. Spreading a thick layer of marshmallow fluff guarantees a gooey, sticky, perfectly distributed layer without the risk of the marshmallow puffing up and rolling out of the sandwich.
Mini Marshmallows: If you prefer the authentic texture of real marshmallows, mini marshmallows melt much faster and more evenly than large ones.
Large Marshmallows: If using large camp-style marshmallows, you MUST cut them in half lengthwise. A full, round marshmallow will create too much distance between the bread slices, preventing the heat from reaching the chocolate and making the sandwich impossible to flip safely.
Ingredients for the Perfect S’mores Grilled Cheese
- – 4 slices of soft white bread (or brioche/Texas toast)
- – 2 tablespoons of unsalted or salted butter, softened to room temperature
- – 1 standard-sized milk chocolate bar (about 1.5 oz), broken into pieces
- – 1/2 cup of mini marshmallows (or 2 large marshmallows cut in half, or 3 tablespoons marshmallow fluff)
- – Optional: 1 tablespoon of graham cracker crumbs (for added crunch)
Step-by-Step Instructions
- Prep the Bread: Take your four slices of bread and lay them flat on a clean cutting board. Using a butter knife, generously spread the softened butter on one side of each slice. Be sure to spread the butter all the way to the very edges—this ensures an even, golden crust across the entire sandwich.
- Build the Base: Flip two of the slices over so the buttered side is facing down against the cutting board. These will be the bottom halves of your sandwiches.
- Layer the Chocolate: Arrange the broken pieces of the milk chocolate bar evenly across the unbuttered side of the two bottom slices. Leave a tiny border around the edge to prevent the chocolate from spilling completely out when it melts.
- Add the Marshmallow: Place the mini marshmallows, halved large marshmallows, or a thick dollop of marshmallow fluff directly on top of the chocolate layer. If using graham cracker crumbs for texture, sprinkle them over the marshmallows now.
- Cap the Sandwich: Place the remaining two slices of bread on top of the marshmallow layer, making sure the buttered side is facing UP and outward.
- Heat the Skillet: Place a non-stick skillet or a well-seasoned cast-iron griddle over medium-low heat. Let the pan preheat for a minute. The secret to this recipe is LOW and SLOW. If the pan is too hot, the bread will burn before the chocolate and marshmallows have a chance to melt.
- The First Grill: Carefully use a spatula to transfer the assembled sandwiches into the skillet. Let them cook undisturbed for 3 to 4 minutes. You are looking for the bottom layer of bread to turn a deep, crispy golden brown. You can gently press down on the top of the sandwich with your spatula to encourage the heat to transfer through the layers, but don’t smash it too hard or the filling will burst out.
- The Flip: This is the most crucial moment. Once the bottom is golden, slide your spatula completely under the sandwich. Place your free hand (or another spatula) lightly on top to stabilize it, and execute a quick, confident flip.
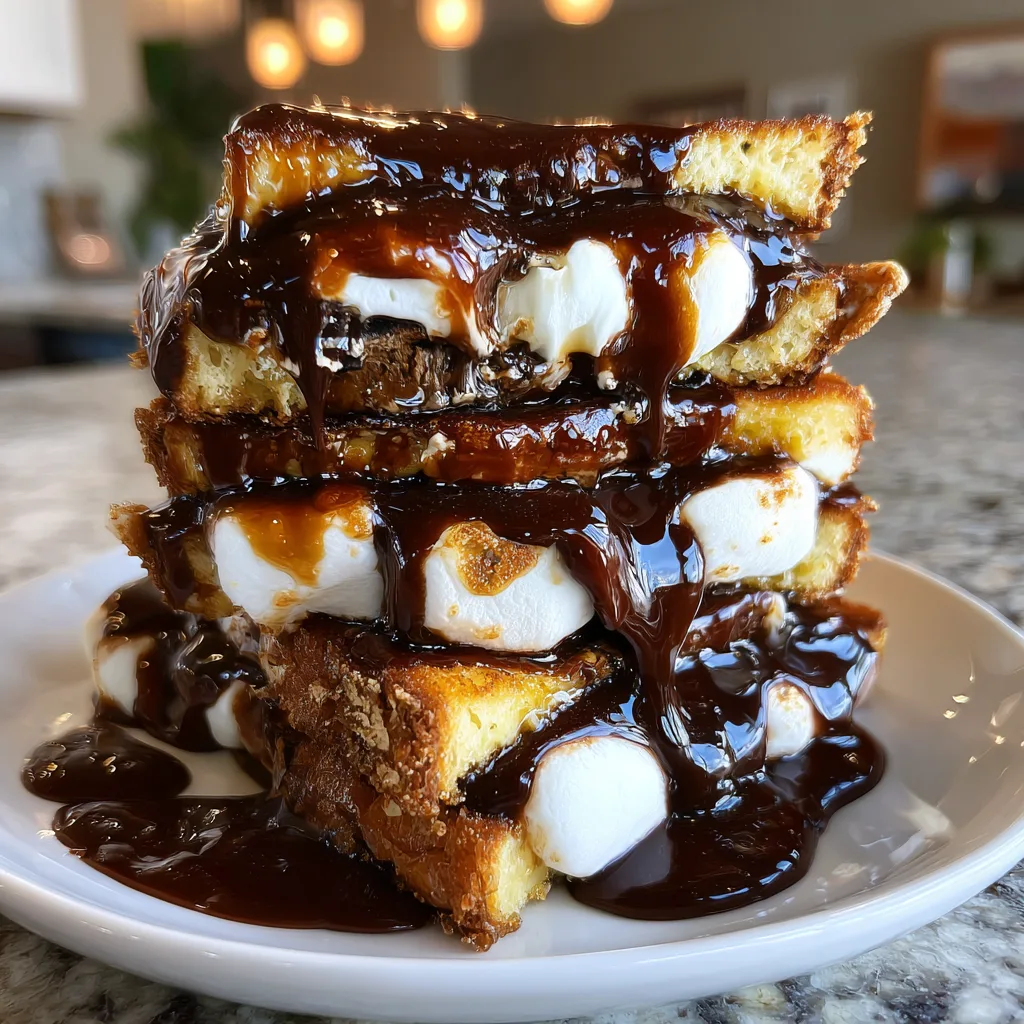
- The Final Melt: Cook on the second side for another 2 to 3 minutes. At this point, you should see the chocolate softening and the marshmallows beginning to stretch and ooze slightly at the edges.
- Rest and Slice: Remove the sandwiches from the pan and let them rest on a cutting board for exactly one minute. This brief resting period allows the molten lava interior to settle slightly so it doesn’t completely run out when you cut it. Slice diagonally into triangles, pull apart to reveal the incredible gooey stretch, and serve immediately!
Expert Tips for the Perfect Melt and Crunch
Cooking a dessert sandwich requires a slightly different technique than your standard savory cheese melt. Keep these expert tips in mind:
Room Temperature Butter is Non-Negotiable: Trying to spread cold, hard butter on soft white bread will tear the bread to shreds. If you forgot to take your butter out of the fridge, you can use mayonnaise instead! Mayonnaise is an emulsion of oil and egg yolks and toasts up incredibly crispy and golden without adding a strong savory flavor once cooked.
The Lid Trick: If you find that your bread is getting perfectly brown but the marshmallows in the center are still stubborn and solid, use the lid trick. After you flip the sandwich, place a pot lid directly over the sandwich in the skillet for about 45 seconds. This traps the ambient heat, creating a mini-oven effect that melts the interior from the top down without burning the bottom.
Pre-Melting (The Cheat Code): If you are using very thick chocolate squares or whole marshmallows and are terrified of burning the bread, you can assemble the open-faced sandwich (bread, chocolate, marshmallow) and microwave it for 10 seconds just to kickstart the melting process before putting the top piece of bread on and grilling it.
Creative Variations on the Classic
Once you have mastered the basic s’mores grilled cheese, your skillet becomes a canvas for endless dessert innovations. Try these variations to impress your family and friends:
The Nutty Camper: Spread a layer of creamy peanut butter or almond butter on the inside of the top slice of bread before closing the sandwich. The salty, roasted flavor of the peanut butter cuts the sweetness and pairs beautifully with the chocolate.
The Berry S’more: Add thinly sliced fresh strawberries or a smear of raspberry jam along with the chocolate. The tartness of the fruit elevates the sandwich into a patisserie-style treat.
The Salted Caramel Crunch: Drizzle a tablespoon of high-quality salted caramel sauce over the marshmallows before grilling, and sprinkle a tiny pinch of flaky sea salt on the buttered exterior of the bread before it hits the pan.
The Campfire Crust: To replicate the graham cracker flavor perfectly, butter the outside of the bread as usual, but then press the buttered side into a plate of crushed graham crackers so the crumbs adhere to the butter. When grilled, this creates a literal graham cracker crust on the outside of your sandwich!
Serving Suggestions and Pairings
Because the s’mores grilled cheese is incredibly rich, sweet, and decadent, it demands a beverage pairing that offers contrast and palate-cleansing properties.
For an afternoon treat, you cannot beat a tall, ice-cold glass of whole milk. The cold fat in the milk washes away the sticky sweetness and cools the mouth after the hot sandwich.
For an adult dessert, pair this sandwich with a robust, hot cup of black coffee or a shot of espresso. The bitter notes of the coffee highlight the deep cocoa flavors in the chocolate and perfectly balance the sugary marshmallows. If you prefer wine, a glass of Ruby Port or a slightly chilled sweet red wine works wonders with the milk chocolate.
Fun Facts and Cultural Context: The History of the S’more
As you bite into your perfectly toasted dessert sandwich, it is fun to reflect on the history of the flavors you are enjoying. The exact origin of combining graham crackers, chocolate, and marshmallows is slightly murky, as campers had likely been throwing these accessible ingredients together for years. However, the first recorded, official recipe for a “Some More” was published in 1927.
The recipe appeared in a book called Tramping and Trailing with the Girl Scouts, credited to a troop leader named Loretta Scott Crew. The recipe called for roasting marshmallows on a stick over a campfire until “crisp and gooey,” then sandwiching them with a piece of chocolate bar between two graham crackers. The heat of the marshmallow would melt the chocolate. The name “Some More” was quickly contracted by eager, mouth-full children into the word we use today: “S’more.”
The popularity of the treat skyrocketed because the ingredients were non-perishable, cheap, and easy to transport into the woods. It became a symbol of American summer nights, scouting, and outdoor recreation. By taking those exact same beloved flavor profiles and adapting them to the indoor convenience of a frying pan and sandwich bread, we are continuing a nearly century-old tradition of sweet, gooey innovation.
Conclusion
The S’mores Grilled Cheese is proof that you do not need to wait for a camping trip to enjoy the magic of melting chocolate and toasted marshmallow. It is a quick, inexpensive, and universally loved dessert that takes less than ten minutes to prepare from start to finish. By understanding the importance of low-heat cooking, buttered bread for savory balance, and the right choice of filling, you can create a cafe-quality dessert right in your own kitchen.
Whether you make it as a surprise after-school snack for the kids, a late-night comfort food craving, or a playful dessert for a dinner party, this gooey, crispy sandwich is guaranteed to bring smiles to the table. So, pull out your skillet, soften that butter, and get ready to experience the ultimate indoor campfire treat. Just make sure you have plenty of napkins on hand—it’s going to get wonderfully messy.
S’mores Grilled Cheese
Ingredients
Equipment
Method
- Spread softened butter evenly on one side of all 4 slices of bread.
- Place two slices of bread, butter-side down, on a clean surface to form the base of the sandwiches.
- Arrange the chocolate pieces evenly over the unbuttered side of the base slices.
- Top the chocolate with an even layer of mini marshmallows or marshmallow fluff. Sprinkle with graham cracker crumbs if using.
- Place the remaining two slices of bread on top, butter-side facing up.
- Heat a skillet over medium-low heat. Carefully place the sandwiches in the pan.
- Cook for 3-4 minutes until the bottom bread is golden brown and crispy.
- Carefully flip the sandwiches and cook for another 2-3 minutes until the second side is golden and the chocolate and marshmallows are completely melted.
- Remove from pan, let rest for 1 minute, slice diagonally, and serve warm.