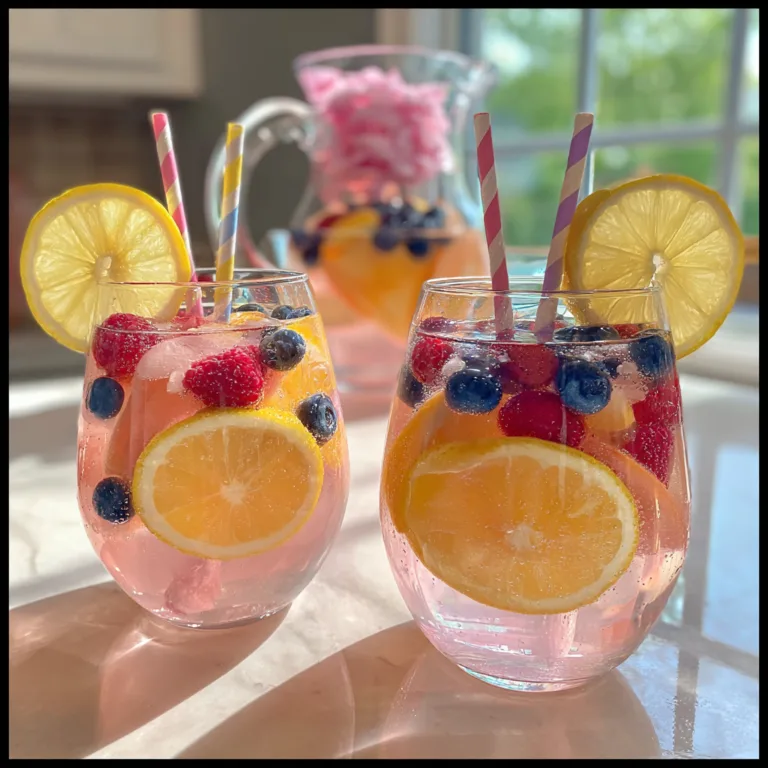
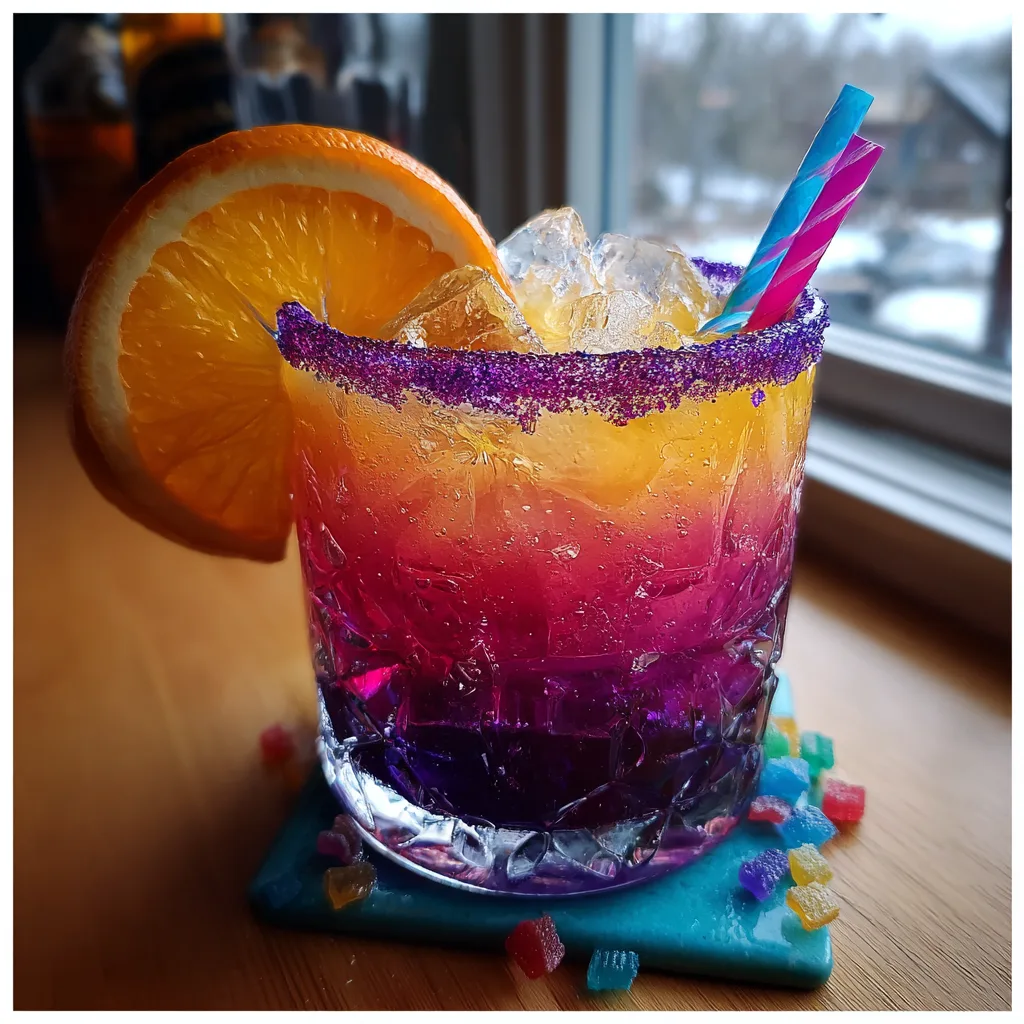
Starburst Drip Drink
The Starburst Drip: A Sweet, Layered Cocktail Sensation
If you grew up trading pink squares for red ones and arguing over whether the orange flavor was underrated, get ready for a wave of nostalgia. The Starburst Drip is more than just a cocktail; it is a liquid tribute to one of the most iconic fruit chews of all time. This vibrant, multi-layered drink captures the essence of “unexplainably juicy” in a glass, delivering a punch of strawberry, orange, and mixed berry flavors that evolve as you sip.
Visually, this drink is a showstopper. The mesmerizing gradient—transitioning from a deep, mysterious purple at the base to a neon pink center and topped with a sunny orange crown—makes it an instant hit for Instagram feeds, summer pool parties, or themed girls’ nights in. But don’t let the complex look fool you; achieving this “drip” effect is surprisingly easy once you understand the science of liquid density. Whether you are a seasoned home bartender or a complete novice looking to impress your friends, this guide will walk you through constructing this candy-inspired masterpiece.
In this article, we will cover everything from the specific spirits needed to mimic that chewy candy taste, to the technique required to keep your colors separated, and even how to make a mocktail version for the whole family to enjoy.
Why You Will Love This Recipe
Visual Impact: The sunset-like ombre effect is stunning. It looks like a drink that cost $18 at an upscale tiki bar, but you can make it in your kitchen for a fraction of the price.
Customizable Sweetness: Unlike pre-mixed bottled cocktails that can be cloying, making this fresh allows you to control the sugar level. You can use fresh juices to cut through the syrups.
Nostalgic Flavor Profile: We use a combination of flavored vodkas and fruit juices to replicate the exact taste of eating a handful of Starbursts at once. It’s fruity, tart, and sweet all in one.
Ingredients
To achieve the distinct layers and the bold candy flavor, you need ingredients with specific densities and colors. Here is what you need:
- Blackberry or Grape Liqueur (The Purple Layer): This creates the dark, heavy bottom layer. You can also use Blue Curacao mixed with a splash of Grenadine if you don’t have purple liqueur.
- Strawberry Vodka (The Pink Layer): This provides the boozy kick and the classic pink fruit chew flavor.
- Sweet and Sour Mix or Lemonade: This acts as a buffer to help separate the colors and adds that tart “citrus” bite found in the candy.
- Orange Juice (The Orange Layer): Use pulp-free orange juice for the cleanest look. This sits on top and provides the citrus finish.
- Purple Sanding Sugar: For the rim. This adds a crunchy texture and extra pop of color.
- Garnishes: A fresh orange slice and, if you are feeling fun, actual Starburst candies skewered or dropped into the glass.
- Ice: You need plenty of ice—preferably crushed or small cubes—to help keep the layers distinct.
Instructions
Step 1: Prep the Glass
Presentation is half the battle with the Starburst Drip. Start by rimming your glass.
- Take a wedge of lemon or lime and run it around the rim of a rocks glass or short tumbler.
- Pour purple sanding sugar onto a small plate.
- Dip the wet rim into the sugar, twisting slightly to ensure a thick, even coat.
- Fill the glass to the brim with ice. The ice is crucial—it acts as a ladder to help you layer the liquids gently.
Step 2: The Purple Base
The heaviest liquid goes first. This layer needs to be the most dense in sugar content.
- Pour 1 ounce of Blackberry Liqueur (or your Blue Curacao/Grenadine mix) directly over the ice into the bottom of the glass.
- It should settle at the bottom, creating a dark, rich foundation.
Step 3: The Pink Middle
This is where the technique comes in. You cannot just dump the next layer in, or it will turn brown.
- In a cocktail shaker, mix 2 ounces of Strawberry Vodka with 1 ounce of Sweet and Sour mix (or lemonade). Shake with ice to chill.
- The Spoon Trick: Take a bar spoon (or a regular teaspoon) and place the tip against the inside of the glass, right above the purple layer.
- Slowly pour the pink mixture over the back of the spoon. The liquid should trickle down the glass and sit on top of the purple layer without mixing violently.
Step 4: The Orange Top
The final touch brings the sunshine.
- Rinse your spoon.
- Using the same spoon technique, gently float 2 ounces of Orange Juice on the very top. Because juice is generally lighter than sugary liqueurs, it should float perfectly.
- If you want an extra “boozy” kick, you can mix the orange juice with a splash of plain vodka or coconut rum before pouring.
Step 5: Garnish and Serve
Finish the look.
- Slit an orange wheel halfway through and slide it onto the rim of the glass.
- Add two colorful straws (paper straws add a nice retro touch).
- Serve immediately while the layers are distinct. Instruct your guests to stir before sipping if they want to blend the flavors!
Tips for Perfect Layering
Specific Gravity is Key: Layering drinks works based on the sugar content (density) of the liquids. Liquids with more sugar are heavier and sink; liquids with more alcohol or water are lighter and float. If your layers are mixing, check your sugar content. The bottom layer must always be the sweetest/heaviest.
Cold Ingredients: Chill all your ingredients beforehand. Cold liquids are more viscous and easier to layer than room-temperature ones.
Don’t rush the pour: Patience is the secret ingredient. Pouring too fast creates turbulence that muddies the colors. The slower you pour over the spoon, the cleaner the line between colors will be.
Variations to Try
The “Pink Starburst” Drip
If you are a purist who believes the pink square is the only one that matters, modify the recipe to focus solely on strawberry. Use Grenadine at the bottom, Strawberry Vodka and cream soda in the middle, and top with a splash of Sprite mixed with a drop of pink food coloring.
The Frozen Starburst
Instead of layering liquids, layer slushies! Blend each layer with ice separately in a blender. Spoon the purple slush into the glass, followed by the pink slush, and finally the orange slush. This creates a solid, stable layered look that won’t mix until it melts.
The Virgin Starburst (Mocktail)
To make this kid-friendly:
Bottom: Grape juice mixed with extra simple syrup (to make it heavy).
Middle: Strawberry lemonade.
Top: Orange juice mixed with a little water (to make it lighter).
The flavors will be just as fruity and delicious without the alcohol.
Serving Suggestions
This cocktail is perfect for themed parties. Here are a few ideas:
- Halloween: The purple and orange colors make this an accidental Halloween masterpiece. Add a gummy worm instead of an orange slice for a “Spooky Drip.”
- Brunch: Since it contains fruit juice, this makes a fun, high-octane alternative to a standard Mimosa or Tequila Sunrise.
- Candy Bar Station: Serve these alongside bowls of unwrapped Starbursts, Skittles, and other fruity candies to enhance the sensory experience.

Conclusion
The Starburst Drip is a testament to the fact that cocktails should be fun. It breaks away from the seriousness of whiskey neat or dry martinis and invites you to play with color and nostalgic flavors. It is sweet, tart, refreshing, and undeniably beautiful. So, grab your shaker, buy a bag of ice, and get ready to taste the rainbow—adult style.
Starburst Drip Cocktail
Ingredients
Equipment
Method
- Run a lime wedge around the rim of the glass and dip into purple sanding sugar to coat.
- Fill the glass to the top with ice cubes.
- Pour the blackberry liqueur (or grape schnapps) directly into the bottom of the glass to form the purple base.
- In a shaker, mix the strawberry vodka and lemonade. Slowly pour this mixture over the back of a spoon onto the ice to create the middle pink layer.
- Rinse the spoon. Gently float the orange juice on the very top using the same spoon technique to create the final orange layer.
- Garnish with an orange slice and colorful straws. Serve immediately.