Ultimate Chocolate Covered Strawberry Brownies
The Ultimate Chocolate Covered Strawberry Brownies: A Love Story in Every Bite
There are certain flavor combinations that are simply destined to be together. Peanut butter and jelly. Salt and caramel. But perhaps the most romantic and indulgent of them all is chocolate and strawberries. This recipe for Chocolate Covered Strawberry Brownies takes that classic duo and elevates it into a dessert that is nothing short of spectacular. Imagine sinking your teeth into a dense, fudgy brownie base, hitting a layer of fresh, juicy strawberries, and finishing with a decadent, silky chocolate ganache that coats your tongue in pure luxury. This isn’t just a brownie; it’s an experience.
Whether you are looking for the perfect Valentine’s Day treat to impress your significant other, a show-stopping dessert for a dinner party, or simply a way to use up that carton of ripe strawberries sitting in your fridge, this recipe is your answer. It bridges the gap between a comfort food bake and a high-end patisserie creation, all while being surprisingly easy to make in your own home kitchen.
Why This Recipe Works
The magic of these brownies lies in the interplay of textures and flavors. A standard brownie is delicious, but it can be heavy and one-dimensional. By introducing a layer of fresh strawberries, you introduce a burst of acidity and natural freshness that cuts through the richness of the chocolate. This makes the dessert feel lighter on the palate, encouraging you (and your guests) to go back for a second slice.
Furthermore, the glossy chocolate ganache on top serves two purposes. Aesthetically, it gives the brownies a professional, bakery-style finish that looks stunning on a plate. Functionally, it acts as a seal, keeping the strawberries fresh and adding a creamy, melting texture that contrasts beautifully with the chewy brownie and the firm fruit.
Key Ingredients for Success
To achieve the perfect Chocolate Covered Strawberry Brownies, quality ingredients matter. Here is what you need to gather:
For the Fudgy Brownie Base
- Unsalted Butter: Using melted butter rather than creamed butter ensures the brownies are chewy and fudgy rather than cakey.
- Granulated Sugar & Brown Sugar: We use a mix. Granulated sugar gives you those crispy edges, while brown sugar adds moisture and a depth of molasses flavor.
- Cocoa Powder: Dutch-processed cocoa powder is recommended for a darker color and a smoother, less acidic chocolate flavor.
- Eggs: Large eggs at room temperature help bind the batter together without creating too much lift.
- Vanilla Extract: A generous splash of vanilla enhances the chocolate flavor.
- All-Purpose Flour: Just enough to hold the batter together. Too much flour will result in a dry brownie.
- Salt: Essential to balance the sweetness and make the chocolate flavor pop.
- Semi-Sweet Chocolate Chips: Folded into the batter for extra pockets of melted chocolate.
For the Strawberry Layer
- Fresh Strawberries: Choose ripe but firm strawberries. Avoid mushy fruit, as it will make the brownies soggy. You will slice these to create a distinct layer.
For the Ganache Topping
- Semi-Sweet Chocolate Chips: High-quality chips melt better and provide a rich flavor that isn’t cloyingly sweet.
- Heavy Cream: This is heated and poured over the chocolate to create a smooth emulsion.
- Unsalted Butter: A small pat of butter added to the ganache gives it that irresistible glossy shine.
Step-by-Step Instructions
Making these brownies is a three-part process: baking the base, layering the fruit, and pouring the ganache. Don’t rush the cooling steps—patience is key to a clean slice!
Step 1: Bake the Brownie Base
- Preheat and Prep: Preheat your oven to 350°F (175°C). Line a 9×9 inch baking pan with parchment paper, leaving an overhang on the sides. This “sling” will make it easy to lift the brownies out later. Grease the parchment lightly.
- Mix Butter and Sugars: In a large microwave-safe bowl, melt the butter. Whisk in the granulated sugar and brown sugar vigorously while the butter is still warm. This helps dissolve the sugar, leading to a shiny crust.
- Add Wet Ingredients: Whisk in the eggs one at a time, followed by the vanilla extract.
- Incorporate Dry Ingredients: Sift the cocoa powder, flour, and salt directly into the wet mixture. Sifting is crucial to remove stubborn cocoa lumps. gently fold the dry ingredients in with a spatula until just combined.
- Fold and Bake: Fold in the chocolate chips. Pour the batter into the prepared pan and smooth the top. Bake for 25-30 minutes, or until a toothpick inserted comes out with moist crumbs (not wet batter).
- Cool Completely: This is the most important step. Let the brownies cool completely in the pan. If they are warm, the strawberries will cook and release water, and the ganache won’t set.
Step 2: The Strawberry Layer
- Prep the Fruit: Wash, hull, and slice your strawberries into thick coins or vertical slices.
- Dry the Fruit: Place the slices on a paper towel and gently pat them dry. Excess moisture prevents the chocolate ganache from sticking to the fruit.
- Arrange: Arrange the strawberry slices in a single, tight layer over the cooled brownie block. Try to minimize gaps so every bite has fruit.
Step 3: The Ganache Finish
- Heat the Cream: In a small saucepan or microwave-safe cup, heat the heavy cream until it begins to steam and bubble slightly at the edges. Do not let it boil over.
- Melt: Place the chocolate chips and the tablespoon of butter in a heat-proof bowl. Pour the hot cream over the chocolate.
- Let it Sit: Do not touch it! Let the mixture sit for 5 minutes to allow the heat to penetrate the chocolate.
- Emulsify: Gently whisk from the center outwards until the mixture transforms into a glossy, dark, smooth liquid.
- Pour and Set: Pour the warm ganache directly over the strawberry layer, using an offset spatula to push it to the edges. Refrigerate the entire pan for at least 30-60 minutes to let the ganache set.
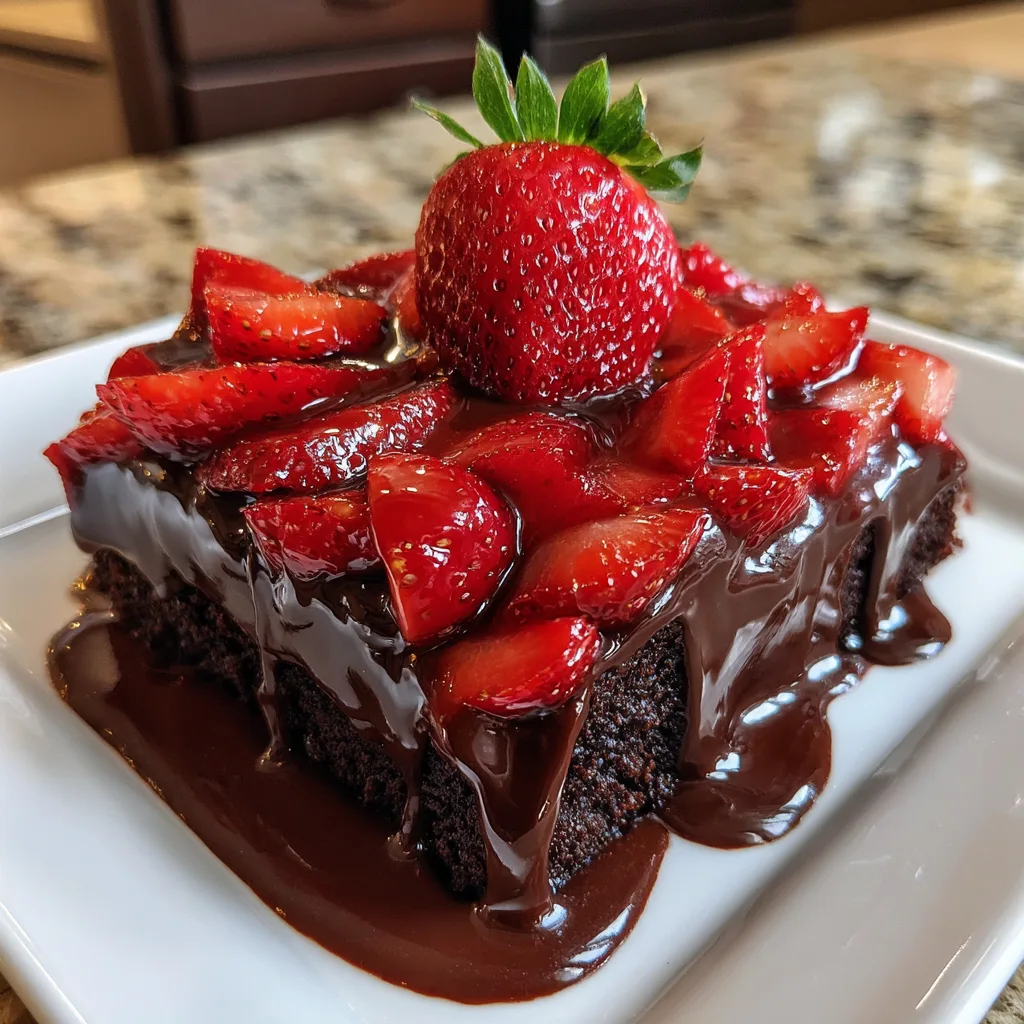
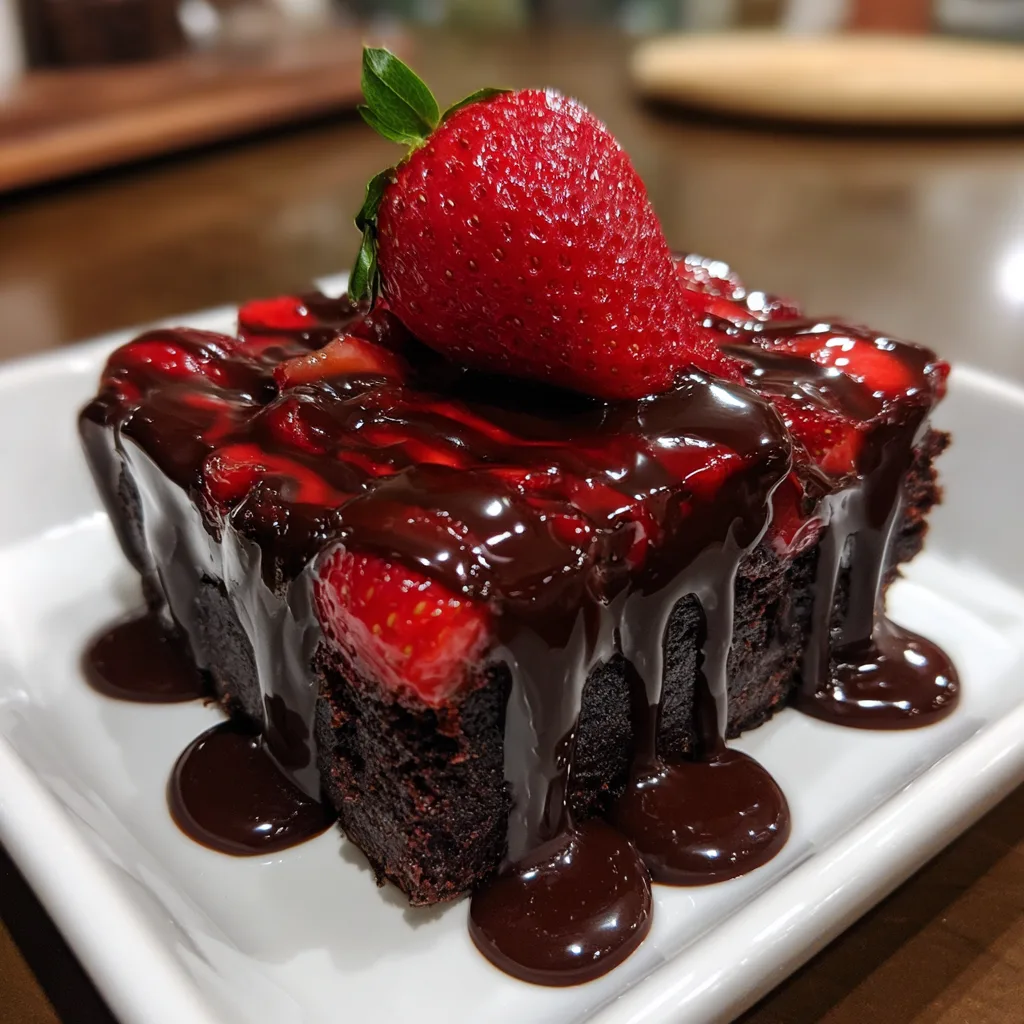
- Serve: Lift the brownies out using the parchment paper. Slice into squares using a hot knife (dip in hot water, wipe dry) for clean cuts. Top with extra strawberry halves for garnish.
Tips for the Perfect Brownie
The “Hot Knife” Trick: Because these brownies have layers of different textures (dense brownie, soft fruit, firm ganache), cutting them can be messy. To get clean, Instagram-worthy cuts, fill a tall glass with hot water. Dip your knife in, wipe it dry with a clean towel, and make one cut. Repeat for every single slice. The heat melts the ganache and butter, allowing the knife to glide through without dragging the layers.
Selecting Strawberries: Since the strawberries are raw, their flavor is prominent. Taste one before using. If they are very tart, you might want to use a slightly sweeter chocolate for the ganache. If they are super sweet, a dark chocolate ganache provides a sophisticated contrast.
Room Temperature Ingredients: Ensure your eggs are at room temperature when making the batter. Cold eggs can shock the warm melted butter, causing it to re-solidify and making your batter lumpy and greasy.
Variations to Try
Once you’ve mastered the classic recipe, feel free to get creative with these variations:
- White Chocolate Drizzle: Use white chocolate chips for the ganache for a “tuxedo” strawberry look.
- Raspberry Swap: Not a fan of strawberries? Fresh raspberries work perfectly and pair beautifully with dark chocolate.
- Nutty Crunch: Add chopped toasted walnuts or pecans to the brownie batter for added texture.
- Liqueur Infusion: Add a tablespoon of Grand Marnier or Baileys to the ganache for an adult twist.
Serving and Storage
These brownies are best served chilled or at slight room temperature. Because they contain fresh fruit, they have a shorter shelf life than regular brownies.
- Storage: Store leftovers in an airtight container in the refrigerator for up to 3 days. The strawberries will release moisture over time, so they are best enjoyed within the first 24-48 hours.
- Freezing: It is not recommended to freeze these brownies once assembled, as the fresh strawberries will become mushy and weep water upon thawing. You can, however, freeze the baked brownie base (without toppings) for up to 3 months.
Fun Facts: The History of Chocolate Dipped Fruit
Did you know that the concept of chocolate-covered strawberries is a relatively modern invention? It is widely believed to have been created in the 1960s by a woman named Lorraine Lorusso at a gourmet store in Chicago called Stop & Shop. She dipped fresh strawberries into the store’s chocolate blend, creating an instant classic. This recipe pays homage to that innovation by turning a simple confection into a hearty, satisfying dessert bar.
These Chocolate Covered Strawberry Brownies are a testament to the fact that with a little creativity, simple ingredients can be transformed into something extraordinary. They are rich, refreshing, and undeniably beautiful—a dessert that demands to be shared (or savored all by yourself!).
Chocolate Covered Strawberry Brownies
Ingredients
Equipment
Method
- Preheat oven to 350°F (175°C). Line a 9×9 inch baking pan with parchment paper.
- In a large bowl, whisk melted butter with granulated and brown sugars until smooth.
- Add eggs one at a time, followed by vanilla, mixing well after each addition.
- Sift in cocoa powder, flour, and salt. Gently fold until just combined.
- Fold in the 1/2 cup of chocolate chips. Pour batter into pan and bake for 25-30 mins.
- Allow brownies to cool completely in the pan.
- Arrange sliced strawberries in an even layer over the cooled brownies.
- Heat heavy cream until simmering. Pour over chocolate chips and butter in a bowl.
- Let sit 5 minutes, then whisk until smooth to create ganache.
- Pour ganache over strawberries. Refrigerate for 1 hour to set before slicing.


