Ultimate Sheet Pan Tacos Recipe
The Ultimate Guide to Quick & Tasty Sheet Pan Tacos
There is a revolution happening in home kitchens across the world, and it involves a simple baking sheet and a craving for Mexican-inspired comfort food. Enter the Sheet Pan Taco. If you have ever stood over a stove frying tacos one by one, dodging splatters of hot oil while the first batch gets cold, this recipe is going to change your life. It is the perfect solution for busy weeknights, feeding a crowd, or simply satisfying a massive taco craving with minimal effort and maximum flavor.
This method isn’t just about convenience; it is about texture. By baking the tacos in a hot oven, you achieve a unique consistency where the bottom of the tortilla gets slightly crisp, the edges become golden and crunchy, and the center remains soft and cheesy. The cheese melts uniformly, binding the seasoned beef inside, creating a sealed pocket of joy that is less messy to eat than a standard hard-shell taco and far more interesting than a soft shell.
In this comprehensive guide, we are going to dive deep into the art of the sheet pan taco. We will cover everything from selecting the right fat content for your beef to the science of the perfect tortilla crisp. Whether you are a seasoned home cook or a kitchen novice, this recipe is foolproof, fun, and undeniably delicious.
Why You Will Love This Recipe
Before we get to the nuts and bolts, let’s talk about why this recipe deserves a permanent spot in your meal rotation. First and foremost, it is a one-pan wonder. Aside from the skillet used to brown the meat, all the magic happens on a single baking sheet. This means less cleanup and more time enjoying your meal.
Secondly, it is universally loved. We are talking about seasoned beef and melted cheese wrapped in a warm carbohydrate. It is a flavor profile that appeals to toddlers, teenagers, and adults alike. It is also incredibly customizable. Do you have a vegetarian in the family? Swap a row of beef for refried beans. Love heat? Add jalapeños to your specific tacos before baking.
Finally, it is batch-cooking friendly. You can make 10 to 12 tacos simultaneously. Everyone sits down to eat at the same time, and everyone gets a hot, fresh taco. No more “short-order cook” syndrome for the host.

Ingredients
To create the perfect sheet pan tacos, you need simple, high-quality ingredients. Here is what you will need to gather:
- Ground Beef – 1 pound (450g). I recommend using 85/15 or 90/10 lean ground beef. You want enough fat for flavor, but not so much that your tacos become soggy with grease in the oven.
- Taco Seasoning – 1 packet (1 oz) or 3 tablespoons of homemade blend. A mix of chili powder, cumin, paprika, onion powder, garlic powder, and oregano is essential.
- Water – 2/3 cup. This creates the sauce with the seasoning that keeps the meat moist inside the oven.
- Flour Tortillas – 10 to 12 small/medium size (fajita or soft taco size). Flour tortillas work best for this method as they are pliable and crisp up nicely without cracking. Corn tortillas can be used but require pre-warming to prevent breakage.
- Cheddar Cheese – 2 cups, shredded. Sharp cheddar or a Mexican blend works beautifully. Pro Tip: Shred your own cheese from a block for the best meltability, as pre-shredded cheese contains anti-caking agents that can prevent that glossy, gooey stretch.
- Vegetable Oil or Melted Butter – 2 tablespoons. This is for brushing the tortillas to ensure they golden properly.
- Onion – 1 small, diced (optional, for cooking with beef).
- Garlic – 2 cloves, minced (optional, for extra flavor).
Optional Toppings for Serving:
- Sour cream
- Salsa or Pico de Gallo
- Guacamole or sliced avocados
- Chopped fresh cilantro
- Lime wedges
- Sliced jalapeños
Instructions
Follow these step-by-step instructions to achieve taco nirvana. The process is divided into preparing the filling and assembling the tray.
Part 1: The Filling
- Preheat and Prep: Preheat your oven to 400°F (200°C). This high heat is crucial for crisping the tortillas quickly without drying out the meat. Line a large standard baking sheet (18×13 inches) with parchment paper for easy cleanup.
- Brown the Beef: Heat a large skillet over medium-high heat. Add the ground beef (and diced onion if using). Break up the meat with a wooden spoon or meat chopper as it cooks. Cook until the beef is fully browned and no longer pink, about 5-7 minutes.
- Drain and Season: If there is excess grease in the pan, drain it carefully. Return the pan to the heat. Add the minced garlic and cook for 30 seconds until fragrant. Stir in the taco seasoning and the water.
- Simmer: Bring the mixture to a simmer and reduce the heat to low. Let it cook for 3-5 minutes, or until the liquid has thickened and coated the meat. You want the meat to be saucy but not watery. Remove from heat.
Part 2: Assembly and Baking
- Prepare the Tortillas: Take your tortillas. To make them more pliable and prevent cracking, you can wrap them in a damp paper towel and microwave them for 20 seconds.
- Layout: Lay the tortillas flat on the baking sheet. It is okay if they overlap slightly at the edges. If you want to make a lot at once, you can arrange them so they hang over the edge of the rim initially, but laying them flat usually works best for keeping the filling in.
- Fill: Spoon a generous portion of the beef mixture onto one half of each tortilla. Spread it slightly but keep it on the one half.
- Cheese it Up: Sprinkle the shredded cheese liberally over the beef. The cheese acts as the glue that will hold the taco shut.
- Fold and Press: Fold the empty half of the tortilla over the filling. Press down gently with your hand or a spatula to help it stay closed. Repeat for all tacos.
- Brush for Crunch: Using a pastry brush, lightly coat the tops of the folded tortillas with vegetable oil or melted butter. This is the secret to that beautiful golden-brown color and flaky texture.
- Bake: Place the baking sheet in the preheated oven. Bake for 10-15 minutes. You are looking for the cheese to be fully melted and the tortillas to be golden brown and slightly crisp on the edges.
- Serve: Remove from the oven. Let them cool for 2 minutes (the filling will be very hot). Garnish with cilantro and serve immediately with your favorite dipping sauces.
Tips for the Perfect Sheet Pan Tacos
Tortilla Selection Matters: While flour tortillas are the standard for this recipe due to their flexibility, you can use corn tortillas for a gluten-free option. However, corn tortillas are more prone to cracking. To mitigate this, brush the corn tortillas with oil and warm them in a skillet for 10 seconds on each side before filling them. This makes them pliable and adds a nice roasted corn flavor.
Don’t Overstuff: It is tempting to load these up, but overstuffing leads to “blowouts” where the filling spills onto the pan during baking. Stick to about 2-3 tablespoons of meat per taco. If you have leftover meat, save it for a taco salad lunch the next day!
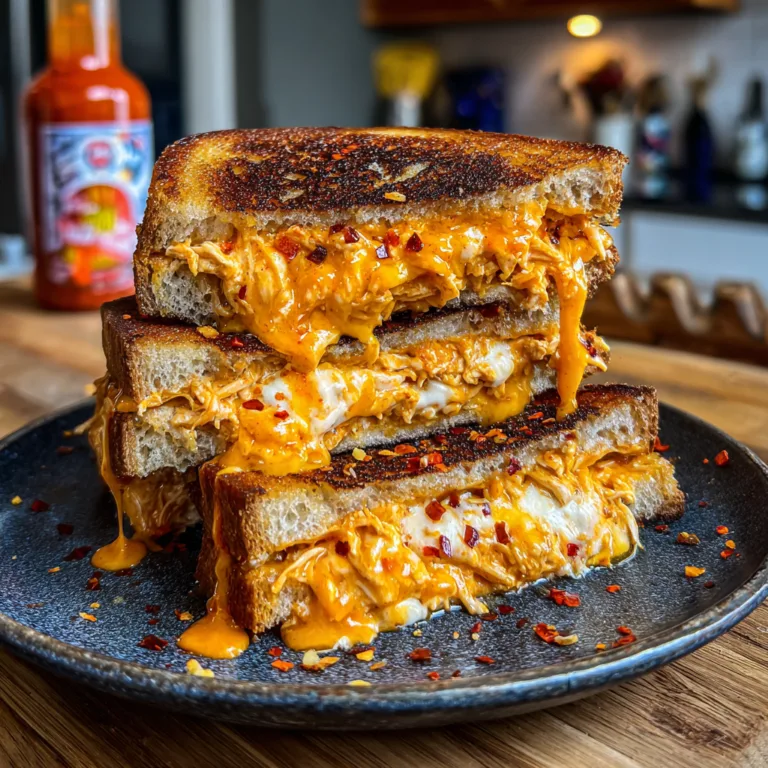
The “Glossy” Cheese Hack: If you want that ultra-glossy, commercial look to your cheese (like in the photo), try mixing a small handful of Mozzarella or Monterey Jack in with your Cheddar. Cheddar provides the sharp flavor, while Mozzarella provides the high-moisture stretch and shine.
Spice It Up: If you like heat, add a pinch of cayenne pepper or red pepper flakes to your beef mixture while it simmers. Alternatively, place a slice of pickled jalapeño inside the taco on top of the cheese before folding.

Variations to Try
One of the best things about Sheet Pan Tacos is their versatility. Here are a few spins on the classic beef version:
1. BBQ Chicken Tacos
Swap the ground beef for shredded rotisserie chicken mixed with your favorite BBQ sauce. Use a blend of cheddar and gouda cheese, and add some red onions inside. Serve with ranch dressing.
2. Breakfast Tacos
Who says tacos are just for dinner? Fill the tortillas with scrambled eggs, cooked sausage crumbles or bacon bits, and cheese. Bake as directed. This is a fantastic way to feed a sleepover crowd in the morning.
3. Vegetarian Black Bean & Sweet Potato
Roast small cubes of sweet potato until tender. Mash slightly with black beans, cumin, and lime juice. Use this as your filling with plenty of cheese. The sweetness of the potato pairs perfectly with the salty cheese.
Serving Suggestions
To turn this into a complete fiesta, consider your side dishes. Because the oven is already on, you could roast some corn on the cob alongside the tacos (if you have room or a second rack). Mexican street corn (Elote) is a fantastic pairing.
A fresh, crisp salad with a lime vinaigrette helps cut through the richness of the cheesy tacos. Rice is also a staple; try a cilantro-lime rice or a classic Mexican red rice. And of course, no taco night is complete without a beverage. A cold horchata, a lime jarritos, or a classic margarita are all excellent choices.
Storage and Reheating
If you somehow manage to have leftovers, these tacos store surprisingly well. Allow them to cool completely, then store them in an airtight container in the refrigerator for up to 3 days.
To Reheat: Do not use the microwave! The microwave will make the tortillas soggy and rubbery. Instead, place the tacos back on a baking sheet and pop them into a 350°F (175°C) oven or toaster oven for about 8-10 minutes. They will crisp right back up and taste almost as good as fresh. You can also reheat them in an air fryer at 350°F for 3-4 minutes.
Fun Facts & Cultural Context
While the “Sheet Pan Taco” is a decidedly modern American invention—born out of the internet age’s desire for efficiency—the concept of baking tacos is not entirely new. In Mexican cuisine, Tacos Dorados (golden tacos) or flautas involve filling tortillas and frying them until hard. This sheet pan method mimics the crunch of a fried taco without the heavy oil absorption of deep-frying.
The rise of sheet pan dinners coincides with a shift in home cooking trends over the last decade. As lives became busier, the “set it and forget it” mentality of slow cookers transitioned into the “roast it all at once” mentality of sheet pan meals. This specific recipe has gained viral status on social media platforms because it is visually appealing (that cheese pull!) and solves the logistical problem of serving hot tacos to a large family simultaneously.
So, preheat that oven and get your baking sheet ready. You are about to make the easiest, cheesiest, most satisfying batch of tacos you have ever tasted. Enjoy the crunch!
Sheet Pan Tacos
Ingredients
Equipment
Method
- Preheat oven to 400°F (200°C). Line a large baking sheet with parchment paper.
- In a large skillet over medium-high heat, brown the ground beef and onion until fully cooked. Drain excess grease.
- Stir in water and taco seasoning. Simmer for 3-5 minutes until sauce thickens. Remove from heat.
- Lay tortillas flat on the prepared baking sheet. Place a scoop of beef mixture on one half of each tortilla.
- Top the beef generously with shredded cheese. Fold the other half of the tortilla over to close.
- Brush the tops of the tortillas lightly with oil or melted butter to ensure crispiness.
- Bake for 10-15 minutes, or until cheese is melted and tortillas are golden brown.
- Serve immediately with sour cream, salsa, and fresh cilantro.