Cookie Dough Chocolate Cups
The Ultimate Chocolate Chip Cookie Dough Cups Recipe
Welcome to the ultimate guide for making the most decadent, mouth-watering dessert you will ever experience: Chocolate Chip Cookie Dough Cups. If you are someone who has always believed that the best part of baking cookies is eating the raw dough straight from the mixing bowl, then this recipe was created specifically for you. We are taking the classic, nostalgic joy of raw cookie dough and elevating it into a sophisticated, bite-sized treat by encasing it in a rich, crisp chocolate shell.
These cups combine the satisfying snap of tempered (or faux-tempered) chocolate with the soft, buttery, brown-sugar-rich texture of classic chocolate chip cookie dough. The best part? This dough is entirely eggless and uses heat-treated flour, making it 100% safe to eat raw. Whether you are hosting a holiday party, preparing a special Valentine’s Day treat, or simply satisfying a late-night sweet tooth, these Chocolate Chip Cookie Dough Cups are guaranteed to be a massive hit.
Why You Will Love These Cookie Dough Cups
There are countless reasons to fall in love with this recipe. First and foremost is the incredible contrast in textures. When you bite into one of these cups, your teeth first break through a firm, snappy layer of chocolate. Immediately after, you are met with a soft, dense, chewy center of sweet cookie dough, dotted with slightly crunchy chocolate chips. It is a sensory experience that standard baked cookies simply cannot replicate.
Furthermore, this is a completely no-bake dessert (aside from briefly heat-treating the flour). This makes it an ideal recipe for hot summer days when you do not want to turn on your oven, or for busy holidays when oven space is at a premium. They are also highly customizable, easily portioned for meal prep or parties, and they freeze exceptionally well. You can make a large batch on a Sunday and have a premium, bakery-quality treat ready to go whenever a craving strikes.
The Magic of Safe, Edible Cookie Dough
Before we dive into the ingredients, it is vital to discuss what makes this cookie dough safe to eat. Many people mistakenly believe that the only danger in raw cookie dough is the raw eggs, which carry a risk of Salmonella. While that is true, an equally significant risk comes from raw flour.
Raw flour is an agricultural product that has not been treated to kill harmful bacteria like E. coli. When you bake cookies, the high heat of the oven eliminates this risk. But for an edible dough, we must pre-treat the flour.
How to Heat Treat Flour: The process is incredibly simple. You can spread your all-purpose flour on a baking sheet and bake it at 350°F (175°C) for about 5 to 7 minutes, or until the temperature of the flour reaches 165°F (74°C) on an instant-read thermometer. Alternatively, you can place the flour in a microwave-safe bowl and heat it in 30-second intervals, stirring in between, until it reaches the safe temperature. Once treated, let the flour cool completely before mixing it into your dough, otherwise, it will melt your butter and chocolate chips, resulting in a greasy texture.
Ingredients You Will Need
To achieve the perfect balance of flavor and texture, you need the right components. Here is a detailed breakdown of everything required to make these extraordinary treats.
For the Chocolate Shell
- Semi-Sweet or Dark Chocolate Chips: You will need a high-quality chocolate. Semi-sweet provides the classic flavor, but dark chocolate offers a beautiful bitter contrast to the sweet dough.
- Coconut Oil: Adding a small amount of coconut oil to your chocolate chips before melting helps thin the chocolate, making it easier to coat the muffin liners. It also softens the set chocolate just enough so it doesn’t shatter aggressively when you take a bite.
For the Edible Cookie Dough Filling
- Unsalted Butter: Needs to be softened to room temperature so it creams perfectly with the sugars.
- Brown Sugar: Light or dark brown sugar works. This is the key to that classic, rich, molasses-forward cookie dough flavor.
- Granulated White Sugar: Adds sweetness and helps create the right granular texture.
- Vanilla Extract: A generous splash is non-negotiable for authentic cookie dough flavor. Use pure vanilla extract if possible.
- Salt: Crucial for balancing the sweetness. A pinch of kosher salt elevates all the other flavors.
- Heat-Treated All-Purpose Flour: As discussed, this is essential for food safety and gives the dough its structure.
- Milk or Heavy Cream: Because we are omitting eggs, we need a liquid to bind the dough together and provide moisture.
- Mini Chocolate Chips: Mini chips are highly recommended over standard size because they distribute more evenly throughout the dough, ensuring chocolate in every single bite without overwhelming the small cup format. Standard chips can be used for topping.
Step-by-Step Instructions for Perfection
Making these cups involves three main phases: creating the chocolate shells, mixing the dough, and assembly.
Phase 1: Crafting the Chocolate Shells
Start by preparing a standard 12-cup muffin tin with paper liners or use silicone muffin cups. Silicone is highly recommended as the chocolate peels away flawlessly.
In a microwave-safe bowl, combine your chocolate chips and coconut oil. Microwave in 30-second bursts, stirring vigorously after each interval, until completely smooth and glossy. Spoon about one tablespoon of the melted chocolate into each muffin cup. Use a spoon or a pastry brush to push the chocolate up the sides of the liners, creating a cup shape. You want the edges to be relatively thick so they don’t break. Place the muffin tin in the freezer for about 10-15 minutes until the chocolate is completely hard.
Phase 2: Mixing the Edible Dough
While the shells are setting, prepare your edible cookie dough. In a large mixing bowl, use a hand mixer or stand mixer to beat the softened butter, brown sugar, and granulated sugar together until light, fluffy, and well combined (about 2-3 minutes). Beat in the vanilla extract and salt.
Next, gradually add your cooled, heat-treated flour. The mixture will look quite dry and crumbly at this stage. This is where the milk comes in. Add the milk one tablespoon at a time, mixing continuously, until the dough reaches your desired consistency. It should be soft, pliable, and hold together when pressed, exactly like standard cookie dough. Finally, use a rubber spatula to gently fold in the mini chocolate chips.
Phase 3: Assembly and Topping
Remove the hardened chocolate shells from the freezer. Scoop about 1.5 to 2 tablespoons of the cookie dough into each chocolate cup. Gently press the dough down so it fills the cup evenly and creates a flat top. You want the dough to reach just below the top edge of the chocolate shell.
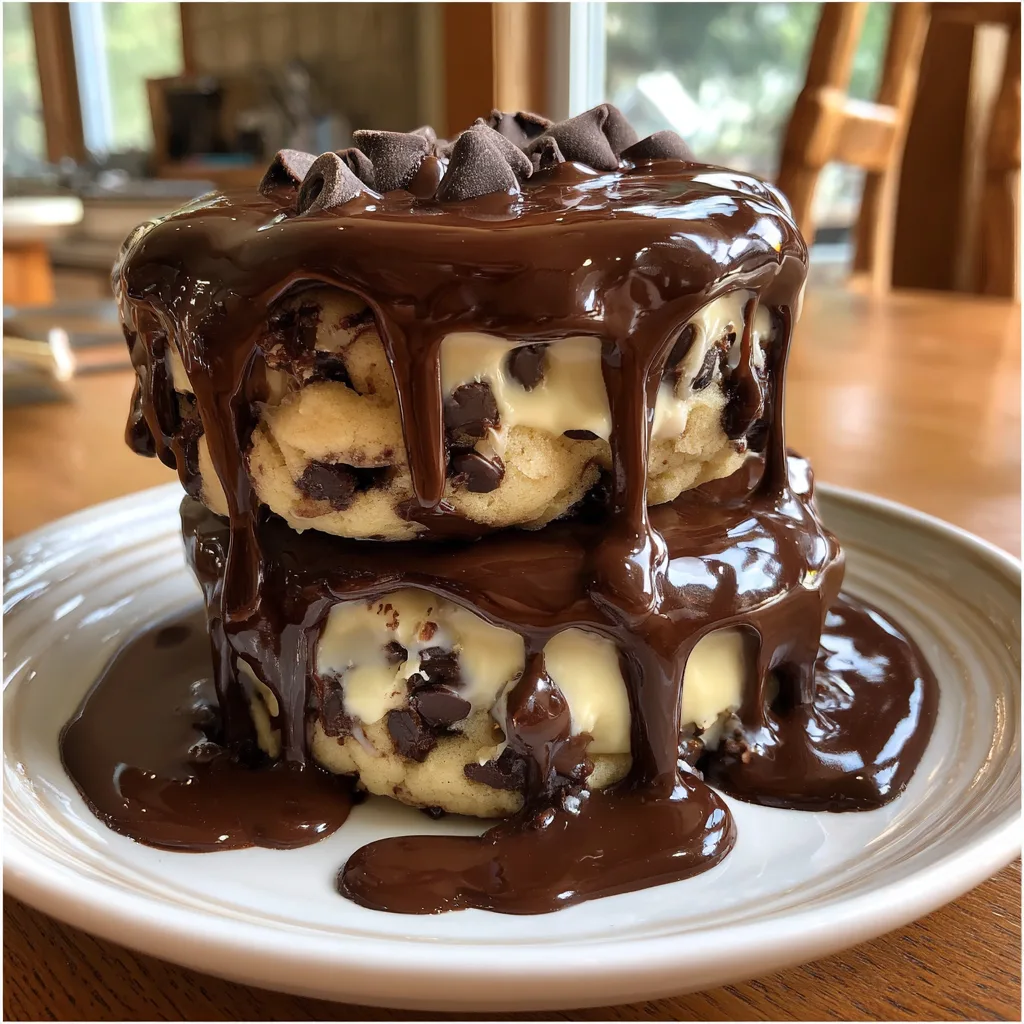
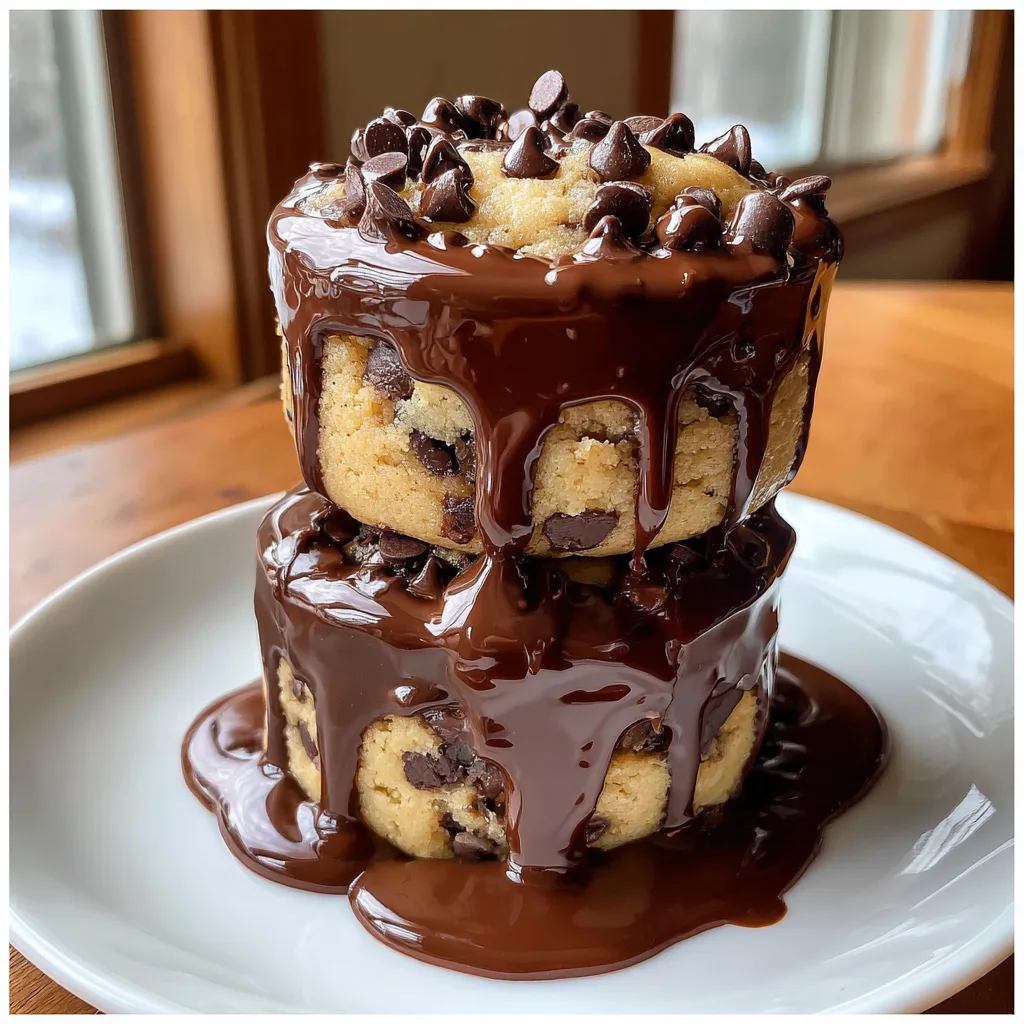
If you have leftover melted chocolate, you can drizzle it over the top, or simply press extra regular-sized chocolate chips into the top of the exposed cookie dough for a beautiful, rustic presentation, exactly as seen in classic bakery photos. Return the cups to the fridge for another 15 minutes to firm up completely before carefully peeling away the liners.
Pro Tips for the Best Chocolate Cups
1. Do not skip cooling the flour: If you add warm, freshly heat-treated flour to your butter mixture, the butter will melt, the sugars will dissolve incorrectly, and you will end up with a greasy, heavy paste rather than a fluffy dough.
2. The Chocolate Coating: If your melted chocolate feels too thick to paint up the sides of the muffin liners, add an extra half-teaspoon of coconut oil. The thinner the chocolate, the easier it is to work with, but ensure it is thick enough to hold the dough.
3. Use a Cookie Scoop: For uniform cups that look professionally made, use a spring-loaded cookie scoop to measure the dough into the cups.
Exciting Variations to Try
Once you master the base recipe, the possibilities are endless. Here are a few ways to customize your Chocolate Chip Cookie Dough Cups:
- Peanut Butter Lovers: Swap half of the butter in the dough for creamy peanut butter, and use a mix of milk chocolate and peanut butter chips for the topping.
- Double Chocolate: Add two tablespoons of unsweetened cocoa powder to your heat-treated flour for a rich, brownie-batter-style dough inside the chocolate shell.
- Festive Funfetti: Omit the chocolate chips in the dough and replace them with a generous handful of colorful rainbow sprinkles. Use white chocolate for the outer shell.
- S’mores Cups: Add crushed graham crackers to the dough and top the cups with a dollop of marshmallow fluff before sealing them with a final layer of chocolate.
Serving and Storage Suggestions
These cups are best served chilled or slightly cooler than room temperature. If they sit out too long in a warm room, the chocolate shell will become soft and messy.
Fridge: Store the completed cups in an airtight container in the refrigerator for up to one week. They make a perfect grab-and-go snack.
Freezer: These are incredibly freezer-friendly. Place them in a single layer in a freezer-safe zip-top bag or container. They will keep for up to 3 months. You can eat them straight from the freezer for a firm, chewy treat, or let them sit at room temperature for 10 minutes before biting in.
Fun Facts About Cookie Dough
Did you know that the modern phenomenon of standalone edible cookie dough cafes began around 2017 in New York City? While people have been sneaking bites of raw dough for over a century, the commercialization of safe, egg-free, heat-treated dough turned a guilty pleasure into a mainstream dessert category. This recipe allows you to bring that trendy, premium cafe experience right into your own kitchen without the exorbitant price tag.
Enjoy crafting these delightful Chocolate Chip Cookie Dough Cups. They bridge the gap between candy and baked goods, offering the absolute best of both dessert worlds!
Chocolate Chip Cookie Dough Cups
Ingredients
Equipment
Method
- Heat treat the flour: Spread flour on a baking sheet and bake at 350°F (175°C) for 5-7 minutes until it reaches 165°F (74°C). Let cool completely.
- Line a 12-cup muffin tin with paper or silicone liners.
- In a microwave-safe bowl, melt the 2 cups of chocolate chips and coconut oil in 30-second intervals, stirring until smooth.
- Spoon about 1 tablespoon of melted chocolate into each liner. Use a spoon to push the chocolate up the sides to form a cup. Freeze for 10-15 minutes until set.
- In a large bowl, cream together the softened butter, brown sugar, and granulated sugar until light and fluffy.
- Beat in the vanilla extract and salt.
- Gradually add the cooled, heat-treated flour. Mix in the milk 1 tablespoon at a time until a soft cookie dough consistency is reached.
- Fold in the mini chocolate chips.
- Remove the set chocolate cups from the freezer. Scoop about 1.5 to 2 tablespoons of cookie dough into each cup, pressing down gently.
- Top each cup with the standard chocolate chips, pressing them slightly into the dough.
- Refrigerate for at least 15 minutes before peeling off the liners and serving. Store in an airtight container in the fridge.