Copycat Breadsticks Recipe
Copycat Olive Garden Breadsticks: The Ultimate Homemade Recipe
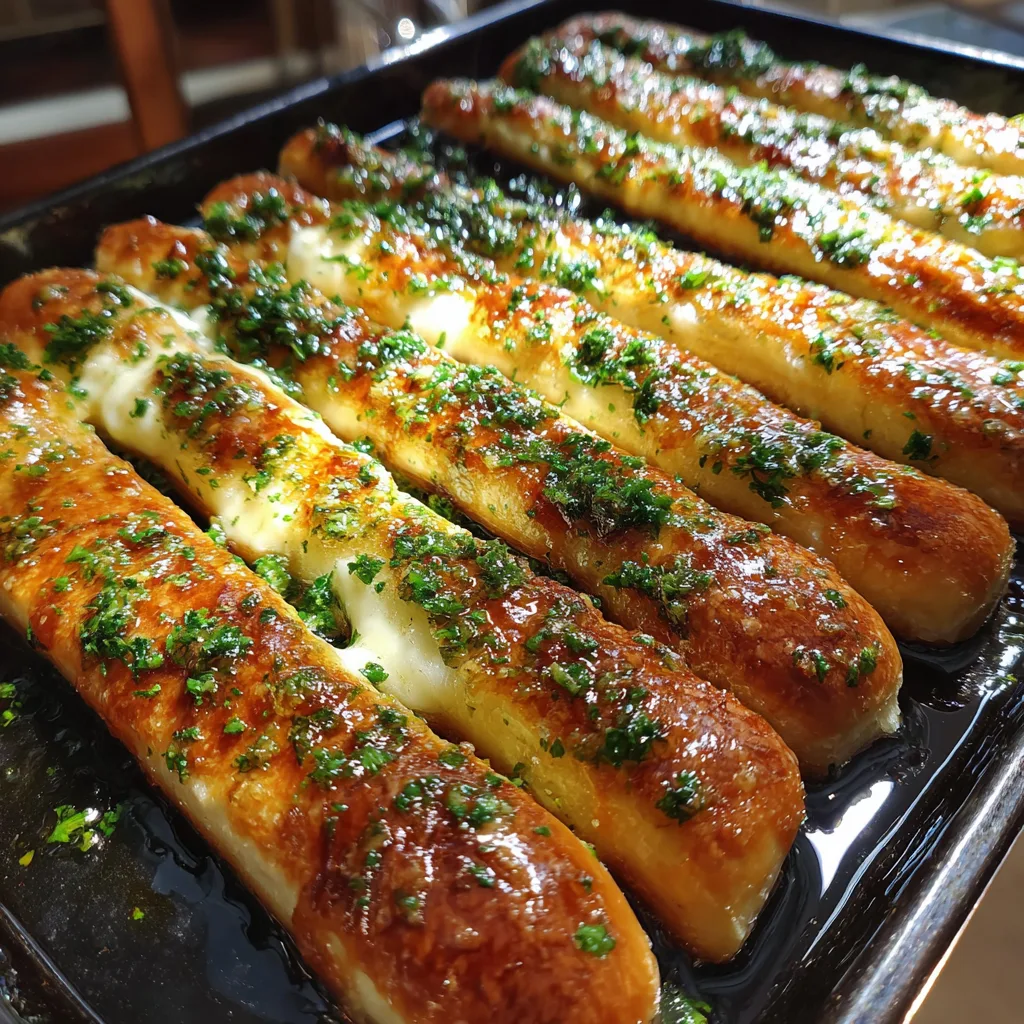
There is a universal truth when it comes to dining at popular Italian-American chain restaurants: the breadsticks are often the main event. Warm, impossibly soft, glistening with a generous coating of salty, garlic-infused butter, and sprinkled with just the right amount of green herbs—these breadsticks are the stuff of culinary legends. If you have ever found yourself filling up on that unlimited basket before your entree even arrives, you are certainly not alone. The good news is that you no longer have to leave your house, or wait for a table, to experience this yeasty, buttery perfection. With this comprehensive Copycat Olive Garden Breadsticks recipe, you can recreate that exact restaurant magic right in your own kitchen.
Baking bread at home can sometimes feel intimidating, especially if you are new to working with yeast. However, this specific recipe is designed to be foolproof, accessible, and incredibly rewarding. By utilizing basic pantry staples like all-purpose flour, active dry yeast, and honey, you can transform simple ingredients into a side dish that will outshine the main course. Whether you are serving a hearty bowl of pasta, a rich and creamy soup, or simply enjoying them straight off the baking sheet, these homemade breadsticks are guaranteed to become a highly requested favorite in your household.
Why Make Copycat Olive Garden Breadsticks at Home?
The appeal of making these iconic breadsticks from scratch goes far beyond just satisfying a craving. First and foremost is the undeniable superiority of freshly baked bread. When you make these at home, you get to experience them at their absolute peak: hot from the oven, with the garlic butter melting directly into the tender crumb. There is no travel time, no sitting under a heat lamp, and no holding back on the toppings. You are in complete control of the butter-to-garlic ratio.

Furthermore, baking these at home is incredibly cost-effective. A single batch yields a generous amount of breadsticks using ingredients you likely already have in your pantry. It is an excellent way to elevate a simple, budget-friendly weeknight spaghetti dinner into an event that feels like a special night out. Additionally, knowing exactly what goes into your food is a massive benefit. There are no mysterious commercial dough conditioners or artificial preservatives here—just pure, wholesome ingredients.
The Secret to the Perfect Soft Texture
What sets an Olive Garden breadstick apart from a standard dinner roll or a crusty baguette? It is all about the remarkably soft, pillowy texture that yields perfectly to every bite while still holding its shape. Achieving this texture relies on a few critical steps in the bread-making process.
1. The Role of Honey: Many bread recipes use white sugar to feed the yeast, but this recipe utilizes honey. Honey not only provides the necessary food for the active dry yeast to bloom and create a beautiful rise, but it also acts as a natural humectant. This means it helps the dough retain moisture, resulting in a significantly softer crumb and a slightly longer shelf life for the baked bread.
2. The Butter in the Dough: Adding melted and cooled unsalted butter directly into the dough enriches it. Fat coats the gluten strands formed by the flour, shortening them. This prevents the breadsticks from becoming tough and chewy, instead ensuring a tender, pull-apart texture.
3. The Boiling Water Technique: You might notice “4 cups boiling water” listed in the ingredients and wonder if that goes into the dough. It does not! This is a classic baker’s trick for creating steam in a home oven. By placing a pan of boiling water on the bottom rack of your oven while the breadsticks bake, you create a humid environment. This steam prevents the crust from setting too quickly and becoming hard or crispy, allowing the breadsticks to expand fully and remain incredibly soft on the outside.
Ingredients You Will Need
Gathering your ingredients is the first step to success. Make sure your ingredients are fresh, particularly the yeast, to ensure a proper rise.
For the Breadstick Dough:
- – 1 cup warm water (about 105°F to 115°F)
- – 2 tablespoons honey
- – 2 1/4 teaspoons active dry yeast (one standard packet)
- – 1/4 cup unsalted butter, melted and cooled
- – 1 1/2 teaspoons kosher salt
- – 3 1/2 cups (425g) all-purpose flour (plus a little extra for dusting)
- – 1 tablespoon olive oil, for greasing the bowl
- – Nonstick cooking spray, for greasing the baking sheet
- – 4 cups boiling water, for creating steam during baking
For the Signature Garlic Butter Glaze:
- – 1/4 cup butter, melted
- – 1 teaspoon garlic powder (ensure it is powder, not garlic salt)
- – 1 tablespoon minced fresh parsley (or 1 teaspoon dried parsley if fresh is unavailable)
Step-by-Step Instructions to Breadstick Perfection
Creating these breadsticks is a labor of love, but the active hands-on time is actually quite minimal. Follow these steps closely for the best results.
- Activate the Yeast: In the bowl of a stand mixer (or a large mixing bowl if kneading by hand), combine the 1 cup of warm water and the honey. Stir to dissolve the honey. Sprinkle the active dry yeast evenly over the top of the water. Let it sit undisturbed for 5 to 10 minutes. The mixture should become foamy and bubbly. If it does not, your yeast may be dead, and you will need to start over with fresh yeast.
- Form the Dough: Once the yeast is activated, add the melted and cooled unsalted butter and the kosher salt. Mix briefly. Gradually add the all-purpose flour, about one cup at a time. If using a stand mixer, use the dough hook attachment on low speed. If mixing by hand, use a sturdy wooden spoon until a shaggy dough forms, then switch to using your hands.
- Knead the Dough: Knead the dough for about 5 to 7 minutes in the stand mixer on medium-low speed, or 8 to 10 minutes by hand on a lightly floured surface. You are looking for a dough that is smooth, elastic, and slightly tacky, but not sticky. If the dough is way too wet, add a tablespoon of flour at a time until the right consistency is reached.
- First Rise: Lightly coat a large, clean bowl with the 1 tablespoon of olive oil. Form the kneaded dough into a ball and place it in the bowl, turning it once to coat the entire surface of the dough with oil. Cover the bowl tightly with plastic wrap or a clean, damp kitchen towel. Place it in a warm, draft-free spot and let it rise until doubled in size, which usually takes about 1 to 1.5 hours depending on the temperature of your kitchen.
- Shape the Breadsticks: Gently punch down the risen dough to release the air bubbles. Turn it out onto a lightly floured surface. Divide the dough into 12 equal pieces. The easiest way to do this is to cut the dough in half, cut those halves in half, and then cut each quarter into thirds. Roll each piece of dough beneath your palms to form a snake-like log about 7 to 8 inches long.
- Second Rise: Lightly grease a large baking sheet with nonstick cooking spray, or line it with parchment paper. Place the shaped breadsticks onto the baking sheet, spacing them about 2 inches apart. They will puff up significantly. Cover them loosely with a clean towel and let them rise for another 45 minutes to 1 hour, until they are noticeably puffy.
- Prepare the Oven and Steam: About 20 minutes before the second rise is complete, preheat your oven to 400°F (200°C). Place an empty, rimmed metal baking pan on the very bottom rack of the oven. Carefully boil 4 cups of water in a kettle or on the stove.
- Bake the Breadsticks: Right before placing the breadsticks in the oven, carefully pour the 4 cups of boiling water into the empty pan on the bottom rack (be cautious of the resulting steam). Quickly place the baking sheet with the breadsticks on the middle rack. Bake for 12 to 15 minutes, or until the breadsticks are a light, beautiful golden brown.
- The Crucial Glaze: While the breadsticks are baking, prepare the topping. In a small bowl, whisk together the 1/4 cup melted butter, garlic powder, and minced fresh parsley. The moment you pull the hot baking sheet from the oven, use a pastry brush to generously drench every single breadstick with the garlic butter mixture. Do not hold back; this is where the signature flavor comes from!
Troubleshooting Common Bread Baking Issues
Even with a foolproof recipe, variations in humidity, temperature, and flour brands can sometimes throw a curveball into your baking process. Here is how to handle common issues.
The Dough is Too Sticky to Shape: If your dough resembles a sticky batter rather than a smooth ball after kneading, it needs more flour. Humidity plays a huge role in flour absorption. Add all-purpose flour one tablespoon at a time, kneading continuously, until it pulls away from the sides of the bowl or your hands cleanly.
The Breadsticks Turned Out Hard: This usually stems from two issues: adding too much flour during the kneading process (which makes the dough dense), or skipping the steam bath in the oven. The boiling water trick is essential. Without that humid environment, the crust dries out and hardens in the high heat of the oven. Also, ensure you are storing them in an airtight container immediately after they cool completely.
The Dough Didn’t Rise: This is almost always a yeast issue. Either your water was too hot (which kills the yeast) or too cold (which won’t wake it up), or the yeast itself was expired. Always make sure your water feels like warm bathwater (around 110°F), and always check the expiration date on your yeast packets.
Serving Suggestions for Your Garlic Breadsticks
These copycat breadsticks are incredibly versatile. While they are famously served alongside monumental bowls of pasta, their potential extends far beyond spaghetti and meatballs.
Soup Dippers: There is nothing better on a chilly evening than a hot bowl of Zuppa Toscana, Minestrone, or creamy Tomato Basil soup served with two or three of these soft breadsticks. They are sturdy enough to be dunked repeatedly without falling apart.
Salad Companions: Pair these with a massive, crisp garden salad dressed in a tangy Italian vinaigrette. The rich, buttery bread perfectly balances the acidity of the salad dressing, recreating that classic soup-salad-and-breadsticks lunch combo.
The Ultimate Snack: Serve a basket of these warm breadsticks with small bowls of warm marinara sauce, Alfredo sauce, or a cheesy spinach and artichoke dip for dipping. They make a fantastic appetizer for dinner parties or a comforting snack for game day.
Variations to Try at Home
Once you have mastered the classic recipe, you can use this fantastic dough as a base for several delicious variations.
Cheesy Breadsticks: During the last 3 minutes of baking, sprinkle a generous amount of finely shredded mozzarella and parmesan cheese over the tops of the breadsticks. Return them to the oven until the cheese is melted and bubbly, then finish with the garlic butter glaze.
Spicy Italian Breadsticks: Add half a teaspoon of crushed red pepper flakes and a teaspoon of dried Italian seasoning to the dough during the mixing phase. This gives the bread inside a savory, slightly spicy kick that pairs beautifully with the garlic exterior.
Everything Bagel Breadsticks: Skip the garlic and parsley glaze. Instead, brush the unbaked breadsticks with an egg wash right before they go into the oven, and sprinkle them heavily with Everything Bagel seasoning. Bake as directed.
How to Store and Reheat Leftovers
It is a rare occasion to have leftover breadsticks, but if you do, proper storage is key to maintaining their incredibly soft texture.
Allow the breadsticks to cool completely to room temperature. Storing them while still warm will create condensation inside the container, making them soggy. Place the cooled breadsticks in an airtight zip-top bag or a plastic container with a tight-fitting lid. Store them at room temperature for up to 3 days. Do not put them in the refrigerator, as the cold air will dry out the bread and make it stale faster.
To Reheat: The best way to revive a leftover breadstick is in the oven. Wrap the breadsticks loosely in aluminum foil to trap their moisture. Place them in a 350°F (175°C) oven for about 5 to 7 minutes until they are warmed through. You can also microwave them wrapped in a slightly damp paper towel for 10-15 seconds, but eat them immediately, as microwaved bread tends to toughen as it cools down again.
Conclusion: Bringing the Italian Restaurant Experience Home
Mastering this Copycat Olive Garden Breadsticks recipe is a game-changer for home cooks. It demystifies the magic of restaurant-quality bread and proves that with a little patience and a few simple techniques, you can achieve extraordinary results. From the soothing process of kneading the dough to the intoxicating aroma of garlic and butter filling your kitchen, making these breadsticks is an experience to be savored.
So the next time you are craving that warm, buttery, garlic-infused comfort, skip the restaurant lines. Tie on your apron, bloom some yeast, and get ready to enjoy the best breadsticks you have ever tasted, right at your own dining table. Prepare yourself for the compliments, because once your family tries these, they will never let you buy store-bought garlic bread again!
Copycat Olive Garden Breadsticks
Ingredients
Equipment
Method
- Combine warm water and honey in a large bowl. Sprinkle yeast over the top and let sit for 5-10 minutes until foamy.
- Add the cooled melted butter and kosher salt. Gradually add the flour, mixing until a dough forms.
- Knead the dough for 5-7 minutes in a stand mixer or 8-10 minutes by hand until smooth and elastic.
- Place the dough in an olive oil-greased bowl, cover loosely, and let rise in a warm place for 1 to 1.5 hours until doubled in size.
- Punch the dough down and divide into 12 equal pieces. Roll each piece into a 7-inch log.
- Place on a greased baking sheet, 2 inches apart. Cover and let rise again for 45 minutes to 1 hour until puffy.
- Preheat oven to 400°F (200°C). Place an empty shallow pan on the bottom oven rack. Carefully pour the 4 cups of boiling water into the pan to create steam.
- Quickly place the baking sheet of breadsticks on the middle rack. Bake for 12-15 minutes until golden brown.
- While baking, whisk together the melted butter, garlic powder, and parsley for the glaze.
- Immediately upon removing the breadsticks from the oven, brush them generously with the garlic butter glaze. Serve warm.