Sage Green Botanical Lace Table Runner Crochet Pattern
📖 B. INTRODUCTION
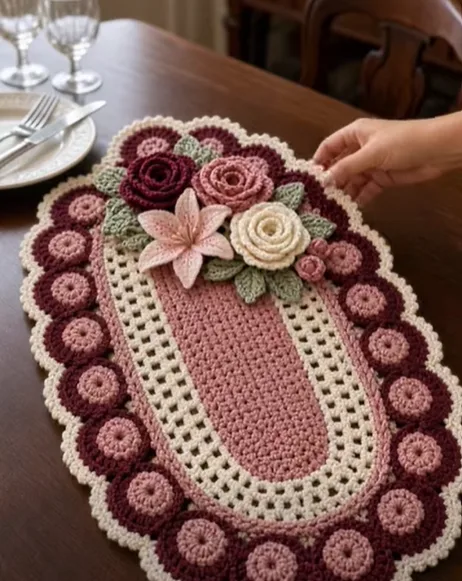
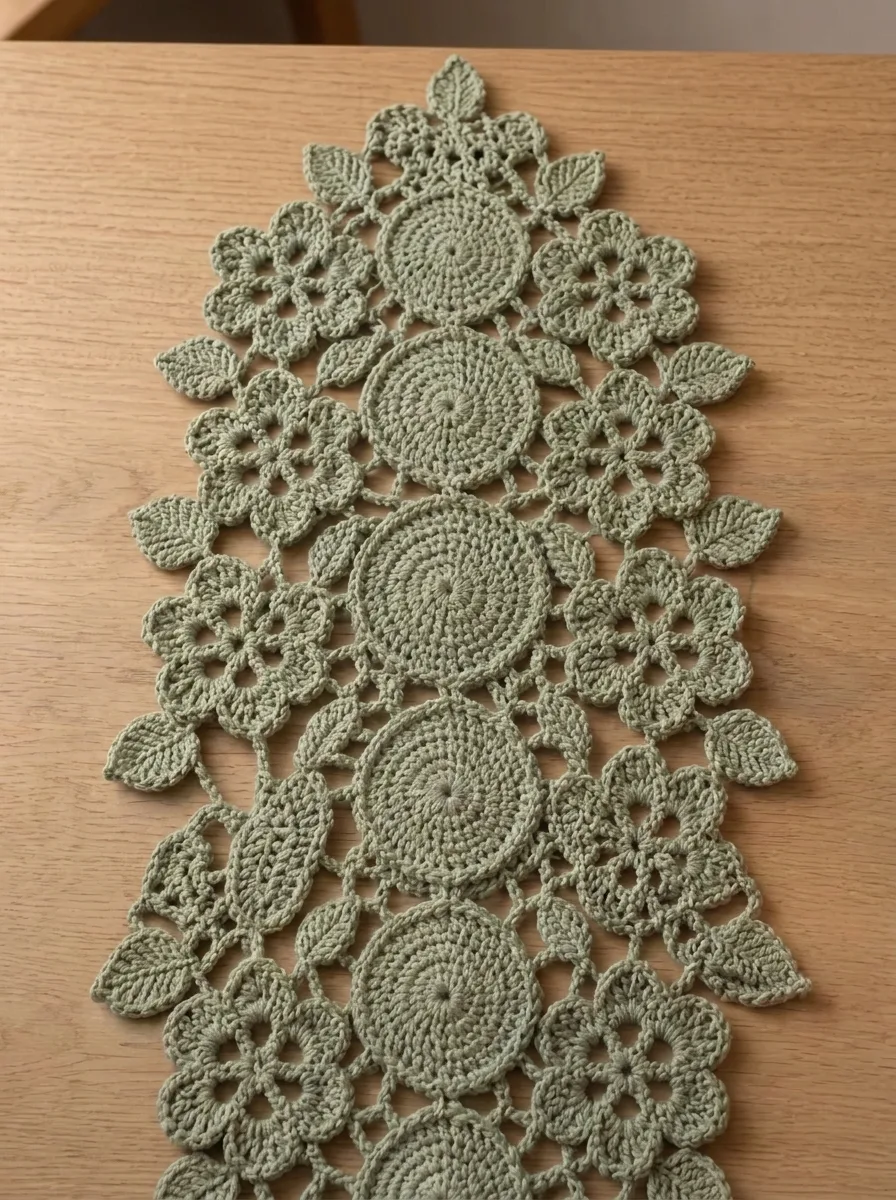
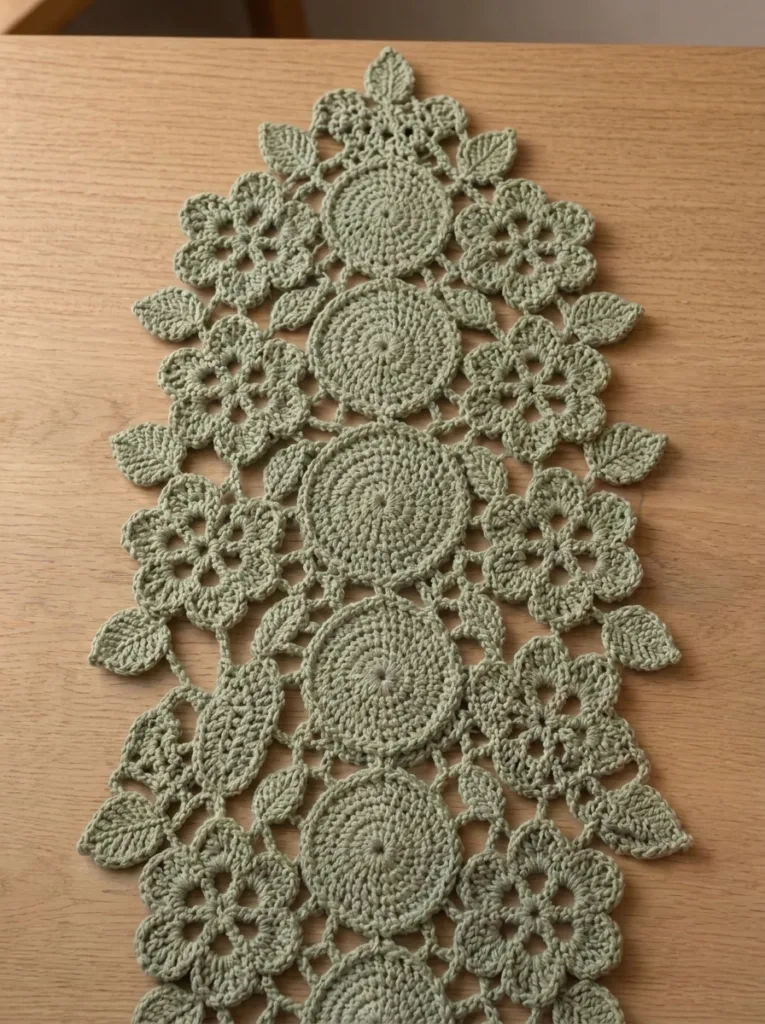
Transform your dining space with the organic elegance of the Sage Green Botanical Lace Table Runner. This original lace design combines structured central geometric medallions with surrounding six-petal floral blossoms and trailing leaf motifs. Rendered in a soothing eucalyptus sage hue, it bridges vintage lace tradition with modern rustic interior styling.
Whether styled as a centerpiece for a farmhouse dining table, layered over a solid linen cloth for wedding receptions, or displayed across a wooden sideboard, this table runner offers a striking focal point. The modular motif construction allows you to easily lengthen or shorten the runner to fit any surface in your home.
Customization options abound: while the sage green creates an earthy, soothing mood, this piece looks equally stunning in creamy ecru, deep forest green, terracotta, or soft blush pink.
🔍 C. MAIN PATTERN OVERVIEW
The Sage Green Botanical Lace Table Runner features a modular motif design assembled into a tapered, diamond-ended silhouette.
- ⚪ Central Medallion Spine: A vertical central column made of dense, solid double-crochet medallions providing visual weight and structure.
- 🌸 Flanking Floral Motifs: Openwork 6-petal flower motifs arranged symmetrically along both sides of the central spine to soften the silhouette.
- 🌿 Botanical Leaf Sprigs: Sculpted leaf motifs with picot-pointed tips that sprout outward from the motifs to create an organic, vine-like border.
- 🕸️ Lace Netting & Point Edging: Interlocking chain bridges and picot borders that unify the individual pieces and end in dramatic tapered points at both ends.
🎯 D. SKILL LEVEL
Level: Intermediate
This pattern uses standard crochet stitches combined into intermediate motif shapes, picots, and join-as-you-go or hand-sewn assembly.
- 🟢 Working in continuous and joined rounds
- 🟢 Working along both sides of a foundation chain (leaves)
- 🟢 Treble crochet ($tr$) and picot stitch execution
- 🟢 Seaming motifs together with neat, invisible stitches or lace chain bridges
- 🟢 Wet blocking and precision pinning
📏 E. FINISHED SIZE
- 📏 Width: 13.5 inches (34 cm) at the widest central point
- 📏 Length: 42 inches (106.5 cm) from tip to tip after blocking
Size Adjustments: You can easily extend the runner length by adding central circle medallions (each additional medallion adds approx. 5.5 inches / 14 cm to the total length) along with 2 matching flanking flowers and 2 leaf sprigs.
🧮 F. GAUGE
- 🧮 Single Central Circle Medallion: 3.5 inches (9 cm) in diameter after light steam blocking.
- 🧮 Single 6-Petal Flower Motif: 3.0 inches (7.5 cm) in diameter.
Note on Gauge: Precision gauge is not strictly critical for table runners, but maintaining consistent tension ensures your motifs lay flat and assemble evenly.
🧶 G. REQUIRED YARN AMOUNTS
- 🧵 Primary Shade (Sage Green): Approx. 680 yards (620 meters) / 220 grams of Fingering/Sport Weight (Category 2) 100% Mercerized Cotton Yarn.
- 🧵 Estimated Breakdown by Component:
- Central Medallions (6 total): ~180 yards (165 m)
- Flanking Flowers (12 total): ~240 yards (220 m)
- Leaf Sprigs (18 total): ~160 yards (145 m)
- Lace Mesh Connections & Edging: ~100 yards (90 m)
🧰 H. MATERIALS
- 🪡 Crochet Hook: Size 3.0 mm (US C-2 or D-3)
- 🧶 Yarn: 100% Mercerized Sport/Fingering Cotton in Sage Green
- ✂️ Tapestry Needle: Fine steel yarn needle for weaving in ends
- 📍 Blocking Tools: Blocking mat, stainless steel rust-proof T-pins, and a spray water bottle or steamer
- 🏷️ Stitch Markers: 10-12 locking stitch markers for alignment during assembly
🔤 I. ABBREVIATIONS – US TERMS
- ch = chain
- sl st = slip stitch
- sc = single crochet
- hdc = half double crochet
- dc = double crochet
- tr = treble (triple) crochet
- st(s) = stitch(es)
- sp(s) = space(s)
- MR = magic ring
- picot = chain 3, sl st in 1st chain made
- BLO = back loop only
- FLO = front loop only
- [ ] = repeat instructions inside brackets as indicated
- ( ) = total stitch count at the end of the round/row
📝 J. NOTES BEFORE YOU BEGIN
- 📌 Modular Construction: All individual motifs (circles, flowers, leaves) are crocheted first and laid out flat before being joined together with lace chain bridges and a final border.
- 📌 Stitch Counts: Count stitches carefully on every round—especially on the central circles—so the connection points remain perfectly symmetrical.
- 📌 Yarn Tails: Leave a 6-to-8-inch tail on each motif for easy seaming and neat finishing.
- 📌 Blocking is Essential: Openwork lace motifs will curl straight off the hook. Wet blocking is required to open up the stitches and achieve the botanical shape shown in the design.
🪡 K. COMPLETE PATTERN
⚪ Central Circle Medallions (Make 6)
Worked in joined rounds.
- R1: MR, ch 3 (counts as 1 dc), work 11 dc into the ring. Join with sl st to top of starting ch-3. (12 dc)
- R2: Ch 3 (counts as 1 dc), 1 dc in same st. Work 2 dc in each st around. Join with sl st to top of starting ch-3. (24 dc)
- R3: Ch 3 (counts as 1 dc), 2 dc in next st. [1 dc in next st, 2 dc in next st] 11 times. Join with sl st to top of starting ch-3. (36 dc)
- R4: Ch 3 (counts as 1 dc), 1 dc in next st, 2 dc in next st. [1 dc in next 2 sts, 2 dc in next st] 11 times. Join with sl st to top of starting ch-3. (48 dc)
- R5: Ch 3 (counts as 1 dc), 1 dc in next 2 sts, 2 dc in next st. [1 dc in next 3 sts, 2 dc in next st] 11 times. Join with sl st to top of starting ch-3. (60 dc)
- R6 (Outer Frame Round): Ch 1, sc in same st, [ch 4, skip 2 sts, sc in next st] 19 times, ch 4, skip 2 sts. Join with sl st to first sc. (20 ch-4 loops)
- Fasten off, leaving an 8-inch tail for seaming.
🌸 Six-Petal Lace Flowers (Make 12)
Worked in joined rounds.
- R1 (Center Ring): MR, ch 1, work 12 sc into the ring. Join with sl st to first sc. (12 sc)
- R2 (Petal Base Loops): [Ch 4, skip 1 st, sl st in next st] 6 times. (6 ch-4 loops)
- R3 (Petal Layer): Into each ch-4 loop around, work: (1 sc, 1 hdc, 3 dc, 1 hdc, 1 sc). Join with sl st to first sc. (6 petals)
- R4 (Rear Anchor Loops): Working behind the petals of R3: [sl st around the post of the R1 sc between petals, ch 6] 6 times. Join with sl st to starting point. (6 ch-6 loops)
- R5 (Outer Lace Petals): Into each ch-6 loop work: (2 sc, 2 hdc, 3 dc, ch 3 picot, 3 dc, 2 hdc, 2 sc). Join with sl st to first sc. (6 large picot-tipped petals)
- Fasten off and weave in ends.
🌿 Botanical Leaf Motifs (Make 18)
Worked in rows around a center foundation chain.
- Foundation: Ch 12.
- Round 1 (Leaf Body):
- Working down the chain starting in the 2nd ch from hook: 1 sc in 2nd ch, 1 hdc in next ch, 1 dc in next 2 ch, 1 tr in next 3 ch, 1 dc in next 2 ch, 1 hdc in next ch.
- In the last chain st work: (1 sc, ch 3 picot, 1 sc) to turn the tip.
- Rotating to work along the opposite side of the foundation chain: 1 hdc in next ch, 1 dc in next 2 ch, 1 tr in next 3 ch, 1 dc in next 2 ch, 1 hdc in next ch, 1 sc in last ch. Join with sl st to first sc.
- Round 2 (Leaf Edge & Spine): Ch 1, sl st in BLO of each st up to the picot tip, work (sl st, ch 2, sl st) into the picot sp, sl st in BLO down the remaining side.
- Fasten off, leaving an 8-inch tail for attachment.
🕸️ Interlocking Mesh Connectors & Point Edging
Once all motifs are made and blocked, arrange them according to the styling diagram below.
- Central Spine Assembly: Line up the 6 Central Circle Medallions vertically. Join each medallion to its neighbor by sewing 2 adjacent outer ch-4 loops together using a tapestry needle and whipstitch.
- Flanking Flower Attachment: Position 1 flower on the left and 1 flower on the right of each central circle seam. Using yarn needle and tail, attach 2 petal picot tips to the outer loops of the circle medallions.
- Leaf Sprig Placement: Pin leaves branching outward from the flower junctions and central circles, angling towards the ends of the runner.
- Outer Lace Netting Border (Worked around entire perimeter):
- Attach yarn at top end point motif with a sl st.
- R1: [Ch 5, sc into next available outer picot/loop of leaf or flower, ch 5, sc in next sp] around outer edge, adjusting chain lengths to 4 or 6 as needed to keep the border flat.
- R2 (Picot Finish): Into each ch-5 sp around work: (3 sc, ch 3 picot, 3 sc).
- Fasten off and weave in all remaining ends.
🎨 L. STYLING / ASSEMBLY / STABILITY / FINAL SHAPING
📐 Layout Blueprint & Alignment
                        [ Leaf Tip Point ]
                              🌸 🌿
                            🔴 (Circle 1)
                          🌿 🌸 🌸 🌿
                            🔴 (Circle 2)
                          🌿 🌸 🌸 🌿
                            🔴 (Circle 3)
                          🌿 🌸 🌸 🌿
                            🔴 (Circle 4)
                          🌿 🌸 🌸 🌿
                            🔴 (Circle 5)
                          🌿 🌸 🌸 🌿
                            🔴 (Circle 6)
                              🌸 🌿
                        [ Leaf Tip Point ]
📍 Step-by-Step Assembly Sequence
- Circle Spine: Stitch 6 Central Circle Medallions into a vertical chain.
- Side Flowers: Place 12 Flower Motifs along the sides (6 per side) nestled in the gaps between circles.
- Outer Foliage: Stitch 18 Leaf Motifs framing the outer edge of the flowers and forming the pointed end caps (3 leaves per point).
- Border Netting: Crochet the outer lace netting round to bind all outer edges into a unified line.
💦 Wet Blocking Protocol
- Submerge finished runner in cold water with mild yarn soak for 15 minutes.
- Gently press out excess water in a towel (do not wring).
- Pin runner onto blocking mats, pulling each outer picot and leaf tip taut with T-pins.
- Allow to dry completely (24 hours) before unpinning.
✅ Final Shaping Checklist
- ✅ All 6 central medallions are aligned straight along the centerline.
- ✅ Flanking flower motifs are mirrored identically on left and right sides.
- ✅ Leaf tips point symmetrically outward and toward the ends.
- ✅ Outer picot border lays completely flat without puckering or waving.
- ✅ All yarn ends are securely hidden and trimmed.
💡 M. HELPFUL CROCHET TIPS
- 💡 Maintain Uniform Tension: Keep yarn tension consistent across all motifs so matching pieces stay identical in size.
- 💡 Use Stitch Markers for Alignment: Pin motifs together with stitch markers before sewing to test symmetry.
- 💡 Mercerized Cotton is Best: Use 100% mercerized cotton yarn; its smooth twist provides sharp stitch definition for lace.
- 💡 Count Circle Loops Carefully: Ensure each central medallion has exactly 20 outer loops to keep attachment points even.
- 💡 Steam Touch-Ups: Keep a steam iron handy for quick touch-ups on leaf tips after storing the runner away.
- 💡 Weave Ends in Double Direction: Weave yarn tails in one direction, then back across, to prevent unraveling during washing.
🧼 N. CARE INSTRUCTIONS
- 🧼 Washing: Hand wash gently in cool water using liquid detergent. Do not rub or agitate roughly.
- 🧼 Drying: Lay flat on a clean dry towel. Reshape leaves and petals by hand while damp.
- 🧼 Ironing/Pressing: Press on the reverse side using a warm iron over a damp pressing cloth if needed.
- 🧼 Storage: Roll the runner loosely around a cardboard tube or fold gently with acid-free tissue paper to avoid permanent creasing.
- 🌸 Victorian Rose Lace Doily Crochet Pattern
- 🌿 Eucalyptus Leaf Garland & Motif Set
- 🍽️ Rustic Farmhouse Linen & Crochet Placemat Pattern
- 🌼 Vintage Daisy Chain Table Runner Pattern
❓ R. FAQ
- ❓ Q: Can I use thread yarn (Size 10) instead of Sport/Fingering weight yarn?
- A: Yes! Using Size 10 crochet thread with a 1.5 mm – 1.75 mm hook will yield a delicate, smaller lace runner approx. 7-8 inches wide—perfect for dressers or narrower accent tables.
- ❓ Q: How do I make the runner longer for a large 8-person dining table?
- A: Simply make additional Central Medallions (each adds ~5.5 inches), along with 2 side flowers and 2 leaves for every added circle.
- ❓ Q: Is wet blocking really necessary for this project?
- A: Yes. Unblocked motifs tend to curl at the edges. Wet blocking opens up the lace work, sharpens leaf tips, and gives the runner a polished, professional lay-flat finish.
- ❓ Q: Can I join the motifs as I go instead of sewing them at the end?
- A: Absolutely. Advanced crocheters can replace the outer chain loop mid-points with slip stitches to join motifs during the final round of each component.
- ❓ Q: How many skeins of yarn will I need?
- A: You will need approximately 3 to 4 skeins (50g each) of standard Fingering/Sport weight cotton yarn for the standard 42-inch length.