Spiral & Holly Bell Crochet Ornament Pattern
Heirloom Christmas Star, Spiral & Holly Bell Crochet Ornament Pattern
Category: Crochet Patterns / Holiday & Seasonal / Christmas Ornaments / Amigurumi Accessories
Skill Level: Easy-Intermediate | Format: Comprehensive Free Pattern & Assembly Guide
📖 B. INTRODUCTION
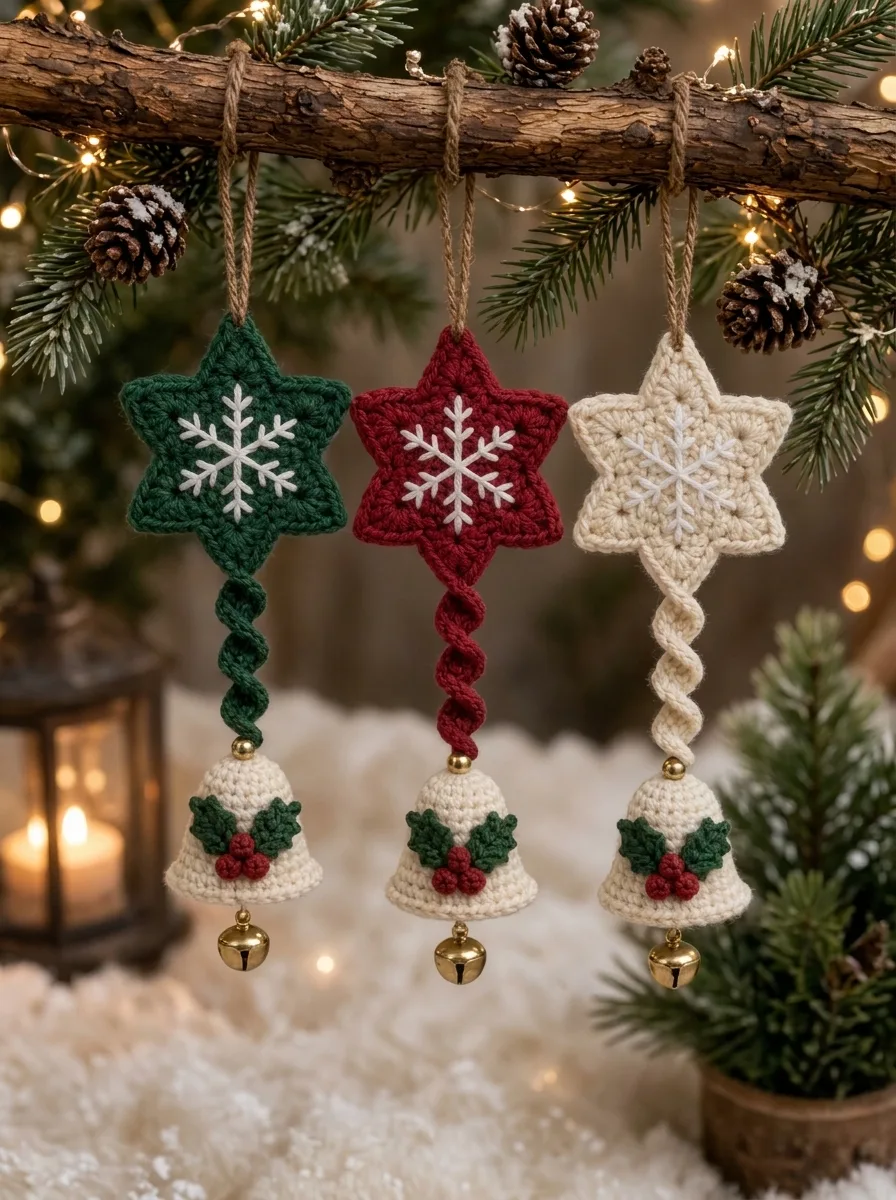
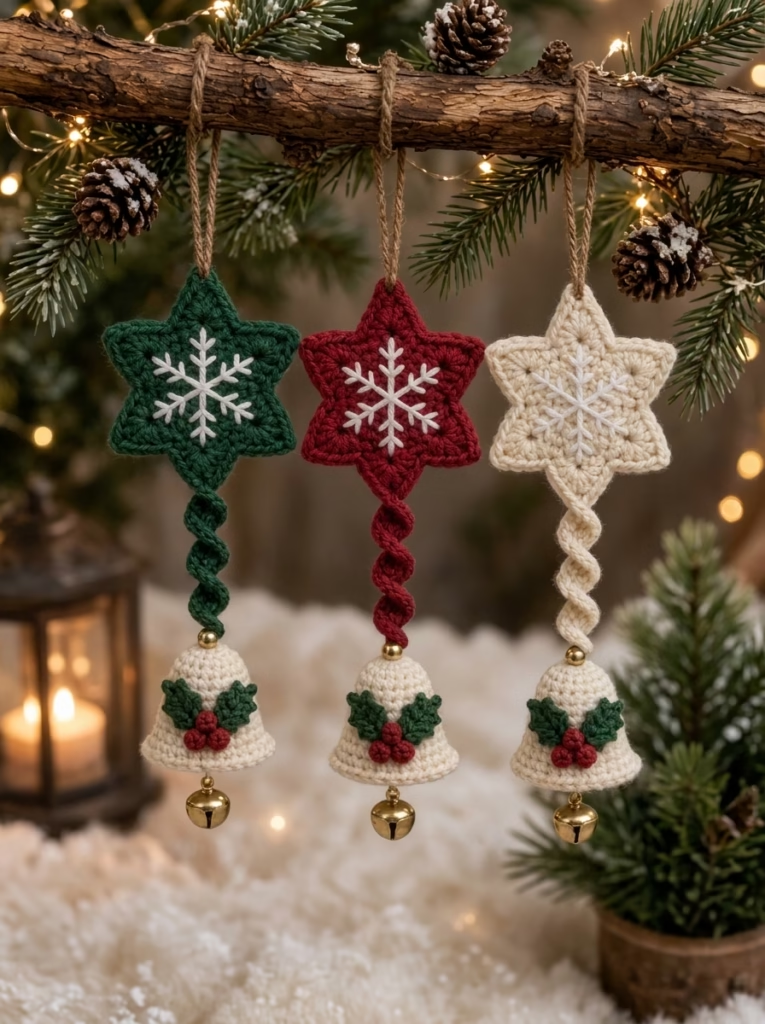
Bring classic festive magic to your holiday decor with this heirloom-quality Christmas ornament set. Featuring a structured six-pointed star adorned with delicate snowflake embroidery, a bouncy twisted spiral stem, and a sweet cream bell embellished with holly leaves and red berries, this design captures the timeless warmth of traditional handmade holiday styling. Hanging from natural jute cord and finished with a ringing gold jingle bell clapper, each piece adds movement, sound, and rich textural depth to your tree.
Whether you prefer traditional forest greens, deep crimson reds, or elegant winter whites, this versatile design allows you to craft a perfectly coordinated trio. These ornaments make exceptional hand-crafted gifts, holiday bazaar bestsellers, or cherished keepsakes that your family will look forward to unpacking year after year.
This project is wonderfully satisfying for crocheters looking to combine simple stitchwork with polished finishing techniques. Using basic stitches—single crochet, half double crochet, double crochet, and quick picots—you will construct double-layered flat stars, a tight icicle spiral, a molded bell dome, and tiny botanical appliqués. Grab your hook, put on your favorite holiday movie, and let’s start stitching this cozy Christmas collection!
🔍 C. MAIN PATTERN OVERVIEW
This festive ornament consists of four primary structural components joined in a continuous vertical suspension line:
- ⭐️ The Double-Layered Star Top: A rigid, six-pointed star made by joining two flat star motifs together. The front star face is detailed with hand-embroidered white snowflake spokes with delicate outer V-branch accents.
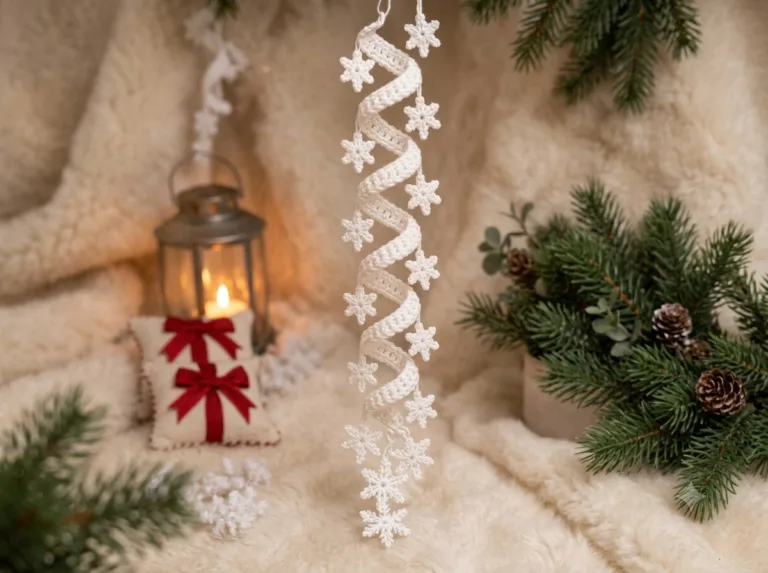
- 🌀 The Twisted Icicle Spiral Stem: A springy, corkscrew crochet tail anchored at the bottom tip of the star that creates a dynamic vertical transition to the bell below.
- 🔔 The Cream Bell Dome: A flared amigurumi-style bell worked in smooth cream yarn, topped with a decorative gold spacer bead where it meets the spiral stem.
- 🌿 The Holly & Berry Appliqué & Bell Clapper: Two structured holly leaves and three dimensional red berries sewn across the front face of the bell, paired with a functional brass jingle bell suspended inside as the clapper.
🎯 D. SKILL LEVEL
Level: Easy to Easy-Intermediate
This project is suitable for confident beginners and intermediate crocheters who know basic stitches and are ready to try light surface embroidery and small piece assembly.
Techniques Involved:
- 🧶 Working in continuous spiral rounds (bell dome) and flat rounds (star motifs)
- 🧶 Magic Ring (MR) initialization
- 🧶 Basic stitches: Single Crochet (sc), Half Double Crochet (hdc), Double Crochet (dc)
- 🧶 Picot stitches for crisp leaf and star point shaping
- 🧶 Working multiple stitches into a single chain to generate natural spiral twisting
- 🧶 Surface embroidery (straight stitch & fly stitch for the snowflake motif)
- 🧶 Basic hand sewing and bead/hardware attachment
📏 E. FINISHED SIZE
- 📏 Total Hanging Length: Approx. 10.5 inches (26.5 cm) from top star point to the bottom of the jingle bell (excluding the jute hanging loop).
- 📏 Star Width: Approx. 3.25 inches (8.25 cm) across from point to point.
- 📏 Spiral Stem Length: Approx. 3.0 inches (7.5 cm) relaxed.
- 📏 Bell Height & Brim Width: Approx. 2.0 inches (5 cm) tall; brim measures 2.25 inches (5.7 cm) in diameter.
(Note: Finished size depends on your yarn weight, hook size, and stitch tension. Working with tighter tension yields crisp, self-supporting stars and firm bell shapes.)
🧮 F. GAUGE
- 🧮 Gauge Reference: 11 sc × 12 rnds = 2 inches (5 cm) using a 2.75 mm (C/2) hook and DK weight yarn.
Exact gauge is not critical for this project, but your stitches must be tight and dense so the star remains flat, the bell holds its shape, and stuffing or interior threads do not show through.
🧶 G. REQUIRED YARN AMOUNTS
All estimates are based on Light Worsted / DK weight yarn (100% Mercerized Cotton or Acrylic/Cotton blend):
- 🧵 Forest Green Yarn: ~25 yards / 12 grams (for 1 green star set + holly leaves)
- 🧵 Deep Crimson Red Yarn: ~25 yards / 12 grams (for 1 red star set + berries)
- 🧵 Winter Cream / Off-White Yarn: ~45 yards / 22 grams (covers all 3 bells + 1 cream star set)
- 🧵 White Embroidery Thread or Fine Yarn: ~5 yards / 2 grams (for snowflake embroidery across all 3 stars)
🧰 H. MATERIALS
- 🪡 Crochet Hook: Size 2.75 mm (US C/2) or 3.0 mm (US 11/D)
- 🧶 Yarn: DK / Light Worsted Cotton Yarn in Forest Green, Crimson Red, Winter Cream
- 🧵 Embroidery Thread: White Stranded Cotton Floss or Fine Lace Yarn
- 🛎️ Hardware & Bells: 3 Small Gold Jingle Bells (15 mm–20 mm diameter)
- 📿 Beads: 3 Gold Metallic Spacer Beads (6 mm–8 mm with a wide hole)
- 🪢 Hanging String: Natural Jute Twine or Thin Satin Ribbon (~10 inches per ornament)
- ✂️ Tools: Sharp Scissors, Tapestry Needle, Embroidery Needle, Stitch Marker, Fiberfill (a tiny pinch per star, optional)
🔤 I. ABBREVIATIONS – US TERMS
- 📌 ch: chain
- 📌 sl st: slip stitch
- 📌 sc: single crochet
- 📌 hdc: half double crochet
- 📌 dc: double crochet
- 📌 inc: increase (2 sc in same stitch)
- 📌 MR: Magic Ring
- 📌 BLO: back loop only
- 📌 st(s): stitch(es)
- 📌 rnd(s): round(s)
- 📌 picot: ch 2, sl st in the 2nd ch from hook
- 📌 [ ]: repeat instructions inside brackets the indicated number of times
- 📌 ( ): total stitch count at the end of the round/row
📝 J. NOTES BEFORE YOU BEGIN
- 💡 Double Star Layering: Each star top consists of two identical star motifs (Front and Back) joined around the perimeter. This gives the ornament double-sided structure so it does not flop over when hanging on the Christmas tree.
- 💡 Embroidery First: Always perform the snowflake embroidery on the Front Star motif before joining it to the Back Star motif.
- 💡 Continuous vs. Joined Rounds: The bell is worked in continuous spiral rounds without joining; use a stitch marker on the first stitch of each round. The star motifs are worked in joined rounds.
- 💡 Creating the Spiral: The twisted stem relies on placing 3 single crochet stitches into every chain space. This naturally forces the strip to curl into a tight corkscrew without needing wire.
🪡 K. COMPLETE PATTERN
⭐️ 1. Star Motif (Make 2 per ornament: 1 Front, 1 Back)
Use Forest Green for Green Ornament, Crimson Red for Red Ornament, or Winter Cream for Cream Ornament.
- Rnd 1: Into a MR, ch 2 (counts as first dc), work 11 dc. Join with sl st to top of starting ch-2. (12 dc)
- Rnd 2: Ch 1, [1 sc in next st, 2 sc in next st] 6 times. Join with sl st to first sc. (18 sc)
- Rnd 3 (Star Points): In the next 3 sts, work as follows:
[1 sc in st 1; in st 2 work (1 hdc, 1 dc, ch 2 picot, 1 dc, 1 hdc); 1 sc in st 3].
Repeat from * 5 more times around. Join with sl st to starting sc. (6 Star Points complete)
🧶 Fasten off. For the Front Star, leave a standard tail. For the Back Star, leave a 12-inch tail for joining.
❄️ 2. Snowflake Embroidery (Front Star Only)
Using White embroidery floss or fine lace yarn and an embroidery needle:
- 🪡 Bring needle up through the center hole of the Magic Ring on the front face of the Front Star.
- 🪡 Stitch 6 straight spokes outward from the center along the center line of each star point, ending just below the picot tip.
- 🪡 Add a small “V” branch accent near the outer tip of each spoke by making two short diagonal straight stitches branching outward.
- 🪡 Knot secure on the wrong (back) side of the Front Star motif.
       \  /       <-- V-branch detail near point
        \/
        ||
   ---- || ----   <-- 6 Central Star Spokes
        ||
        /\
       /  \
⭐️ 3. Star Assembly & Edge Joining
- Place Front Star (embroidered) and Back Star with wrong sides facing together.
- Using the tail from the Back Star and a tapestry needle (or sl st with your crochet hook through both layers):
- Work single crochet (or whipstitch) through both loops of both layers around the outer edge.
- At each star peak: work (1 sc, ch 1, 1 sc) into the picot chain space to keep the tip crisp.
- At each inner valley: work 1 sl st deep between the points to keep valleys defined.
- 🧶 (Optional) Stuff lightly with a tiny pinch of fiberfill before closing the last point.
- 🧶 Fasten off and weave in ends inside the star core.
🌀 4. Twisted Spiral Stem
Attach yarn matching the star color to the VERY BOTTOM point/picot of the assembled star.
- Row 1: Ch 26.
- Row 2: Starting in 2nd ch from hook, work 3 sc into each ch space across to the end. (75 sc)
🌀 As you work, the row will naturally twist into a tight, springy icicle spiral.
🧶 Fasten off, leaving an 8-inch tail for bell assembly.
🔔 5. Cream Bell Body
Use Winter Cream yarn for all bell bodies.
- Rnd 1: MR 6 sc. (6)
- Rnd 2: [inc] 6 times. (12)
- Rnd 3: [1 sc, inc] 6 times. (18)
- Rnd 4: [2 sc, inc] 6 times. (24)
- Rnds 5–8 (4 rnds): sc in each st around. (24)
- Rnd 9 (Flared Brim): [3 sc, inc] 6 times. (30)
- Rnd 10: sc in each st around. (30)
- Rnd 11: [4 sc, inc] 6 times. (36)
- Rnd 12: sl st loosely in each st around to create a smooth, reinforced rim. (36)
🧶 Fasten off, weave in end neatly inside the bell brim.
🌿 6. Holly Leaves (Make 2 per Bell)
Use Forest Green yarn.
- Row 1: Ch 7.
- Working down the chain:
- 1 sc in 2nd ch from hook
- 1 hdc in next ch
- in next ch work: (1 dc, ch 2 picot, 1 dc)
- 1 hdc in next ch
- 1 sc in next ch
- in end ch work: (1 sc, ch 2 picot, 1 sc) — turns corner to work along bottom edge of chain.
- Working down opposite side of chain:
- 1 sc in next st
- 1 hdc in next st
- in next st work: (1 dc, ch 2 picot, 1 dc)
- 1 hdc in next st
- sl st into starting ch.
🧶 Fasten off, leaving a 6-inch tail for sewing onto the bell face.
🍒 7. Holly Berries (Make 3 per Bell)
Use Crimson Red yarn.
- Rnd 1: MR 4 sc.
- Rnd 2: Sl st to first sc, pull ring tight.
🧶 Fasten off, leaving a 4-inch tail. Pinch the tiny disc into a plump 3D sphere.
🛎️ 8. Jingle Bell Clapper
- Take a 10-inch length of cream yarn (or strong gold thread).
- Thread through the top loop of the gold jingle bell.
- Tie a firm double knot about 1.25 inches (3 cm) above the jingle bell loop. This knot will sit inside the top apex of the bell dome, allowing the jingle bell to hang down slightly below the bell rim.
🎨 L. STYLING / ASSEMBLY / STABILITY / FINAL SHAPING
           [ Jute Hanging Loop ]
                   ||
              ⭐️ [ STAR ]  (Double-layered with Embroidery)
                   ||
             🌀 [ SPIRAL ] (Twisted Icicle Stem)
                   ||
             📿 [ BEAD ]   (Gold Spacer Bead)
              🔔 [ BELL ]   (With Holly & Berries)
                   ||
           🛎️ [ JINGLE BELL ] (Suspended Clapper)
📍 Step-by-Step Assembly Sequence
- Attach Hanging Loop: Thread a 10-inch piece of jute twine through the top point of the star motif. Tie a knot at the ends to form a hanging loop.
- Mount Gold Bead & Top Bell Connection:
- Thread the bottom yarn tail of the Twisted Spiral Stem through a tapestry needle.
- Slide one gold spacer bead onto the yarn tail so it rests directly against the bottom of the spiral.
- Insert the needle down through the top center hole (MR) of the Cream Bell.
- Mount Jingle Bell Clapper:
- Pull the clapper thread up through the top center hole (MR) of the bell from the inside out.
- Securely tie the clapper thread together with the stem yarn tail inside the top crown of the bell. Apply a tiny dot of craft glue to lock the knot.
- Attach Holly & Berry Appliqué:
- Position two Green Holly Leaves in an inverted V-shape on the front face of the Cream Bell (Rnds 7–10).
- Pin in place and sew using the yarn tails and a tapestry needle.
- Cluster three Red Holly Berries at the top intersection where the two leaves meet. Sew securely.
- Final Shaping:
- Gentle pull and twist the spiral stem between your fingers to maximize its springy coil.
- Press the star edges flat and ensure the jingle bell hangs centered beneath the bell brim.
💡 M. HELPFUL CROCHET TIPS
- 💡 Tension Control: Maintain firm, even tension throughout the star and bell. Loose stitches will cause the star points to curl and the bell brim to lose its defined bell shape.
- 💡 Creating Perfect Spirals: If your spiral tail is not coiling tightly, make sure you are placing 3 full single crochets into every single chain space.
- 💡 Blocking Stars: If your star points turn inward, pin the stars onto a blocking board, mist lightly with water or starch spray, and let dry completely before assembly.
- 💡 Clean Color Changes: When changing colors on the star variants, pull the new color through the final loop of the preceding slip stitch for seamless joins.
- 💡 Neat Embroidery: Use a dedicated embroidery needle with a sharp point to split stitches cleanly when working the white snowflake details.
- 💡 Securing Jingle Bells: Double-knot all internal bell attachments and apply a tiny dab of clear fabric glue or hot glue to prevent thread slippage over time.
- 💡 Bead Sizing: Check that your gold spacer bead has an eye large enough to fit your yarn tapestry needle through twice.
- 💡 Batch Production: If making a set of three, crochet all 6 star faces first, complete all embroidery in one sitting, and then move on to bell construction.
🧼 N. CARE INSTRUCTIONS
- 🧼 Spot Cleaning: Spot clean gently with a damp cloth and cold water. Do not submerge or machine wash.
- 🧼 Reshaping: If stored flattened in seasonal storage, mist the star lightly with water, pin the star tips flat, reshape the bell dome over your thumb, and let air dry.
- 🧼 Hardware Preservation: Keep metal jingle bells and gold beads dry to prevent tarnishing or corrosion.
- 🧼 Storage: Store flat in a dry, cool box layered between tissue paper. Avoid heavy stacking on top of the bells.
❓ R. FAQ
❓ Can I use Worsted Weight (Category 4) yarn instead of DK yarn?
Yes! Using worsted weight yarn with a 3.5 mm (E/4) hook will produce a slightly larger ornament (approx. 12-13 inches long). Ensure your tension remains firm so the star points and bell rim keep their rigid structure.
❓ How do I get my star points to stay completely flat?
Working two identical star motifs and stitching them together creates a sturdy double layer that holds its shape naturally. If you prefer extra firmness, spray the finished star with fabric stiffener spray or diluted white glue before assembling the spiral stem.
❓ Do I need fiberfill stuffing for the bell?
No, the cream bell is designed to remain hollow so that the gold jingle bell clapper hangs freely inside and rings when shaken.
❓ Where can I find jingle bells and gold beads?
Small 15 mm–20 mm metallic jingle bells and gold spacer beads are widely available in the jewelry-making or seasonal crafting aisles of local craft supply stores.
❓ How long does it take to complete one ornament?
An experienced crocheter can complete one full ornament (star, embroidery, stem, bell, and holly details) in approximately 1.5 to 2 hours.
❓ Is this pattern safe for homes with young toddlers?
Because this ornament incorporates small metal beads and jingle bells, keep it hanging out of reach of young children and pets, or substitute the metal findings with embroidered or crocheted details for safety.