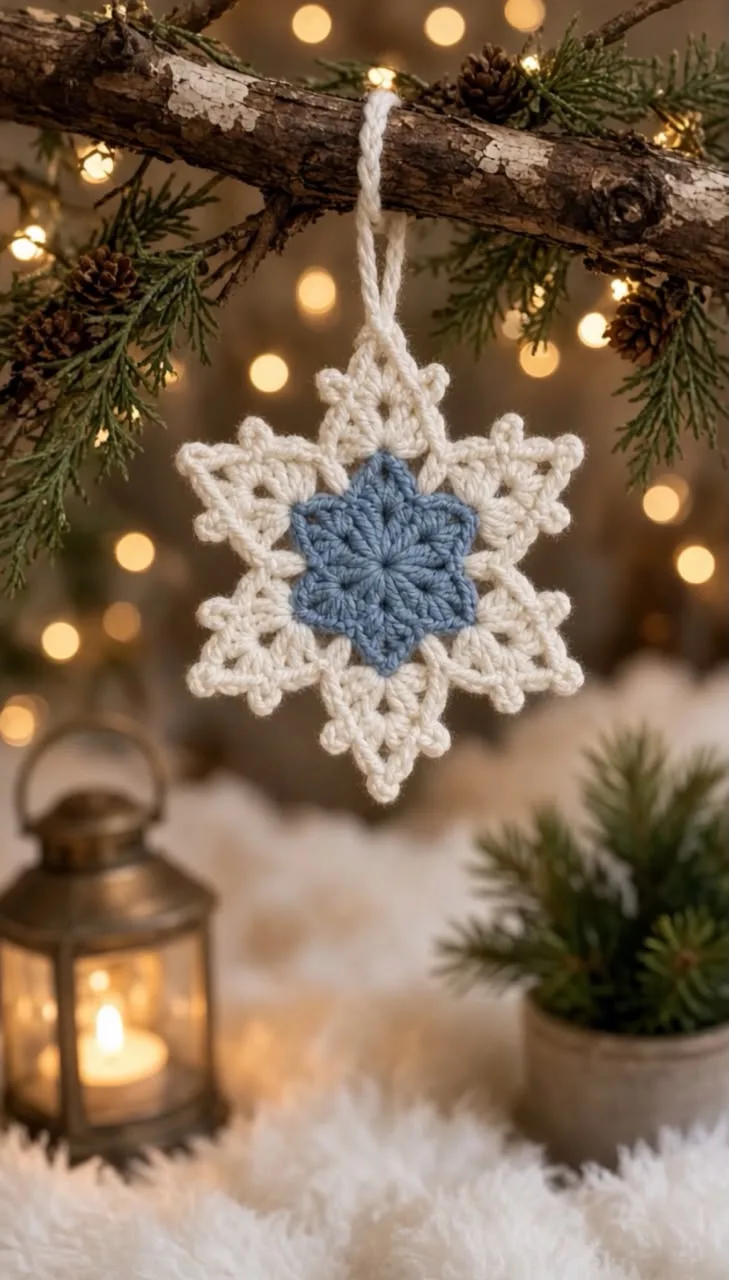
Free Holiday Decor & Advent Crochet Pattern
Free Holiday Decor & Advent Crochet Pattern
📖 INTRODUCTION
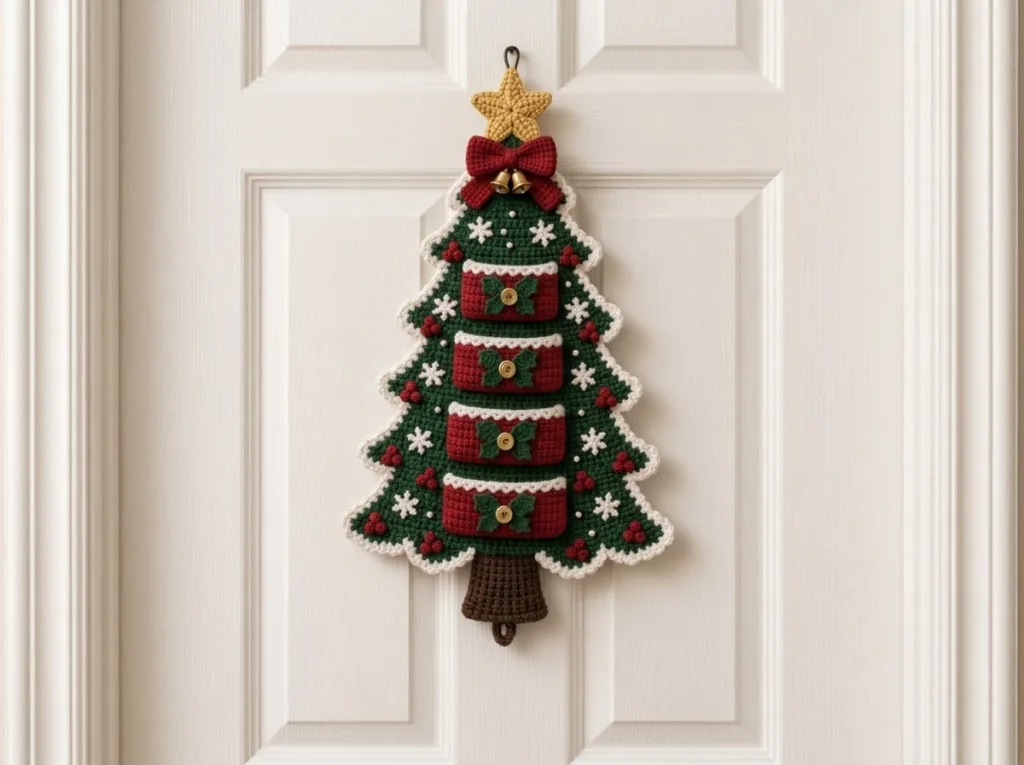
This stunning Pocket Christmas Tree Wall Hanging serves double duty as a gorgeous piece of holiday home decor and a functional advent calendar or treat holder. Featuring a tiered evergreen base adorned with a snowy scalloped border, 3D berry clusters, and pearl accents, this piece brings incredible texture to your seasonal display. Four beautifully decorated red pockets run down the center, perfectly sized for holding gift cards, daily advent notes, or small chocolate treats.
- Multi-Functional Decor: Use it as an advent calendar, a mail/card holder, or a striking door hanger.
- Textural Masterpiece: Combines flat tapestry shaping with 3D applique elements like the stuffed top star, a structured bow, and clustered berries.
- Heirloom Quality: Designed with dense single crochet and reinforced pockets to withstand years of holiday use.
🔠MAIN PATTERN OVERVIEW
- The Tree Base: Worked flat in rows from the top down. The signature evergreen shape is created by a series of increases, followed by long chains at the start of new tiers to create the sweeping branches.
- The Snowy Border: A continuous shell-stitch border worked entirely around the finished green tree and trunk.
- The Treat Pockets: Four separate red rectangles edged in white scallops, attached to the center of the bottom four tree tiers.
- The Appliques: Includes a double-thick stuffed gold star, a classic red bow, green holly leaves for the pockets, mini snowflakes, and tiny red berry clusters.
- The Hardware: Embellished with real gold buttons on the pockets, gold bells beneath the bow, and scattered pearl beads.
🎯 SKILL LEVEL
Intermediate Requires comfort with working flat shaping (increasing and chaining on edges), attaching appliques symmetrically, and maintaining consistent tension over a large piece.
- Working flat in rows with complex turning chains
- Crocheting around the raw edge of a large project
- Working in the round for 3D appliques (star, berries)
- Sewing and structural alignment
📠FINISHED SIZE
Measurements: Approximately 22 inches (56 cm) tall from the tip of the star to the base of the trunk, and 14 inches (35.5 cm) wide at the bottom branches. Sizing Variables: Hook size, yarn weight, and your natural tension will drastically alter the size of a wall hanging. Using a stiffer, thicker yarn (like a bulky acrylic) will yield a massive, rigid tree.
🧮 GAUGE
Gauge: 14 sts x 16 rows = 4 inches (10 cm) in single crochet. Gauge is not mathematically critical for the tree to fit correctly, but consistent, tight tension is vital. A tight fabric prevents the pockets from sagging when filled and keeps the tree from curling at the edges.
🧶 REQUIRED YARN AMOUNTS
| Yarn Color | Project Component | Estimated Yardage |
| Dark Green (MC) | Main tree base, holly leaves | ~ 200 yards (183 m) |
| Deep Red (CC1) | Pockets, bow, berry clusters | ~ 120 yards (110 m) |
| White (CC2) | Scalloped borders, snowflakes | ~ 75 yards (68 m) |
| Dark Brown (CC3) | Tree trunk | ~ 25 yards (23 m) |
| Gold/Mustard (CC4) | Top star | ~ 30 yards (27 m) |
Yarn used for this design is a sturdy worsted weight (Category 4) acrylic to ensure maximum structure and durability.
🧰 MATERIALS
- Hook: 4.5 mm (G+) for the tree body; 3.5 mm (E) for appliques
- Yarn: Worsted weight (Category 4) in Dark Green, Deep Red, White, Dark Brown, and Gold
- Buttons: 4 flat gold buttons (approx. 15mm)
- Bells: 2 small gold metal bells (approx. 12mm)
- Beads: 10-15 small white pearl beads or flatback pearls
- Support: Optional flat wooden dowel or stiff felt backing to prevent curling
- Stuffing: A tiny pinch of polyfill for the top star
- Tools: Tapestry needle, sewing needle, sewing thread (for beads), stitch markers, pins, scissors
🔤 ABBREVIATIONS – US TERMS
| Abbreviation | Definition |
| ch | Chain |
| st(s) | Stitch(es) |
| sl st | Slip Stitch |
| sc | Single Crochet |
| hdc | Half Double Crochet |
| dc | Double Crochet |
| inc | Increase (2 sc in one st) |
| dec | Decrease (sc 2 together) |
| picot | ch 2, sl st into the first ch |
| FO | Fasten Off |
📠NOTES BEFORE YOU BEGIN
- Turning Chains: The ch 1 at the end of flat rows does not count as a stitch.
- Tier Shaping: To create the stepped branches, you will be instructed to chain a specific number at the end of a row, turn, and work back across that chain to widen the panel instantly.
- Blocking is Mandatory: Crocheted flat shapes naturally curl. You must steam block or wet block the green tree body before attaching the pockets to ensure it hangs flat against your wall.
🪡 COMPLETE PATTERN
🌲 Main Tree Body Use Dark Green (MC) and the larger 4.5mm hook. Worked flat from the top down.
Tier 1: Row 1: ch 2, 3 sc in the 2nd ch from hook. (3) Row 2: ch 1, turn. inc, 1 sc, inc. (5) Row 3: ch 1, turn. sc across. (5) Row 4: ch 1, turn. inc, 3 sc, inc. (7) Row 5: ch 1, turn. sc across. (7) Row 6: ch 1, turn. inc, 5 sc, inc. (9) Row 7: ch 1, turn. sc across. (9) Row 8: ch 1, turn. inc, 7 sc, inc. (11) Row 9: ch 1, turn. sc across. (11)
Tier 2: Row 10: ch 1, turn. sc across. At the end of the row, ch 5. Row 11: turn. sc in 2nd ch from hook and next 3 chs. sc across the 11 sts of the tree. At the end of the row, use a separate strand of green yarn to join to the base of the last st, ch 4, FO. Pick up your working loop, and sc across the newly added 4 chains. (19 sts total) Row 12: ch 1, turn. inc, 17 sc, inc. (21) Row 13: ch 1, turn. sc across. (21) Row 14: ch 1, turn. inc, 19 sc, inc. (23) Row 15: ch 1, turn. sc across. (23) Row 16: ch 1, turn. inc, 21 sc, inc. (25) Row 17: ch 1, turn. sc across. (25)
Tier 3: Row 18: ch 1, turn. sc across. At the end, ch 6. Row 19: turn. sc in 2nd ch from hook and next 4 chs. sc across the 25 sts. Join separate yarn to end, ch 5, FO. sc across the newly added 5 chains. (35 sts total) Row 20: ch 1, turn. inc, 33 sc, inc. (37) Row 21: ch 1, turn. sc across. (37) Row 22: ch 1, turn. inc, 35 sc, inc. (39) Row 23: ch 1, turn. sc across. (39) Row 24: ch 1, turn. inc, 37 sc, inc. (41) Row 25: ch 1, turn. sc across. (41)
Tier 4: Row 26: ch 1, turn. sc across. At the end, ch 7. Row 27: turn. sc in 2nd ch from hook and next 5 chs. sc across the 41 sts. Join separate yarn to end, ch 6, FO. sc across the 6 chains. (53 sts total) Row 28-33: Repeat the increase sequence (inc on even rows, sc across on odd rows). Ends with 59 sts.
Tier 5: Row 34: ch 1, turn. sc across. At the end, ch 7. Row 35: turn. sc 6 on ch, sc 59, add ch 6 with separate yarn, sc 6 on new ch. (71 sts total) Row 36-41: Repeat increase sequence. Ends with 77 sts. FO, weave in ends. Block the piece flat.
🪵 Tree Trunk Use Dark Brown (CC3). Row 1: Count 31 sts in from the bottom right edge of the tree. Attach Brown. sc in the next 15 sts. (15) Row 2-8: ch 1, turn. sc across. (15) Row 9: ch 1, turn. dec, 11 sc, dec. (13) Row 10: ch 1, turn. sc across. (13) FO, weave in ends.
â˜ï¸ Scalloped Snowy Border Use White (CC2). Work around the entire perimeter of the tree and trunk. R1: Join White at the bottom right corner of the trunk. ch 1. sc evenly around the entire piece, placing 3 sc in every outward point (corners of the branches) and skipping a stitch in the inner “armpits” of the branches to maintain sharp angles. Join with sl st to first sc. R2: ch 1. sc in next st, skip 1 st, 5 dc in next st, skip 1 st. Repeat from * to * all the way around the tree. Adjust skips slightly at the branch tips to ensure a 5-dc shell lands directly on the points. FO, weave in ends.
â 3D Gold Star (Make 2) Use Gold (CC4) and 3.5mm hook. R1: MR 10 sc. sl st to first sc. (10) R2: ch 5. sl st in 2nd ch from hook, sc in next, hdc in next, dc in last ch. skip 1 st on the center ring, sl st into the next st. Repeat from * to * 4 more times to create 5 points. FO first star. Do not FO second star. Place both stars wrong-sides together, sc around the edges through both layers to join them, stuffing lightly before closing the final point.
🎀 Red Bow Use Deep Red (CC1). Main Bow: ch 30. Join to form a loop. sc in each ch around (30). Work 6 continuous rounds of sc. FO. Flatten the tube so the seam is in the back middle. Bow Center: ch 10, sc 9 across for 3 rows. FO, leaving a long tail. Wrap this center strip around the middle of the main flattened tube, cinching it tightly to form the bow shape. Sew closed at the back.
🧧 Treat Pockets (Make 4) Use Deep Red (CC1). Worked flat. Row 1: ch 21. sc in 2nd ch from hook and each across. (20) Row 2-12: ch 1, turn. sc across. (20) Change to White (CC2) for the top border. Row 13: ch 1, turn. sc, skip 1, 4 dc in next, skip 1. Repeat across to make a scalloped top edge. FO, leaving a very long red tail (from the red section) for sewing the sides and bottom to the tree.
🃠Holly Leaves for Pockets (Make 8) Use Dark Green (MC). Row 1: ch 7. sl st in 2nd ch from hook, sc, hdc, dc, hdc, sc. Row 2: rotate to work up the opposite side of the ch: sc, hdc, dc, picot, dc, hdc, sl st. FO, leaving a tail for sewing.
💠Berry Clusters (Make 12) Use Deep Red (CC1). For each individual berry: MR 4 sc. sl st to first sc, FO. Group them in sets of 3, sewing them tightly together to form 12 distinct little clusters.
â„ï¸ Mini Snowflakes (Make 8-10) Use White (CC2). R1: MR, sc 1, ch 3, sl st in 2nd ch from hook, ch 1. Repeat from * 5 more times. Pull MR tight. FO, tie ends securely at the back.
🎨 STYLING / ASSEMBLY / STABILITY / FINAL SHAPING
1. Stabilizing the Tree (Optional but Recommended) Because pockets will hold weight, cut a piece of stiff craft felt or plastic canvas matching the shape of the green tree (excluding the white border). Sew this backing to the wrong side of the tree using invisible stitches.
2. Attaching the Pockets Pin the four red pockets to the exact center of Tiers 2, 3, 4, and 5. Ensure they are perfectly aligned vertically. Using the long red yarn tails, whipstitch down the left side, across the bottom, and up the right side of each pocket. Leave the white scalloped top open!
3. Pocket Details Sew two green holly leaves to the center of each red pocket, angling them outward. Sew one gold button over the center point where the leaves meet.
4. Tree Topper and Bow Sew the stuffed 3D gold star securely to the top point of Tier 1. Sew the large red bow directly below the star. Attach the two small metal bells to the bottom center of the red bow using a needle and thread.
5. Applying Embellishments
- Berries: Sew the 12 red berry clusters to the outermost points (the “tips” of the branches) on the tree.
- Snowflakes: Sew or hot glue the mini white snowflakes randomly onto the green space of the tree.
- Pearls: Using a sewing needle and white thread, stitch small pearl beads randomly among the snowflakes for extra texture.
6. Hanging Loop Attach a 4-inch loop of green yarn or gold cord firmly to the back of the gold star to hang the tree.
✅ Final Finishing Checklist
- ✅ Tree lays completely flat against the wall.
- ✅ All four pockets are securely sewn on three sides and can hold items without tearing.
- ✅ Pocket buttons and holly are perfectly centered.
- ✅ Pearls and bells are securely knotted so they do not pose a falling hazard.
💡 HELPFUL CROCHET TIPS
- 💡 Steam Blocking is Magic: Acrylic yarn responds beautifully to steam. Pin your tree out on a blocking mat, hold a steam iron 2 inches above the fabric (do NOT touch the yarn), and let it cool. It will permanently relax the edges and fix any curling.
- 💡 Pocket Placement: Before sewing, use a ruler to measure the distance from the edge of the tree to the edge of the pocket on both sides. Symmetrical pockets make or break the professional look of this piece.
- 💡 Alternative Hanging Method: Instead of a loop at the top, you can sew a small fabric sleeve onto the top back of the tree and insert a wooden dowel. Tie a ribbon to both ends of the dowel for a perfectly straight hang.
- 💡 Invisible Sewing: When sewing the appliques onto the tree, only pick up the top loops of the green tree fabric. This prevents your colored sewing stitches from showing on the back of the piece.
🧼 CARE INSTRUCTIONS
Due to the mixed materials (metal bells, beads, buttons), this wall hanging cannot be machine washed. Spot clean only with a damp cloth and mild detergent. Store it lying flat in a tissue-lined box during the off-season. Do not fold or crush it, as the pockets may become permanently creased.
â“ FAQ
â“ Can I make this tree bigger? Yes! To make a wider, taller tree, simply continue adding tiers. Add a “Tier 6” by chaining 8 at the beginning of the rows and working an extra 8 rows of increases. Keep adding tiers until it reaches your desired size.
â“ How can I turn this into an advent calendar? Instead of four pockets, make 24 miniature pockets (ch 8, sc 7 for 4 rows) and sew them across the various tiers of the tree. Embroider the numbers 1-24 on them using white thread.
â“ The edges of my tree are curling inward. What did I do wrong? This is a natural trait of dense single crochet worked flat. Your tension might be slightly tight, but steam blocking (or wet blocking if using cotton) will completely resolve this issue.