Free Holiday Crochet Pattern & Amigurumi Guide
📖 INTRODUCTION
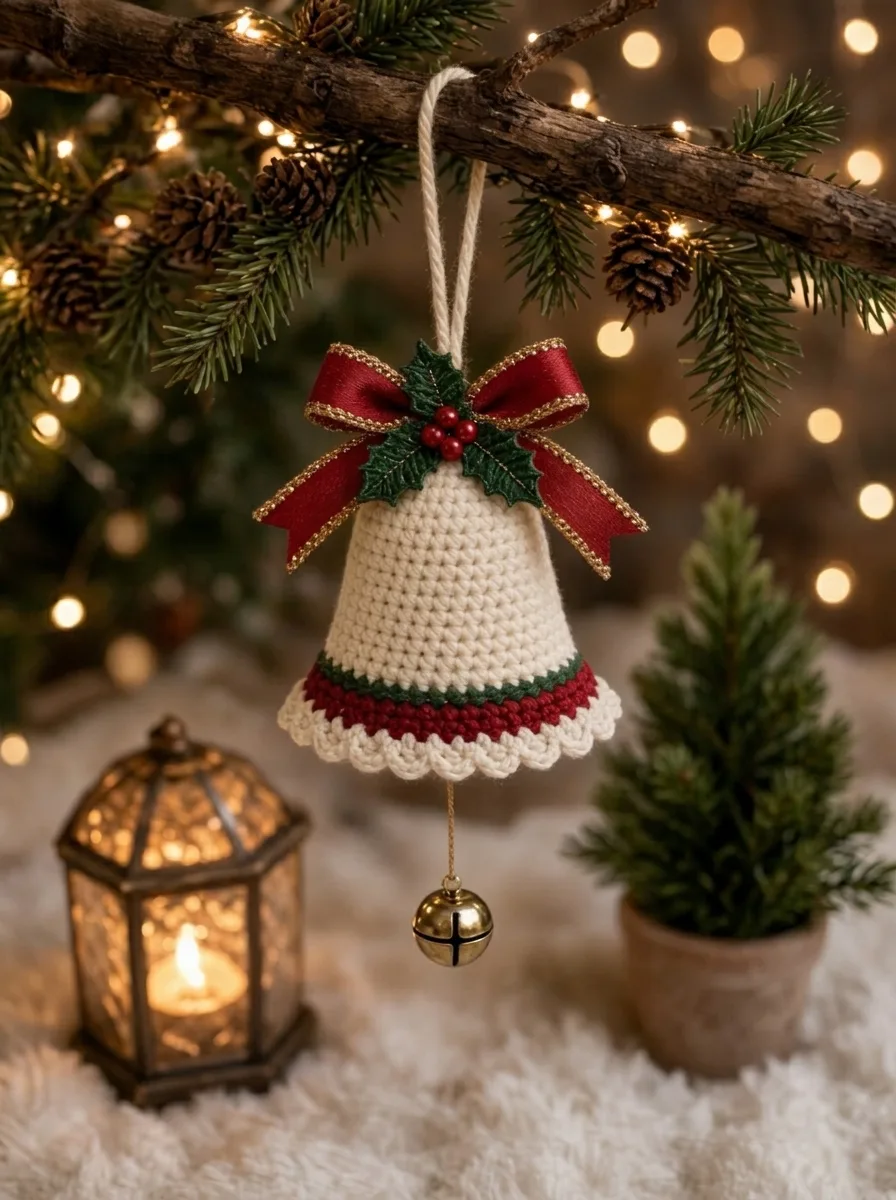
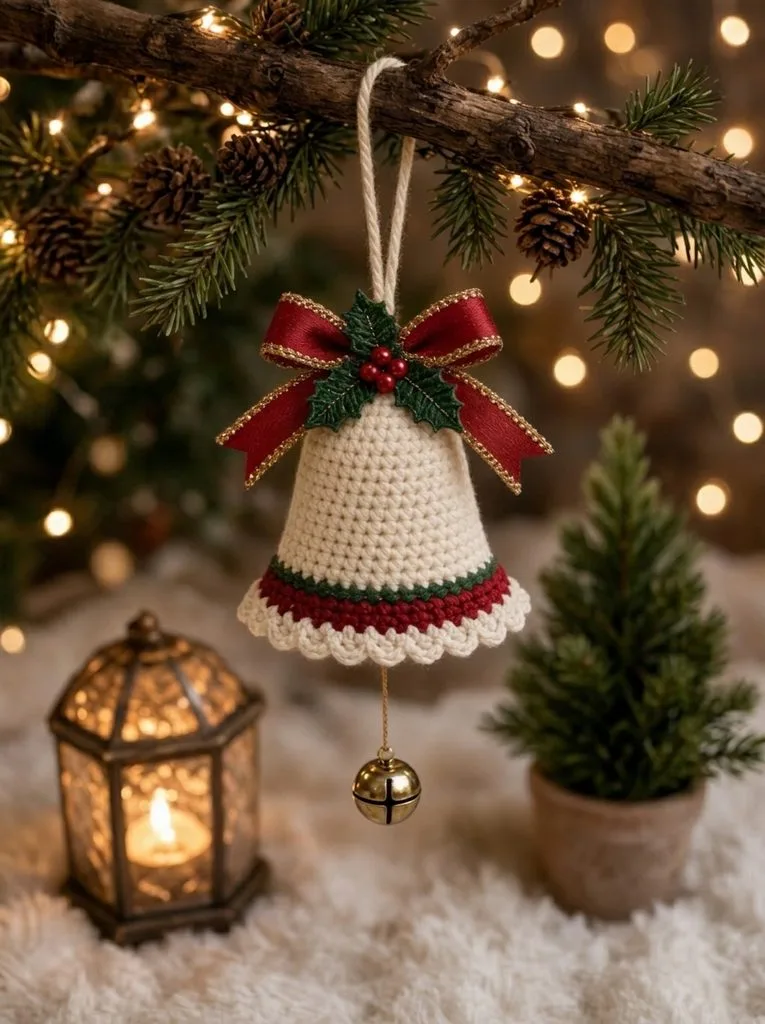
This classic crocheted bell ornament features a tapered cream silhouette, festive color-blocked striping, and a delicate scalloped edge. Designed for holiday trees, mantle garlands, or elegant gift toppers, it combines simple continuous rounds with mixed-media finishing details like a fabric ribbon and a functional jingle bell.
- Customizable: Swap the traditional red and green for ice blue and silver, or match your specific holiday decor.
- Quick Make: Works up in under two hours, making it an ideal last-minute gift or craft fair best-seller.
- Heirloom Quality: The dense single crochet fabric holds its shape beautifully year after year.
🔍 MAIN PATTERN OVERVIEW
- The Bell Body: Crocheted top-down in a continuous spiral, starting with a magic ring and gradually increasing to create the iconic flared shape.
- The Striped Brim: Features crisp color changes to dark green and deep red to anchor the design.
- The Scalloped Edge: A simple shell stitch border worked in the main cream color adds a delicate, snowy finish.
- The Embellishments: Finished with a tied fabric ribbon, crocheted (or craft) holly leaves, berry beads, and a real internal jingle bell.
🎯 SKILL LEVEL
Easy / Advanced Beginner
Requires comfort with crocheting in the round, basic increases, simple color changes, and sewing on attachments.
- Magic Ring (MR)
- Single crochet (sc) increases
- Double crochet (dc) for the scalloped border
- Working over yarn tails during color changes
📏 FINISHED SIZE
Measurements: 4.5 inches (11.4 cm) tall x 3.5 inches (8.9 cm) wide at the base.
Variations: Sizing will scale up or down depending on your yarn weight and hook size. Using a thicker blanket yarn will result in a large statement piece; using fingering weight will yield a miniature ornament.
🧮 GAUGE
Gauge: 5 sts x 6 rounds = 1 inch (2.5 cm) in single crochet.
Consistent, tight tension is required so the bell holds its structural shape without needing a stiffening agent. If your stitches have visible gaps, size down your hook.
🧶 REQUIRED YARN AMOUNTS
| Yarn Color | Purpose | Estimated Yardage |
| Cream (MC) | Main bell body & scallop edge | ~ 45 yards (41 m) |
| Dark Green (CC1) | Stripe & crochet leaves | ~ 10 yards (9 m) |
| Dark Red (CC2) | Bottom stripe | ~ 12 yards (11 m) |
Yarn used for this design is a standard worsted weight (Category 4) acrylic/cotton blend.
🧰 MATERIALS
- Hook: 3.5 mm (E) crochet hook
- Yarn: Worsted weight (Category 4) in Cream, Dark Green, and Dark Red
- Ribbon: 5/8-inch wide red satin ribbon with gold trim
- Berries: 3 small red beads (approx. 6mm)
- Bell: 1 medium metal jingle bell (approx. 1 inch/25mm)
- Hanger: Gold embroidery thread or rustic twine for the hanging loop and clapper
- Tools: Tapestry needle, scissors, stitch markers, hot glue gun (optional, for bow placement)
🔤 ABBREVIATIONS – US TERMS
| Abbreviation | Definition |
| MR | Magic Ring |
| ch | Chain |
| st(s) | Stitch(es) |
| sl st | Slip Stitch |
| sc | Single Crochet |
| dc | Double Crochet |
| inc | Increase (2 sc in one st) |
| FO | Fasten Off |
📝 NOTES BEFORE YOU BEGIN
- Continuous Rounds: The main body of the bell is worked in a continuous spiral. Do not join with a slip stitch or chain 1 at the end of rounds unless explicitly instructed.
- Stitch Marker: Place a stitch marker in the first stitch of every round to keep track of your count.
- Color Changes: To achieve clean stripes, perform the color change on the last pull-through of the stitch prior to the new color.
- Stiffening: The tight gauge usually provides enough structure. If you want a rigidly hard bell, you can brush the inside with a mixture of equal parts PVA glue and water after crocheting, letting it dry over a cone mold.
🪡 COMPLETE PATTERN
🔔 The Bell Body
Use Cream (MC). Work in continuous rounds.
R1: MR 6 sc. (6)
R2: inc x 6. (12)
R3: (1 sc, inc) x 6. (18)
R4-R8: sc around. (18)
R9: (2 sc, inc) x 6. (24)
R10-R14: sc around. (24)
R15: (3 sc, inc) x 6. (30)
R16-R20: sc around. (30)
R21: (4 sc, inc) x 6. (36)
R22-R25: sc around. (36)
R26: (5 sc, inc) x 6. (42)
R27: sc around. (42)
Drop MC, change to Dark Green (CC1).
R28: sc around. (42)
Drop CC1, change to Dark Red (CC2).
R29: (6 sc, inc) x 6. (48)
R30: sc around. (48)
Drop CC2, change back to Cream (MC).
🌊 The Scalloped Edge
Continue with Cream (MC). Work in joined rounds for the border.
R31: sl st into the first st of R30 to level the round. ch 1. sc in current st, skip 1 st, 5 dc in next st, skip 1 st. Repeat from * to * around. Join with a sl st to the first sc. (12 scallops)
FO and weave in all ends neatly on the inside of the bell.
🍃 Holly Leaves (Make 2)
Use Dark Green (CC1).
Row 1: ch 6.
Row 2: Working in the back bumps of the chain: sl st in 2nd ch from hook, sc in next, hdc in next, sc in next, sl st in last.
Row 3: ch 1, rotate to work up the opposite side of the chain: sl st, sc, hdc, sc, sl st.
FO, leaving a long tail for sewing.
🎨 STYLING / ASSEMBLY / STABILITY / FINAL SHAPING
1. Attaching the Hanger and Jingle Bell
Cut a 12-inch length of gold thread or twine. Thread it through the top loop of the metal jingle bell, positioning the bell exactly in the center of the thread. Tie a knot about 3 inches above the bell (this dictates how low the bell hangs inside). Thread both tails onto a tapestry needle, push the needle up through the absolute center hole (MR) of the crocheted bell, pull through, and tie a hanging loop at the top.
2. Assembling the Greenery
Sew or hot glue the two small crocheted holly leaves to the top front of the bell, positioning them at a slight angle. Sew or glue the three red berry beads directly to the center of the leaves.
3. The Ribbon Bow
Tie your fabric ribbon into a neat, symmetrical bow. Trim the tails at a 45-degree angle or in a V-notch to prevent fraying (you can lightly run a lighter over the cut satin edges to seal them). Attach the bow just above or slightly behind the holly leaves using hot glue or a few securing stitches.
✅ Final Finishing Checklist
- ✅ Jingle bell hangs freely inside without extending past the scalloped edge.
- ✅ Color change jogs are positioned at the back of the ornament.
- ✅ Hanging loop is secure and centered.
- ✅ Scallops lay flat (gently block or steam them if they curl).
💡 HELPFUL CROCHET TIPS
- 💡 Invisible Color Changes: For a flawless look on the striped brim, try using the invisible join method when finishing the green and red rounds rather than working a continuous spiral.
- 💡 Hide the Seam: Always designate the side where your color changes happen as the “back” of the bell. Mount your bow and holly on the exact opposite side.
- 💡 Customizing the Flare: If you want a wider bell, add one more increase round (7 sc, inc) before starting the green stripe.
- 💡 Safety First: If making this for a home with toddlers or pets, double-knot all interior strings and consider sewing the bow securely instead of gluing it.
- 💡 Stiffening Hack: A quick mist of heavy spray starch on the inside of the bell helps it retain that perfect flared cone shape.
🧼 CARE INSTRUCTIONS
Store in a rigid box during the off-season to prevent crushing. If the bell gets dusty, gently spot clean with a damp cloth and mild detergent. Do not machine wash or submerge in water, as the metal jingle bell may rust and the fabric ribbon may lose its crisp shape.
❓ FAQ
❓ Can I use cotton yarn instead of acrylic?
Absolutely. Mercerized cotton actually yields brilliant stitch definition and natural stiffness, making it a fantastic choice for structured ornaments like this one.
❓ The top of my bell looks too flat. What happened?
You may have increased too rapidly or your tension is too loose. Ensure you are working tight stitches and following the exact (sc, inc) ratios in rounds 1-5.
❓ Can I add a face to make it an amigurumi character?
Yes! You can insert 8mm safety eyes between rounds 12 and 13 (spaced 5 stitches apart) and embroider a tiny smile before closing the top or finishing the piece.
❓ What size ribbon is best for this?
A 5/8-inch or 1/2-inch wide ribbon looks best proportional to a 4.5-inch bell. Wire-edged ribbon is even better as you can sculpt the bow loops perfectly.