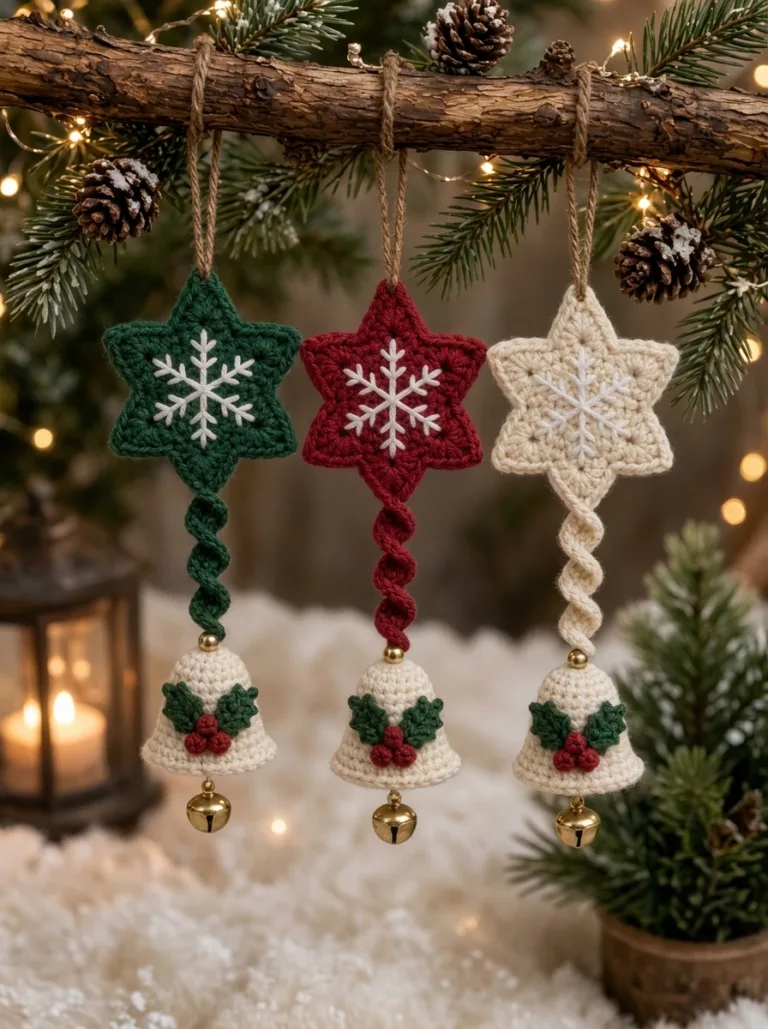
Bow & Bells Trio Ornament — Cream, Burgundy & Forest Green 🎄🔔
🧸 A. TITLE + category/tag line
Bow & Bells Trio Ornament — Cream, Burgundy & Forest Green Free Rustic Crochet Christmas Ornament Pattern
📖 B. INTRODUCTION
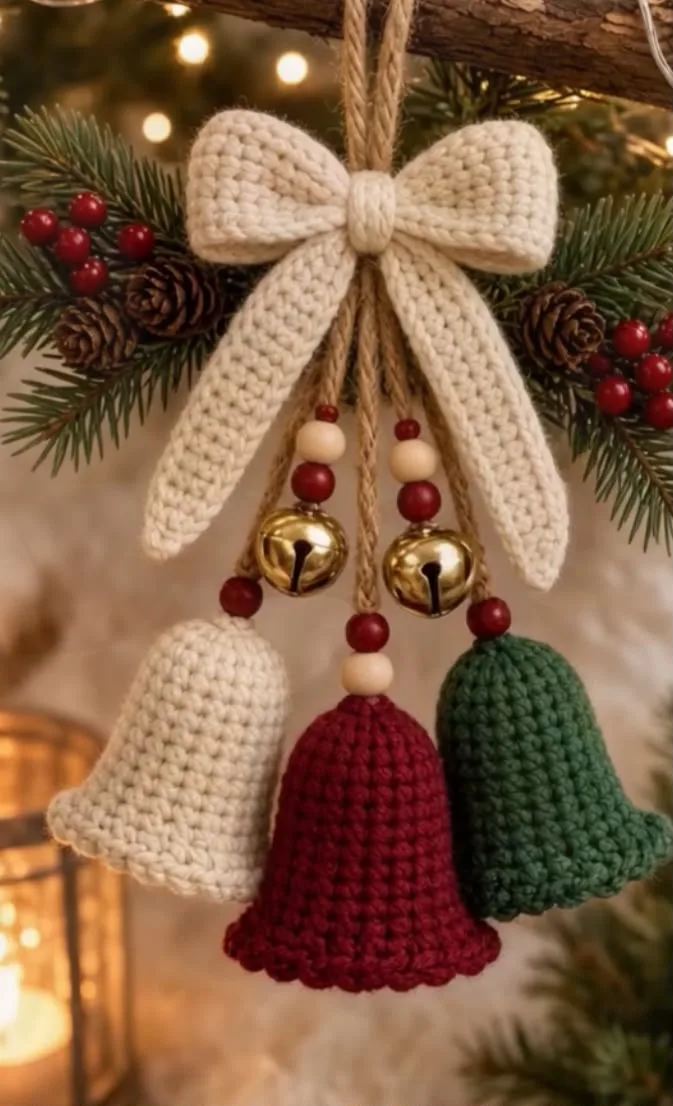
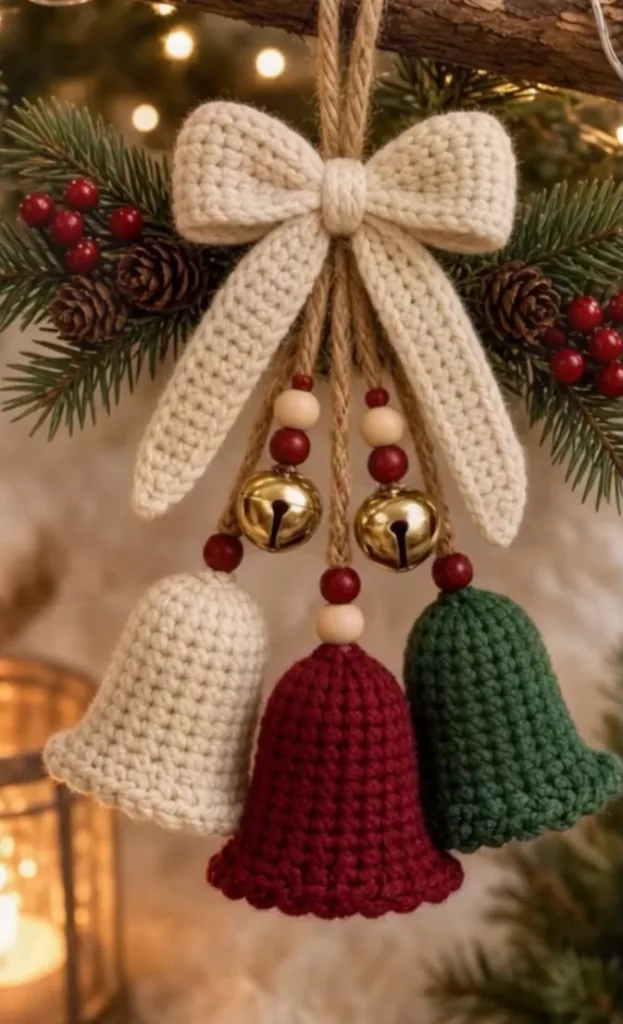
This charming Bow & Bells Trio Ornament brings a nostalgic, rustic touch to your holiday decorating. Featuring three gently flared crocheted bells in classic winter hues suspended from natural jute twine, this design perfectly balances soft yarn textures with the crisp ring of real metal jingle bells and wooden bead accents. The arrangement is crowned with a structured, timeless crocheted bow that ties the woodland aesthetic together.
Crocheting this ornament offers a wonderful opportunity to mix media, combining your yarn stash with natural crafting elements. It works beautifully as a statement tree ornament, a decorative accent for holiday wreaths, or a stunning topper for special gift wrapping.
🔠C. MAIN PATTERN OVERVIEW
- Crocheted Bells: Three separate bell shapes (one cream, one burgundy, one forest green) featuring a magic ring top and a gently flared rim finished with a neat, textured edge.
- Crocheted Bow: A three-part cream bow assembly consisting of a main looped body, two tapered tails, and a center knot wrap.
- Suspension & Accents: Jute twine serves as the structural hanger, threaded with natural and dark red wooden beads, alongside two metallic gold jingle bells to complete the cluster.
🎯 D. SKILL LEVEL
Easy
- Working in the round (continuous spirals)
- Working in flat rows
- Increasing and decreasing
- Basic assembly and threading
📠E. FINISHED SIZE
| Component | Measurement |
| Individual Bell (Height) | 2.5 inches (6.5 cm) |
| Bow (Width) | 4 inches (10 cm) |
| Total Ornament Length | 9 inches (23 cm) excluding hanger |
Size will vary slightly based on yarn weight, tension, and the length of twine you choose during assembly.
🧮 F. GAUGE
5 sc sts and 5 rows = 1 inch (2.5 cm) Tight, consistent stitches are highly recommended so the bells hold their structural shape without needing fabric stiffener.
🧶 G. REQUIRED YARN AMOUNTS
| Color | Function | Est. Yardage |
| Cream (Color A) | Bow & One Bell | ~35 yards |
| Burgundy (Color B) | One Bell | ~15 yards |
| Forest Green (Color C) | One Bell | ~15 yards |
Estimates based on medium (#4) worsted weight cotton or sturdy acrylic yarn.
🧰 H. MATERIALS
- Yarn: Medium (#4) worsted weight yarn in Cream, Burgundy, and Forest Green.
- Hook: 3.5mm (US E/4) crochet hook.
- Twine: Natural jute twine (approx. 3 yards for assembly).
- Beads: 6 natural wood beads (8-10mm) and 6 dark red wood beads (8-10mm).
- Bells: 2 metal gold jingle bells (approx. 1-inch diameter).
- Tools: Large-eye tapestry needle (large enough for twine), scissors, stitch markers.
🔤 I. ABBREVIATIONS – US TERMS
- MR: Magic Ring
- ch: chain
- sl st: slip stitch
- sc: single crochet
- inc: single crochet increase (2 sc in one st)
- dec: single crochet decrease (sc2tog)
- st(s): stitch(es)
- BLO: back loop only
📠J. NOTES BEFORE YOU BEGIN
- 🧵 Continuous Rounds: The bells are worked in continuous spirals. Do not join with a slip stitch or chain 1 at the end of rounds. Use a stitch marker to track the first stitch of each round.
- âš ï¸ Bow Tails: The tails are worked in flat rows, turning at the end of each row.
- ✅ Tension: Keep tension firm on the bells so they flare nicely without flopping.
🪡 K. COMPLETE PATTERN
🔔 Crocheted Bells (Make 3: 1 Cream, 1 Burgundy, 1 Green)
R1: MR, 6 sc into the ring. (6) R2: inc in each st around. (12) R3: (1 sc, inc) 6 times. (18) R4-9: sc in each st around. (18) (6 rounds total) R10: (2 sc, inc) 6 times. (24) R11: (3 sc, inc) 6 times. (30) R12: sc in each st around. (30) R13: Working in BLO, sl st loosely in each st around to create a clean, finished lip. (30) Fasten off and weave in all yarn ends. The magic ring hole at the top should be pulled snug, but leave just enough space for a needle carrying twine to pass through during assembly.
🎀 Main Bow Loop (Color A: Cream)
Row 1: ch 11, sc in 2nd ch from hook and each ch across. Turn. (10) Row 2-36: ch 1, sc in each st across. Turn. (10) Fasten off, leaving a long 8-inch tail. Fold the long rectangle in half so the short ends meet. Whipstitch the short ends together to form a continuous loop. Weave in ends.
ðŸŽ—ï¸ Bow Tails (Color A: Cream — Make 2)
Row 1: ch 3, sc in 2nd ch from hook and next ch. Turn. (2) Row 2: ch 1, inc, sc in next st. Turn. (3) Row 3: ch 1, sc in each st across. Turn. (3) Row 4: ch 1, inc, sc in next 2 sts. Turn. (4) Row 5-26: ch 1, sc in each st across. Turn. (4) Fasten off, leaving a short tail to weave in.
🧵 Bow Center Wrap (Color A: Cream)
Row 1: ch 13, sc in 2nd ch from hook and each ch across. Turn. (12) Row 2-3: ch 1, sc in each st across. Turn. (12) Fasten off, leaving a long 10-inch tail for assembly. Do not fold or sew yet.
🎨 L. STYLING / ASSEMBLY / STABILITY / FINAL SHAPING
1. Preparing the Hanging Cords Cut five lengths of jute twine, each roughly 18 inches long. Tie all five strands together with a sturdy overhand knot about 6 inches from the top. The top loops will form your main hanger.
2. Assembling the Crocheted Bells
- Thread one strand of the lower twine through your large-eye needle.
- String one natural wood bead, then one red wood bead onto the twine.
- Pass the needle down through the top MR hole of the Burgundy bell.
- Tie a bulky knot (or multiple knots) inside the bell, large enough that it cannot slip back through the MR hole. Trim the excess twine inside the bell.
- Repeat this process for the Cream and Forest Green bells on two other strands of twine, varying the twine lengths slightly so the bells hang at slightly staggered heights.
3. Assembling the Metal Bells
- On the remaining two twine strands, thread one natural wood bead and one red wood bead.
- Tie the metal jingle bells to the ends of these strands. Adjust the knots so the metal bells sit slightly higher than the crocheted bells, nestled between them.
4. Assembling the Bow
- Lay the two Bow Tails flat, crossing them slightly at their wide ends (Row 26).
- Pinch the Main Bow Loop exactly in the center to create the bow creases. Place this pinched center over the crossed tails.
- Wrap the Bow Center Wrap tightly around the pinched center of the loops and the top of the tails. Using the long yarn tail, stitch the center wrap securely closed at the back, anchoring it through the tails and loops so everything stays firmly in place.
5. Final Attachment
- Place the assembled bow over the large main knot in your jute twine hanger.
- Using a yarn needle and cream yarn, sew the back of the bow securely to the twine knot, ensuring it doesn’t slip down the cords.
- ✅ Alignment: Ensure the two metal bells are visible between the three yarn bells.
- ✅ Silhouette: Gently shape the crocheted bell skirts with your fingers so they flare evenly.
💡 M. HELPFUL CROCHET TIPS
- 💡 When threading the twine through the crocheted bells, if your MR hole is too tight, use your crochet hook to gently widen the center stitch.
- 💡 Adjust the twine lengths before making your final knots inside the bells. Tape the whole assembly to a wall or table temporarily to step back and check the balance.
- 💡 If your bow loop feels too floppy, slide a small piece of folded felt inside the loops before wrapping the center to give it permanent volume.
- 💡 A drop of hot glue inside the top of the crocheted bell (on the twine knot) can add extra security and prevent the beads from sliding around.
- 💡 Working the final bell round (R13) in BLO slip stitches creates a subtle, neat ridge that mimics the rolled edge of a real metal bell.
🧼 N. CARE INSTRUCTIONS
- Store flat in a dry box. Do not crush the bows beneath heavier ornaments.
- Spot clean the yarn gently with a damp cloth if necessary.
- Do not submerge the ornament in water, as the metal bells may rust and the wooden beads may swell or bleed color.
â“ R. FAQ
â“ Can I use a different yarn weight? Yes. If you use a bulky yarn, your bells and bow will be significantly larger, making this a great wall hanging or door decoration rather than a standard tree ornament.
â“ My bell edges are curling inward. How do I fix this? If R13 is pulling too tight, your slip stitches are too firm. Try re-doing R13 with a hook one size larger (e.g., 4.0mm) to ensure the lip stays flat and flared.
â“ Do I need to stuff the bells? No stuffing is required! The stiff tension of the worsted weight yarn keeps them hollow and perfectly shaped.
Share the love! If you whip up this rustic Bow & Bells Trio, I would love to see it! Share your finished photos on social media and tag me so I can admire your beautiful holiday makes.
Categories: Christmas Ornaments, Home Decor, Quick Projects, Scrap Yarn Ideas Tags: #CrochetOrnament, #RusticChristmas, #CrochetBells, #AmigurumiPattern, #HolidayCrafts, #DIYChristmas
Leave a Comment: What colors are you planning to use for your bell trio? Will you stick to classic holiday colors or try something modern and bright? Let me know below!
You might also like:
- Crochet Pinecone & Holly Berry Garland
- Rustic Farmhouse Crochet Stocking Pattern
- Miniature Amigurumi Reindeer Ornament
- Classic Plaid Crochet Tree Skirt