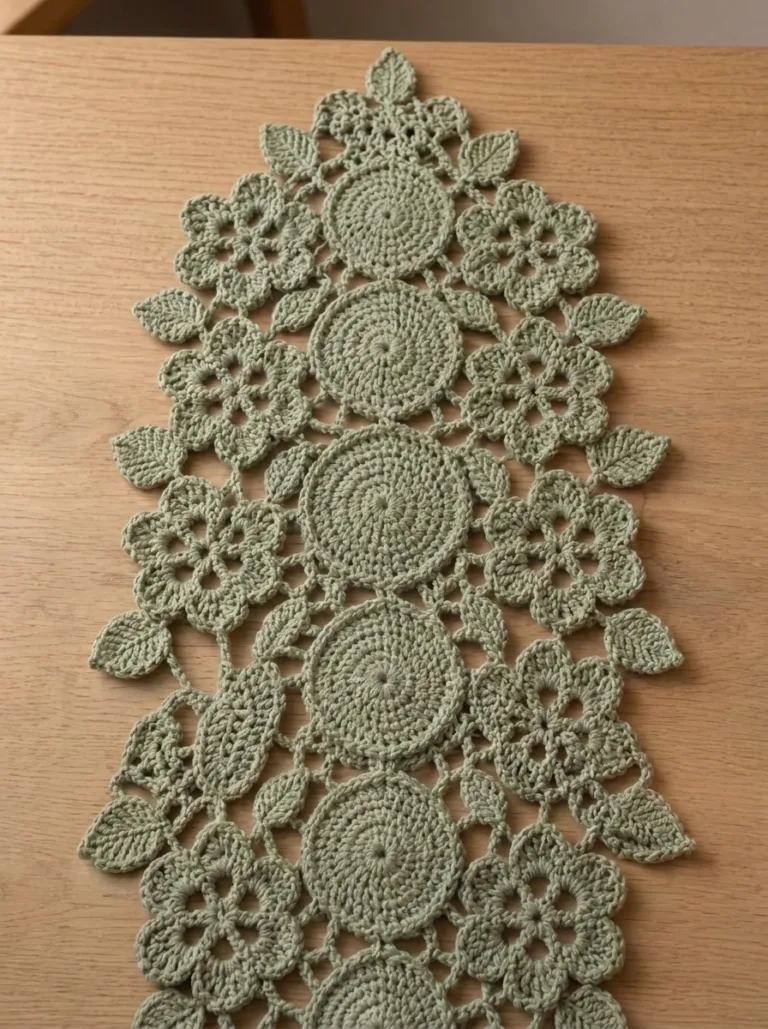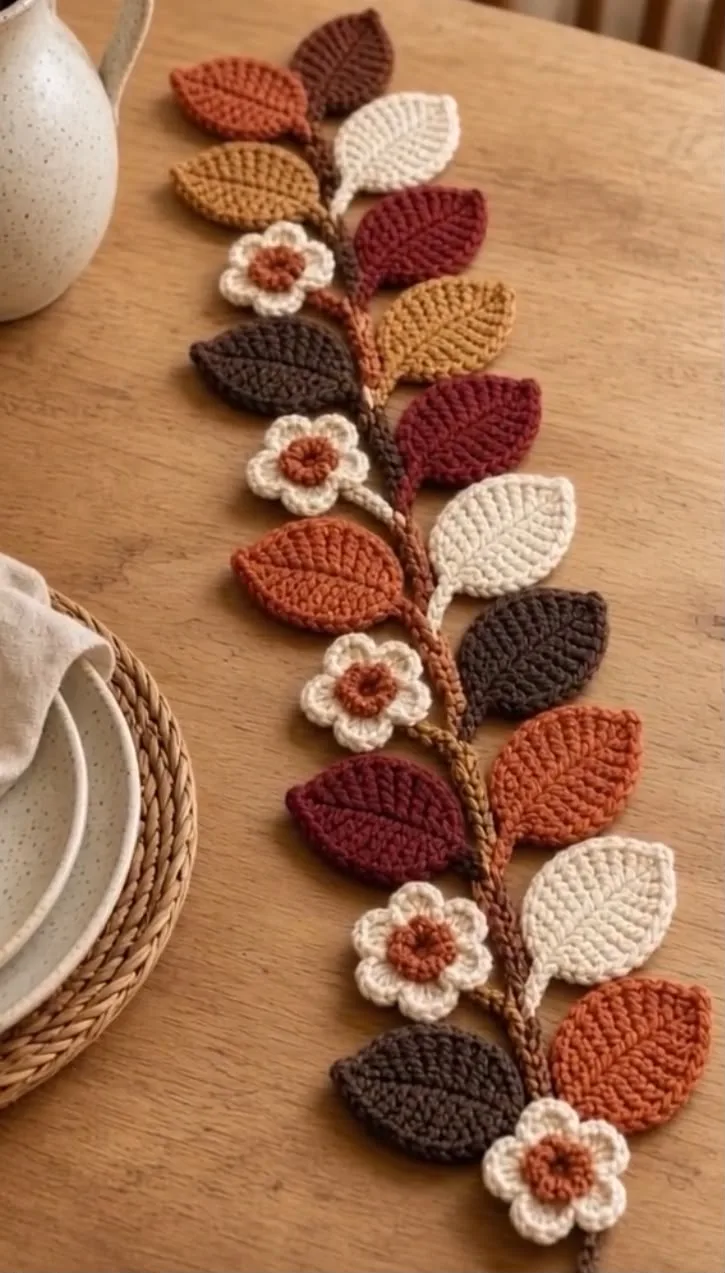
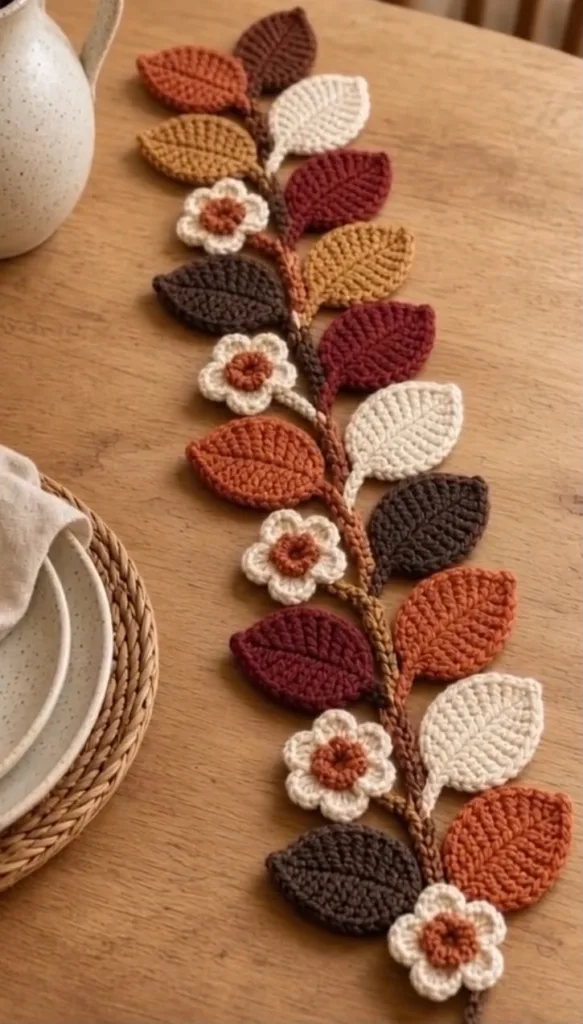
Oval leaf & flower table runner🍂
🧸 A. TITLE + category/tag line
Oval Leaf & Flower Table Runner 🂠Free Crochet Home Decor & Tablescape Pattern
📖 B. INTRODUCTION
The Oval Leaf & Flower Table Runner is a stunning seasonal centerpiece that brings the warmth of autumn directly to your dining room. Featuring a central column of striking mustard and rust floral motifs, the design radiates outward into a textured olive green leafy border, finally resolving into a delicate, cream-colored lacy edge. This piece beautifully balances bold geometric flowers with soft, organic leaf clusters, making it the perfect focal point for Thanksgiving dinners, harvest festivals, or everyday fall decorating.
Crocheting this runner allows you to experiment with modular motif joining and continuous oval rounds. Because the central flowers are made individually and joined as you go, you can easily customize the length of the runner to fit everything from a small coffee table to a grand 12-seater dining table. The intricate picot edging and structured leaf clusters give the finished piece a polished, heirloom-quality drape.
Disclosure: This post may contain affiliate links. If you make a purchase through these links, I may earn a small commission at no extra cost to you.
🔠C. MAIN PATTERN OVERVIEW
- Central Floral Axis: Five individual flower motifs crocheted in rich autumn tones, joined petal-to-petal in a straight line to form the spine of the runner.
- Leaf Cluster Rounds: Continuous oval rounds worked entirely around the floral spine, utilizing cluster stitches in olive green to create a wreath of leaves.
- Lacy Picot Border: A lightweight, cream-colored finishing edge made of chain arches and sharp picot points to give the runner a delicate, traditional frame.
🎯 D. SKILL LEVEL
Intermediate
- Working in the round (circles and ovals)
- Join-as-you-go motif techniques
- Cluster stitches (dc3tog) for texture
- Chain-space lacework and picots
📠E. FINISHED SIZE
| Component | Measurement |
| Total Length (with 5 flowers) | 38 inches (96.5 cm) |
| Total Width (at center) | 14 inches (35.5 cm) |
| Individual Flower Diameter | 4.5 inches (11.5 cm) |
Size can be easily adjusted by adding or subtracting central flower motifs. Each additional flower adds approximately 4.5 inches to the total length.
🧮 F. GAUGE
1 Flower Motif = 4.5 inches (11.5 cm) across. Gauge is not strictly critical for this project, but maintaining consistent tension will ensure your table runner lies completely flat without rippling or cupping.
🧶 G. REQUIRED YARN AMOUNTS
| Color | Function | Est. Yardage |
| Rust (Color A) | Flower Centers | ~30 yards |
| Mustard (Color B) | Flower Petals | ~75 yards |
| Olive Green (Color C) | Leaf Border | ~120 yards |
| Cream (Color D) | Lace Border & Background | ~150 yards |
Estimates based on medium (#4) worsted weight cotton. 100% mercerized cotton is highly recommended for durability, heat resistance, and crisp stitch definition.
🧰 H. MATERIALS
- Yarn: Medium (#4) worsted weight cotton yarn in Rust, Mustard, Olive Green, and Cream.
- Hook: 4.5mm (US 7) crochet hook.
- Tools: Yarn needle, scissors, stitch markers.
- Optional: Blocking mats, rust-proof T-pins, and spray starch (highly recommended for a flat finish).
🔤 I. ABBREVIATIONS – US TERMS
- MR: Magic Ring
- ch: chain
- sl st: slip stitch
- sc: single crochet
- hdc: half double crochet
- dc: double crochet
- dc3tog: double crochet 3 together (cluster stitch)
- sp: space
- st(s): stitch(es)
- picot: ch 3, sl st in 3rd ch from hook
📠J. NOTES BEFORE YOU BEGIN
- 🧵 Yarn Choice: Cotton is strongly preferred over acrylic for table runners. It blocks much flatter and will not melt under warm serving dishes.
- âš ï¸ Joining Rule: The first flower is made completely. Flowers 2 through 5 are joined to the previous flower during their final round.
- ✅ Oval Corners: Pay close attention to the increase corners during the border rounds to prevent the ends of the runner from curling inward.
🪡 K. COMPLETE PATTERN
🌸 Motif 1: First Complete Flower
R1 (Color A – Rust): MR, ch 1. 12 sc in ring. Sl st to first sc to join. Fasten off Color A. (12) R2 (Color B – Mustard): Join Color B in any st. ch 4 (counts as dc + ch 1). dc in next st, ch 1. Repeat from * to * 10 times. Sl st to the 3rd ch of the starting ch-4. (12 dc, 12 ch-1 sps) R3 (Color B): Sl st into the first ch-1 sp. ch 1, (sc, hdc, dc, hdc, sc) all in the same ch-1 sp. Sl st into the next dc st. Repeat from * to * 11 times to create 12 petals. Sl st to the base of the first petal to join. Fasten off and weave in ends.
🔗 Motifs 2–5: Join-As-You-Go Flowers
Make 4 more flowers, joining each one to the previous flower during R3. R1-R2: Work exactly as Motif 1. R3 (Joining Round): Work the first 10 petals exactly as Motif 1.
- Petal 11 (Joining): ch 1, (sc, hdc) in ch-1 sp. ch 1. Drop loop from hook, insert hook through the center dc of a petal on the previous flower, pull loop through. ch 1. (hdc, sc) in the same ch-1 sp on the current flower. Sl st into next dc.
- Petal 12 (Joining): ch 1, (sc, hdc) in ch-1 sp. ch 1. Drop loop, insert hook through the next adjacent petal’s center dc on the previous flower, pull loop through. ch 1. (hdc, sc) in the same ch-1 sp. Sl st to the base of the first petal to join. Fasten off and weave in ends. You now have a straight line of 5 connected flowers.
🂠Base Oval Round (Color D: Cream)
This round establishes the foundation for the border by working around the entire perimeter of the joined flowers. R1: Join Color D in the top center dc of the very first petal on Motif 1. ch 1, sc in same st.
- Along the sides: ch 5, sc in the center dc of the next petal. Repeat this across the top edge of all flowers. When crossing the joint between flowers, ch 5, sc in the first available petal of the next flower.
- Around the ends: At the end flowers (Motif 1 and Motif 5), work (sc, ch 5) into each of the 5 outer petals to turn the corner.
- Continue down the bottom edge in the same manner. Sl st to the first sc to join. (Total ch-5 spaces will depend on your flower count; for 5 flowers, you will have 42 ch-5 spaces).
🌿 Leaf Cluster Round (Color C: Olive Green)
R2: Join Color C in any ch-5 space along the straight side. ch 3 (counts as first part of cluster), work 2 dc directly into the same sp to complete the first dc3tog. ch 3. dc3tog in the same ch-5 sp. (This creates a V-leaf). ch 2. In the next ch-5 sp, work (dc3tog, ch 3, dc3tog). Repeat from * to * around the entire oval.
- Turning the ends: To ensure the oval lies flat, on the 5 loops at each extreme end of the runner, ch 3 between the leaf clusters instead of ch 2.
- Sl st to the top of the first cluster to join. Fasten off Color C.
✨ Lacy Picot Edging (Color D: Cream)
R3: Join Color D in any ch-3 sp between two leaves on the straight side. ch 1, sc in same sp. ch 4, sc in the ch-2 sp between the leaf pairs. ch 4, sc in the next ch-3 sp (between the leaves). Repeat from * to * around. Sl st to first sc to join. R4 (Final Round): Sl st into the first ch-4 sp. ch 1. Work (2 sc, picot, 2 sc) in the ch-4 sp. Skip the next sc st. Repeat from * to * in every ch-4 sp around the entire runner. Sl st to the first sc to join. Fasten off and weave in all remaining ends.
🎨 L. STYLING / ASSEMBLY / STABILITY / FINAL SHAPING
- ✅ Blocking is Mandatory: Because of the lacework and cluster stitches, the runner will look slightly crumpled right off the hook.
- ✅ Wet Blocking: Soak the runner in lukewarm water for 15 minutes. Gently press out excess water in a towel (do not wring).
- ✅ Pinning: Lay the runner flat on blocking mats. Place a rust-proof T-pin in the center picot of every single chain arch around the border. Gently pull outward to open up the chain spaces and stretch the leaf clusters into defined V-shapes. Let dry completely (24-48 hours).
💡 M. HELPFUL CROCHET TIPS
- 💡 When weaving in the ends of your central flowers, weave the tails securely through the dense R1 single crochets. A loose tail here can cause the center of your flowers to open up.
- 💡 If your runner begins to ruffle or wave during the Leaf Cluster round, it means you have too many stitches. Try reducing the chain spaces between the leaf clusters on the straight edges to ch-1 instead of ch-2.
- 💡 Conversely, if your runner is cupping like a bowl, your tension is too tight. Ensure you are chaining loosely on the turning corners at the ends of the oval.
- 💡 Use a spray starch during the blocking phase if you want the runner to have a crisp, store-bought stiffness that resists wrinkling on the table.
🧼 N. CARE INSTRUCTIONS
- Machine wash gently in cold water inside a mesh laundry bag.
- Do not tumble dry. Heat can shrink the cotton and ruin the shape.
- Lay flat to dry. You will likely need to re-block or steam-iron the runner flat after every wash to restore the sharp picot edges.
â“ R. FAQ
â“ Can I make this runner wider? Yes. To make a wider runner, you can repeat the cream chain-space rounds (R1 of the border) multiple times to grow the foundation outward before adding the green leaf clusters.
â“ Can I use acrylic yarn? You can, but it is not recommended for table runners. Acrylic can melt if a hot plate or serving dish is placed on it, and it does not block as sharply as cotton.
â“ How do I adjust the length? Simply crochet and join fewer flowers for a shorter runner, or more flowers for a longer one. The border instructions work seamlessly regardless of how many flowers are in the center strip.
â“ What if my edges ruffle? Ruffling means there is too much slack in the outer rounds. Ensure you are blocking the piece aggressively. If it still ruffles, drop a hook size for the final two lace rounds.
Share the love! If you create your own Oval Leaf & Flower Table Runner, share it on social media! We love seeing how different color palettes change the entire mood of the pattern.
Leave a Comment: What color palette will you choose for your table runner? Are you sticking to autumn hues or trying something bright for spring? Let us know below!
You might also like:
- Sunflower Coaster & Trivet Set
- Rustic Pumpkin Table Centerpiece
- Lacy Vintage Hexagon Tablecloth
- Pinecone & Acorn Napkin Rings