Free Christmas Tree Cutlery Holder Crochet Pattern
📖 B. INTRODUCTION
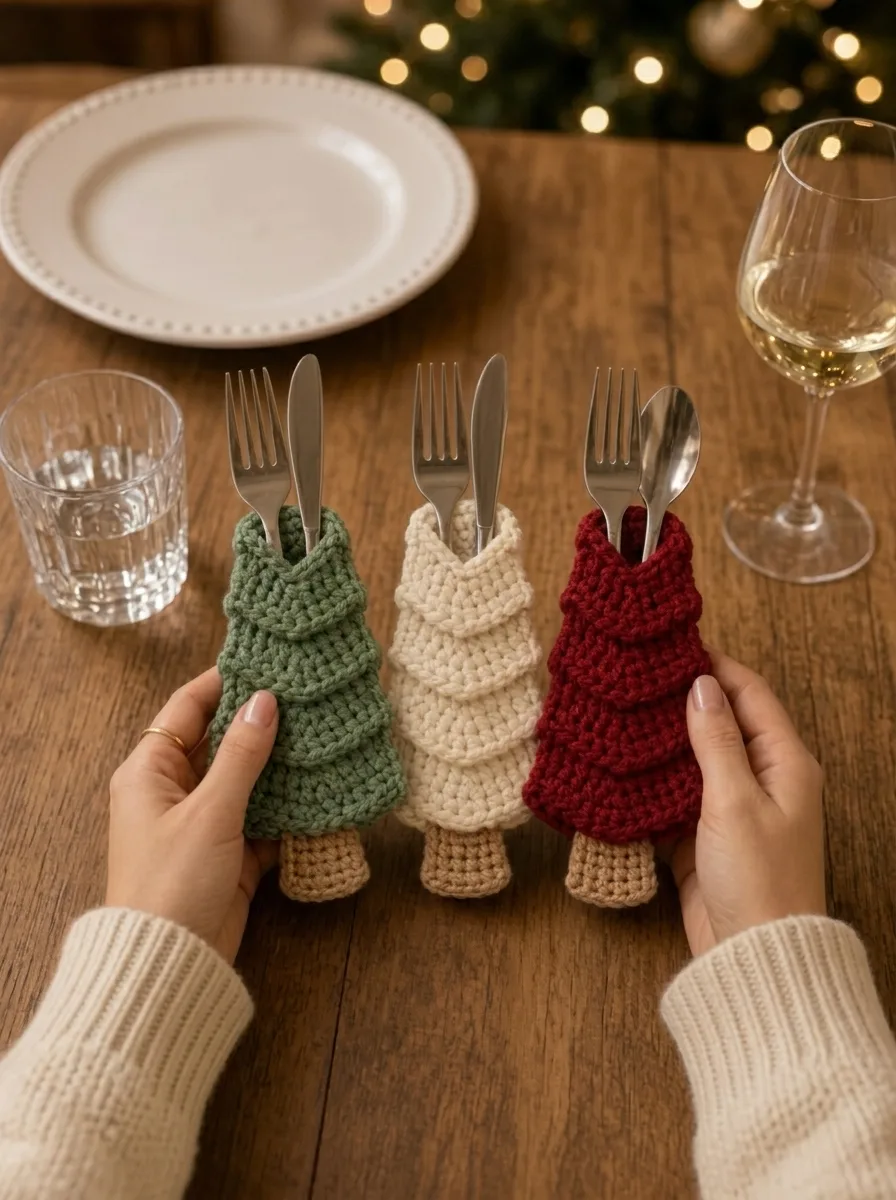
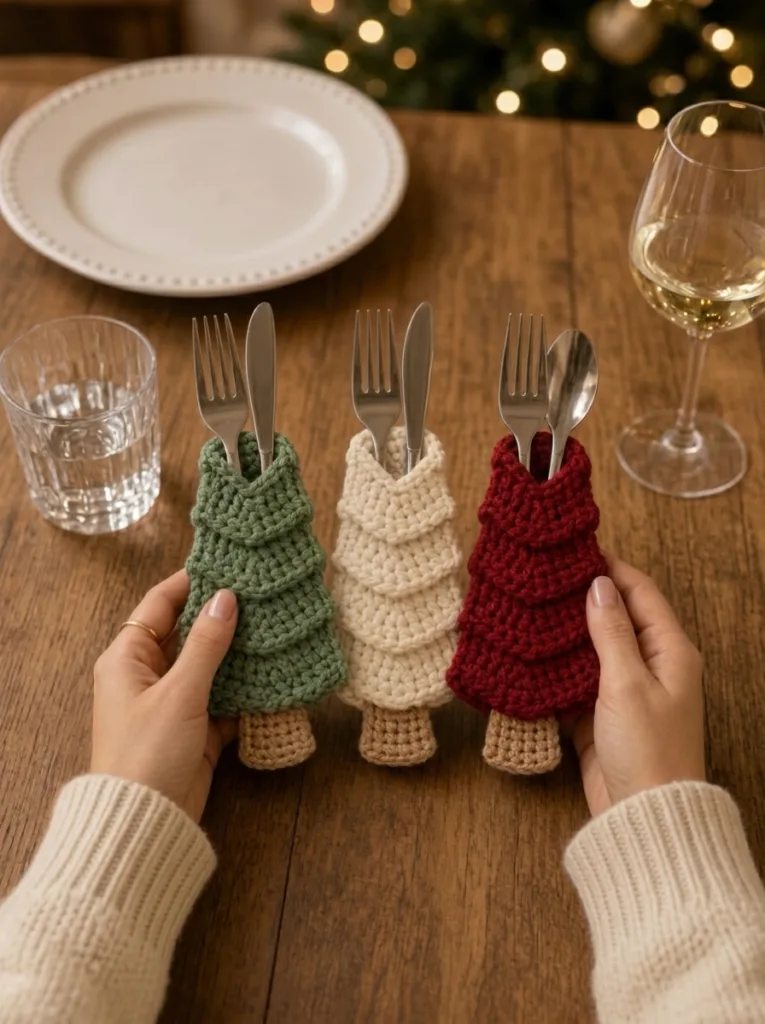
Make your holiday table unforgettable with this charming set of three crocheted Christmas tree cutlery holders! Designed with practicality and style in mind, these festive sleeves are the perfect addition to a Christmas Eve dinner, a festive brunch, or as a thoughtful handmade gift. A standard fork and knife, or even a spoon, slip easily into the top opening of each tree, keeping your silverware organized and adding a touch of cozy texture to your place setting.
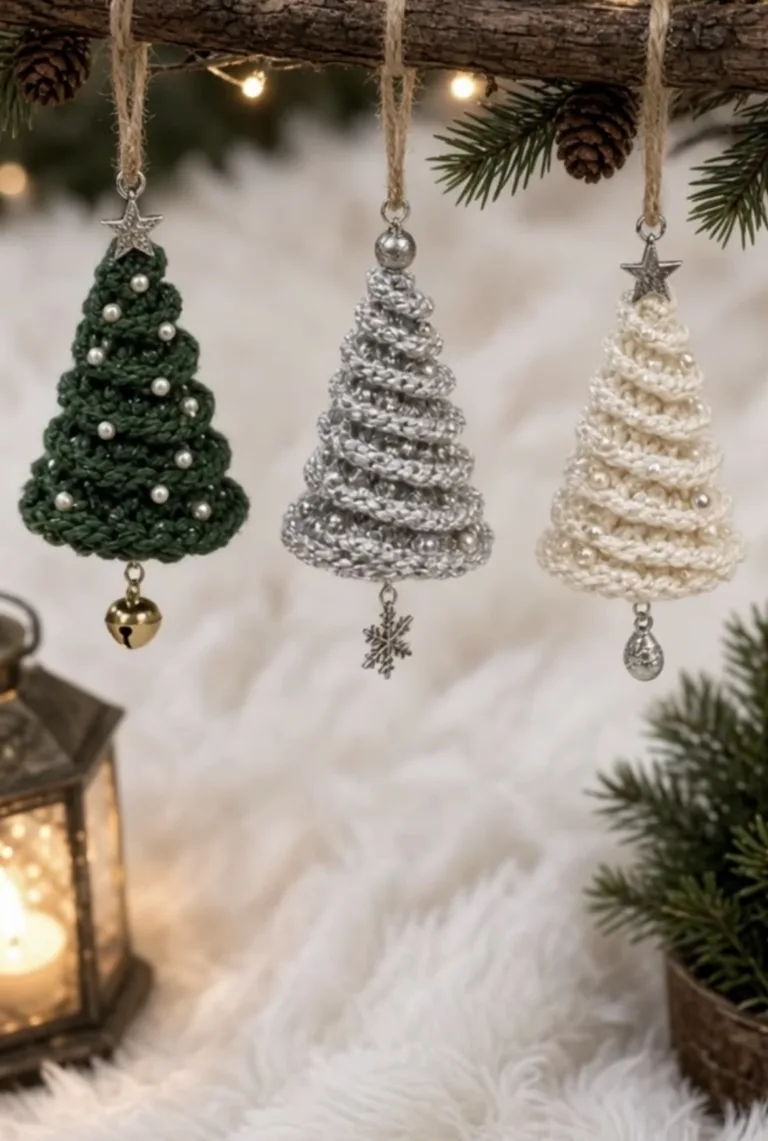
This original pattern allows you to create three distinct versions—a classic forest green, a warm cream (off-white), and a deep maroon/red—each sitting atop a practical tan-colored trunk base. Their recognizable ruffled, layered design is achieved with simple stitches and strategic shaping, making them a fun and rewarding project. Best of all, they can be made quickly, letting you crochet a whole set in a single weekend.
These aren’t just for cutlery! You can easily personalize them with different colors, add tiny crocheted ornaments or beads, or make a larger set. They also work beautifully as small decorative trees on their own. Get ready to add some handmade magic to your holiday celebration.
🔍 C. MAIN PATTERN OVERVIEW
This pattern includes instructions for making three individual Christmas tree-shaped cutlery holders as shown in the original image. Each holder is a hollow, conical sleeve with a multi-layered, ruffled body that decreases towards the top. A simple, cylindrical trunk base is crocheted for each, allowing the trees to stand upright. The holders are open at the top, providing a practical compartment for silverware. The final design features four distinct ruffles stacked upon each other, creating the appearance of a cozy evergreen tree.
🎯 D. SKILL LEVEL
Intermediate Beginner
This project is suitable for crocheters who are comfortable with the basics but are ready for a slight challenge.
- ✅ Techniques Involved:
- Working in continuous rounds (spirals)
- Magic Ring
- Single crochet (sc)
- Increase (inc)
- Invisible Decrease (dec)
- Working in Back Loops Only (BLO)
- Working in Front Loops Only (FLO)
- Adding Ruffles (simple shaping in rows)
- Changing color cleanly
📏 E. FINISHED SIZE
Approximately 6.5 inches (16.5 cm) tall
(Final size may vary depending on your choice of yarn and hook, your individual tension, and the density of your stitches. Gauge is less critical for this project than a consistent tight texture.)
🧮 F. GAUGE
10 sc and 10 rows = 2 inches (5 cm) using a 4mm (G-6) hook.
Gauge is not critical for this design, but tight, consistent stitches are essential to make the tree bodies stand up on their own and provide a sturdy compartment for the cutlery. It is always better to work too tightly than too loosely for amigurumi-style structure.
🧶 G. REQUIRED YARN AMOUNTS
Total Estimated Yardage: approximately 100-120 yards of medium weight (Aran/Worsted, size 4) cotton yarn.
(Note: These are estimates for a set of three holders.)
- 🌲 Green Tree: approximately 35 yards (32m) of Main Color A (e.g., Forest Green)
- 🍦 Cream Tree: approximately 35 yards (32m) of Main Color B (e.g., Off-White/Cream)
- 🍒 Maroon Tree: approximately 35 yards (32m) of Main Color C (e.g., Deep Maroon/Red)
- 🪵 Trunk Bases (all 3): approximately 15 yards (14m) of Accent Color D (e.g., Tan/Taupe/Light Brown)
- 🧵 Small amount of embroidery thread or accent yarn for optional decorations.
🧰 H. MATERIALS
- Yarn: Aran/Worsted (size 4) cotton yarn in Forest Green, Cream, Maroon, and Tan.
- Crochet Hook: 4mm (US G-6) or size needed to obtain a tight gauge. (A smaller hook than usual for the yarn is recommended for structure).
- Yarn Needle: For weaving in ends and minor assembly.
- Scissors: Essential.
- Stitch Marker: Essential for working in continuous rounds.
- Pins: Optional, useful for positioning.
- Optional: Small beads, tiny buttons, or embroidery thread for decorations.
⚠️ Safety Note: If using small beads or tiny parts for decoration, ensure they are securely fastened. This project is not intended for small children to play with.
🔤 I. ABBREVIATIONS – US TERMS
- MR: Magic Ring
- ch: chain stitch
- sl st: slip stitch
- sc: single crochet stitch
- inc: single crochet increase (2 single crochets into one stitch)
- dec: invisible single crochet decrease (sc 2 stitches together using only front loops)
- BLO: work into the Back Loop Only
- FLO: work into the Front Loop Only
- st(s): stitch(es)
- ( ) x number: repeat the instructions inside the parentheses the specified number of times.
- [ ] : total stitch count at the end of the round.
📝 J. NOTES BEFORE YOU BEGIN
- This pattern is written in standard US crochet terms.
- Unless otherwise specified, the main body of the tree and the trunk base are worked in continuous rounds. Use a stitch marker to track the start of each round.
- Ruffles are added in rows, working into the front loops of completed rounds, in a non-continuous fashion. (Joined rounds are not used for the body core to keep a seamless look).
- For a clean appearance, use the invisible decrease method (dec) where possible.
- To keep the “cutlery compartment” clear, stuff the trunk base lightly but leave the main conical body unstuffed. The weight of the silverware provides all the structure needed.
- Instructions are given once for making ONE tree. Repeat the entire process with the specified color to complete the full set of three.
🪡 K. COMPLETE PATTERN
🌲 1. Tree Base/Trunk
(Make 1 per tree; total 3 in Tan color)
Use Accent Color D (Tan).The trunk is worked in continuous rounds from the base up.
R1: MR, 6 sc into ring. [6] R2: inc around. [12] R3: (1 sc, inc) x6. [18] R4: sc in each st around. [18] R5: sc in each st around. [18] R6: sc in each st around. [18] R7: sc in each st around. [18] Fasten off, leaving a short tail. (This trunk will be used as a stable base for the tree core).
Repeat this step for each of the three trees, making three identical Tan trunks.
🌲 2. Core Tree Body (Open Compartment)
(Make 1 per tree; Green, Cream, or Maroon color)
This section is worked in continuous rounds, starting where the trunk ends, using the invisible decrease and working in specified loops to create ruffles.
For each tree, attach the Main Color (A, B, or C) yarn with a sl st to any stitch in the top round of the completed Tan trunk. Start the rounds from this point. We will first create the core cone, leaving Front Loops visible for ruffle attachment later.
Tip: A tight tension is crucial here for the cone to maintain its shape.
R1: Work sc into each st around. (18) [18] R2: BLO (2 sc, inc) x6. [24] R3: sc in each st around. [24] R4: BLO (3 sc, inc) x6. [30] R5: sc in each st around. [30] R6: BLO (4 sc, inc) x6. [36] R7: sc in each st around. [36] Note: We have just added the three base ruffles. The subsequent rounds form the tapering cone. R8: BLO (10 sc, dec) x3. [33] R9: sc in each st around. [33] R10: BLO (9 sc, dec) x3. [30] R11: sc in each st around. [30] R12: BLO (8 sc, dec) x3. [27] R13: sc in each st around. [27] R14: BLO (7 sc, dec) x3. [24] R15: sc in each st around. [24] R16: BLO (6 sc, dec) x3. [21] R17: sc in each st around. [21] R18: BLO (5 sc, dec) x3. [18] R19: sc in each st around. [18] R20: BLO (4 sc, dec) x3. [15] R21-R23 (3 rounds): sc in each st around. [15] (This forms the narrow top ‘neck’ where the handles sit) Fasten off. Weave in the final tail.
You now have a plain, tapering, unstuffed cone with several exposed front loops at various stages. Repeat this process for the Cream and Maroon trees.
🌲 3. Adding the Ruffles
(Make for ALL trees)
Ruffles are added one at a time, working in rows into the previously exposed Front Loops Only (FLO) of specific rounds. Each ruffle is a non-continuous strip that overlaps the top of the next one.
Choose a completed tree core. We will be re-attaching the Main Color yarn (Green, Cream, or Maroon) to specific FLO rounds, starting from the BOTTOM ruffle and working UP. The goal is to create overlapping tiers.
Bottom Ruffle (worked into FLO of Core R2): Attach yarn with a sl st to any FLO stitch in R2. Row 1: Working in the next FLO sts around, (inc, 1 sc) repeat around. [36] Row 2: 1 sc in each st around. [36] Sl st to join and fasten off.
Second Ruffle (worked into FLO of Core R4): Attach yarn with a sl st to any FLO stitch in R4. Row 1: Working in the next FLO sts around, (2 sc, inc) repeat around. [40] Row 2: 1 sc in each st around. [40] Sl st to join and fasten off.
Third Ruffle (worked into FLO of Core R6): Attach yarn with a sl st to any FLO stitch in R6. Row 1: Working in the next FLO sts around, (2 sc, inc) repeat around. [48] Row 2: 1 sc in each st around. [48] Sl st to join and fasten off.
Fourth Ruffle (worked into FLO of Core R8): Attach yarn with a sl st to any FLO stitch in R8. Row 1: Working in the next FLO sts around, (2 sc, inc) repeat around. [44] Row 2: 1 sc in each st around. [44] Sl st to join and fasten off.
The remaining visible FLO rounds (R10, R12, etc.) define the shape of the cone but do not have separate ruffles, adding to the stacked appearance. Now you have a fully formed tree. Repeat for all three trees. Weave in all loose ends.
🎨 L. STYLING / ASSEMBLY / STABILITY / FINAL SHAPING
✅ Head-to-Body Assembly
Since the trunk and core are crocheted together, there is no separate head/body assembly required in terms of sewing major parts. The only assembly is weaving in all ends from color changes and ruffle additions. Ensure the tan trunk is aligned symmetrically with the conical tree body above it.
✅ Stability / Structure
These holders do not require stuffing in the main tree body; the silverware will create all the necessary structure and weight.
- To help them stand better on their own without cutlery, you might stuff the trunk base lightly and flatten the bottom.
- The tight gauge used in construction is key to stability. If your work is loose, consider using a thinner, more durable yarn (like cotton) and a smaller hook.
✅ Final Shaping / Finishing Checklist
- ✅ Check Symmetry: Align all ruffles to sit evenly. The tiers should stack uniformly around the cone.
- ✅ Ruffle Alignment: Ensure all ruffles overlap correctly. They should lay flat like the fronds of an evergreen.
- ✅ Cutlery Fit: Insert a standard fork and knife to ensure they fit snugly but easily within the central compartment.
- ✅ Clean Edges: Weave in all loose ends neatly, especially around color changes and ruffles.
- ✅ Flatten Base: Gently push up on the Tan trunk bottom to make it slightly concave so it stands firmly on a flat surface.
- ✅ Styling: Arrange the set of three—Green, Cream, and Maroon—side-by-side or scattered on your table.
💡 M. HELPFUL CROCHET TIPS
- 💡 Choose Cotton Yarn: Pure cotton yarn is ideal for durable home decor items like cutlery holders. It holds its shape better than acrylic or wool and can withstand potential food stains.
- 💡 Tight Tension is Everything: For amigurumi or structured objects, work your stitches significantly tighter than usual. If you see gaps between your stitches, use a smaller hook. This allows the cone to stand without stuffing.
- 💡 Master Color Changes: Use a clean, seamless color change method at the start of the trunk-to-body round and when re-attaching ruffles.
- 💡 Invisible Decrease: Always use the invisible decrease (dec) method in amigurumi. Working into only the front loops of the two stitches you are decreasing creates a smooth, almost invisible closure that keeps your fabric sturdy.
- 💡 Count Your Stitches! Missing or adding even a single stitch in amigurumi will affect the symmetry and final stitch counts of later rounds. Check counts at the end of every round until you reach the repeating straight rounds.
- 💡 Flatten the Ruffles: Use a warm iron or steamer lightly on a low setting over a damp cloth to help the ruffles lay flat and stacked if they refuse to behave.
- 💡 Customize: Personalize each tree with unique colors, tiny crocheted stars on top, or embroidered bead details.
- 💡 Yarn Substitution: While cotton is best, a worsted weight cotton-blend or a sturdy acrylic can work, but you may need a smaller hook and very tight tension. Check gauge if substituting.
- 💡 Quick Holiday Crochet: This set is a fast project. Complete one tree in one sitting and have the full set ready for Christmas weekend.
🧼 N. CARE INSTRUCTIONS
Hand wash or spot clean only. Immerse the cotton holders in cool or lukewarm water with a mild, delicate-friendly detergent. Avoid twisting or wringing, which can distort the shape. Rinse thoroughly. To dry, place them on a clean, dry towel, gently reshape them, and air dry. Do not machine wash, and certainly do not tumble dry, especially with cutlery inside! Avoid high heat, which can damage fibers or melt any added decorations.
❓ R. FAQ
1. How long does it take to make one tree holder?
One tree can be crocheted and finished in approximately 1.5 to 2.5 hours, making it a wonderful quick holiday gift. The set of three can easily be completed in a weekend.
2. Can I use a different yarn weight?
This pattern is written for worsted or Aran weight (size 4) yarn. If you use a lighter weight (like DK/size 3) and a smaller hook, the trees will be smaller and may not fit standard silverware. If you use a bulkier yarn, they will be larger and might not fit your place setting well. It is best to stick to worsted weight cotton for the desired size and stability.
3. Are these suitable for all cutlery?
They are designed to hold standard-sized dinner forks, knives, and spoons. If you have particularly large or wide-handled silverware, they may fit tightly. Always check the fit as you work.
4. Do I need to stuff them?
No, stuffing is not necessary for the main tree core. The weight of the silverware keeps them stable. You can, however, stuff the trunk base lightly and flatten the bottom to help them stand independently.
5. Is it difficult to make the ruffles lay flat?
Working ruffles into specific front loops of rounds naturally creates the stacked effect. However, simple blocking—or a very light touch with a steamer—over a damp cloth will help them lay perfectly if needed.
6. Can I substitute the cotton yarn?
Cotton is recommended for durability and shape retention. Acrylic yarn is usually too soft to hold this structure well unless worked exceptionally tightly. A cotton blend would be the next best choice.
7. How do I customize the colors?
You can use any colors you like! Consider white for a “snowy” tree, multiple shades of green for depth, or even bright colors for a more playful, modern table. Personalize with tiny crocheted ornaments or beads for extra holiday cheer.
8. Is this pattern truly free?
Yes, this pattern is completely free for you to use! I have created an original pattern inspired by the lovely design in the reference image. I encourage you to share this pattern with other crocheters and share your finished creations, but please do not claim this specific pattern text as your own. Enjoy!