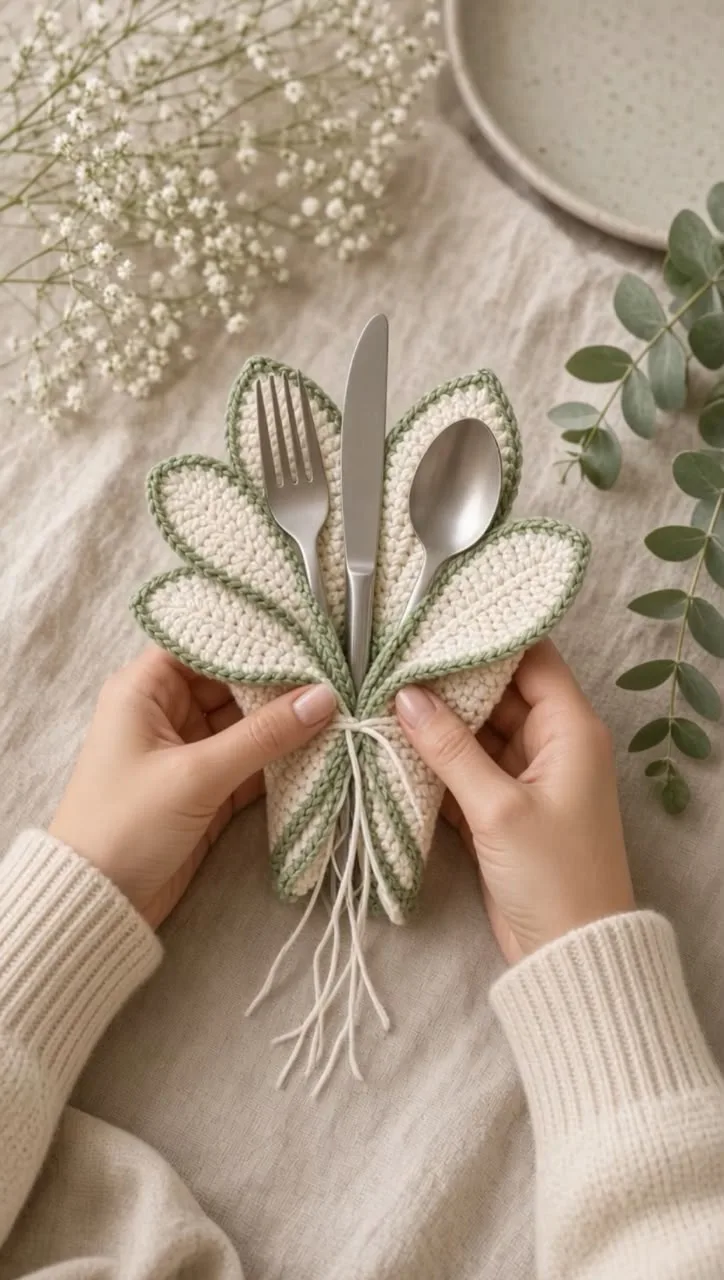
Leaf & Vine Crochet Cutlery Wrap
📖 B. INTRODUCTION
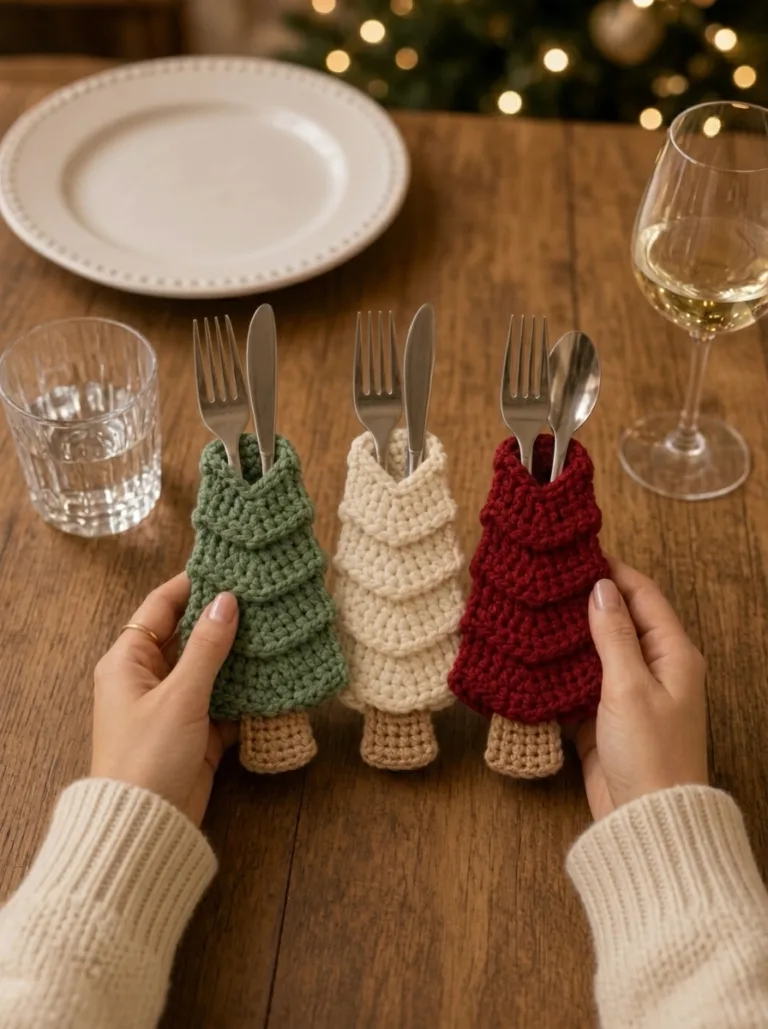
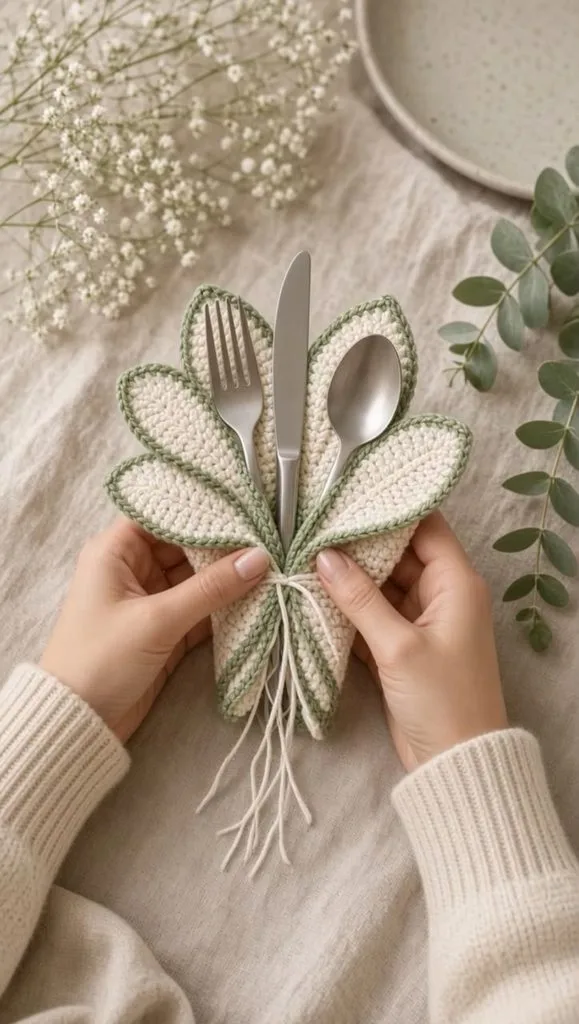
Elevate your dining table, picnic basket, or wedding table settings with the Leaf & Vine Crochet Cutlery Wrap. Inspired by the natural elegance of overlapping foliage, this beautiful botanical pocket holds a standard fork, knife, and spoon within a fanned bouquet of crocheted leaves.
Perfect for cottagecore decor enthusiasts, eco-friendly hosts, or anyone looking to add a personalized handmade touch to special occasions, this wrap works up quickly using basic stitches. The design relies on worsted-weight cotton to provide structure and durability, ensuring your cutlery stays protected while looking stunning. The contrast sage green edging makes the petal silhouette pop, while a simple rustic string tie cinches the base for a polished, harvest-ready finish. Choose colors that match your seasonal decor or stick to the classic cream and green for a timeless natural aesthetic.
🔍 C. MAIN PATTERN OVERVIEW
The Leaf & Vine Cutlery Wrap is constructed modularly to create a layered, overlapping fan effect.
- The Leaves: You will crochet five individual leaf panels in three slightly different sizes (one large center leaf, two medium inner leaves, and two small outer leaves) working flat in rows from the base to the pointed tip.
- The Vine Border: Each leaf receives a contrasting single crochet border to define its shape.
- The Assembly: The five leaves are layered in a specific fanned arrangement and seamed together across their bottom halves to create a sturdy, unified pocket for the cutlery.
- The Wrap: A simple multi-strand yarn tie is attached at the base to cinch the pocket closed.
🎯 D. SKILL LEVEL
Easy / Advanced Beginner This pattern uses fundamental stitches and basic shaping techniques. It is highly accessible but requires careful attention during the assembly phase to achieve the perfect fan shape.
- Working flat in rows
- Basic increases (inc) and decreases (dec)
- Adding an even border around raw edges
- Layered seaming
📏 E. FINISHED SIZE
- Height: 9.5 inches (24 cm) from the base to the tip of the center leaf.
- Width: 7 inches (18 cm) across the widest point of the fanned leaves.
- Pocket Depth: Approximately 4.5 inches (11.5 cm).
- Note: Size can easily be adjusted by using a different yarn weight and corresponding hook size. Looser tension will result in a larger wrap.
🧮 F. GAUGE
18 sc x 20 rows = 4 x 4 inches (10 x 10 cm) Tight, consistent stitches are preferred so the leaves hold their shape and the cutlery does not poke through the fabric. If your leaves feel too floppy, drop down half a hook size.
🧶 G. REQUIRED YARN AMOUNTS
Worsted Weight (Size 4) 100% Cotton Yarn (e.g., Lily Sugar’n Cream, Dishie, or 24/7 Cotton)
- Main Color (MC) – Cream/Off-White: Approximately 60 yards (55 meters) per wrap.
- Contrast Color (CC) – Sage Green: Approximately 15 yards (14 meters) per wrap.
- Cotton is highly recommended over acrylic for this project as it holds its shape better, absorbs moisture, and is easily washable for table use.
🧰 H. MATERIALS
- Hook: 4.0 mm (US G/6) crochet hook
- Yarn: Worsted weight cotton in Cream (MC) and Sage Green (CC)
- Needle: Tapestry/yarn needle for seaming and weaving ends
- Scissors: Sharp craft scissors
- Stitch Markers: 2-3 locking markers (helpful for pinning leaves during assembly)
- Optional: Fabric stiffener spray (if you want rigid, perfectly flat leaves)
🔤 I. ABBREVIATIONS – US TERMS
- ch: chain
- sc: single crochet
- inc: increase (2 sc in the same stitch)
- dec: decrease (single crochet 2 stitches together – standard or invisible)
- st(s): stitch(es)
- sl st: slip stitch
- FO: fasten off
- MC: Main Color (Cream)
- CC: Contrast Color (Sage Green)
📝 J. NOTES BEFORE YOU BEGIN
- 🧵 Turning Chains: The turning chain (ch 1) at the beginning of each row does not count as a stitch.
- ⚠️ Decreases: When working flat, standard decreases (sc2tog) often look cleaner on the edges than invisible decreases. Use whichever method gives you the straightest edge.
- ✅ Stitch Counts: The number in parentheses at the end of each row instruction indicates the total stitch count for that row.
- 🌿 Symmetry: Ensure your tension remains even across all five leaves so the final fan shape is symmetrical.
🪡 K. COMPLETE PATTERN
🌿 Center Leaf (Make 1)
Purpose: The tallest backdrop leaf of the fan. Yarn: MC (Cream) Row 1: Ch 7, sc in 2nd ch from hook and in each ch across. (6) Row 2: Ch 1, turn. inc, sc 4, inc. (8) Row 3: Ch 1, turn. sc 8. (8) Row 4: Ch 1, turn. inc, sc 6, inc. (10) Row 5: Ch 1, turn. sc 10. (10) Row 6: Ch 1, turn. inc, sc 8, inc. (12) Rows 7-18: Ch 1, turn. sc 12. (12) [12 rows total] Row 19: Ch 1, turn. dec, sc 8, dec. (10) Row 20: Ch 1, turn. sc 10. (10) Row 21: Ch 1, turn. dec, sc 6, dec. (8) Row 22: Ch 1, turn. sc 8. (8) Row 23: Ch 1, turn. dec, sc 4, dec. (6) Row 24: Ch 1, turn. sc 6. (6) Row 25: Ch 1, turn. dec, sc 2, dec. (4) Row 26: Ch 1, turn. dec 2 times. (2) Row 27: Ch 1, turn. dec. (1) FO and weave in ends.
🌿 Inner Side Leaves (Make 2)
Purpose: The medium leaves that flank the center. Yarn: MC (Cream) Row 1: Ch 6, sc in 2nd ch from hook and in each ch across. (5) Row 2: Ch 1, turn. inc, sc 3, inc. (7) Row 3: Ch 1, turn. sc 7. (7) Row 4: Ch 1, turn. inc, sc 5, inc. (9) Rows 5-15: Ch 1, turn. sc 9. (9) [11 rows total] Row 16: Ch 1, turn. dec, sc 5, dec. (7) Row 17: Ch 1, turn. sc 7. (7) Row 18: Ch 1, turn. dec, sc 3, dec. (5) Row 19: Ch 1, turn. sc 5. (5) Row 20: Ch 1, turn. dec, sc 1, dec. (3) Row 21: Ch 1, turn. dec, sc 1. (2) Row 22: Ch 1, turn. dec. (1) FO and weave in ends.
🌿 Outer Front Leaves (Make 2)
Purpose: The smallest foreground leaves. Yarn: MC (Cream) Row 1: Ch 5, sc in 2nd ch from hook and in each ch across. (4) Row 2: Ch 1, turn. inc, sc 2, inc. (6) Row 3: Ch 1, turn. sc 6. (6) Row 4: Ch 1, turn. inc, sc 4, inc. (8) Rows 5-12: Ch 1, turn. sc 8. (8) [8 rows total] Row 13: Ch 1, turn. dec, sc 4, dec. (6) Row 14: Ch 1, turn. sc 6. (6) Row 15: Ch 1, turn. dec, sc 2, dec. (4) Row 16: Ch 1, turn. dec 2 times. (2) Row 17: Ch 1, turn. dec. (1) FO and weave in ends.
✨ Vine Border (Work on all 5 leaves)
Purpose: Adds the defining green outline to each leaf. Yarn: CC (Sage Green) Step 1: With the right side of the leaf facing you, join CC with a sl st in the bottom right corner of the leaf base. Step 2: sc evenly up the right side of the leaf. Place approximately 1 sc at the end of each row. Step 3: At the top point (Row 27/22/17), work (sc, ch 1, sc) all into the very top stitch to create a sharp point. Step 4: sc evenly down the left side of the leaf. Step 5: sc across the bottom base edge. Sl st into the first sc to join. FO and leave a long tail (about 12 inches) on the Inner and Outer leaves for sewing during assembly. (Weave in the green tail on the Center leaf).
🎨 L. STYLING / ASSEMBLY / STABILITY / FINAL SHAPING
Correct assembly is crucial to achieving the fanned, pocketed look.
Step 1: The Layout
- Lay the Center Leaf flat on your workspace, right side up.
- Place the two Inner Side Leaves on top of the Center Leaf, angling them outward slightly so their tips fan out to the left and right. Their bottom edges should perfectly align with the bottom edge of the Center Leaf.
- Place the two Outer Front Leaves on top of the Inner Leaves, angling them out even further. Align all bottom edges perfectly.
Step 2: Pinning
- Use stitch markers or sewing pins to clamp all 5 layers together across the bottom 2 inches (5 cm).
- Pin the side edges of the leaves where they overlap to ensure the pocket stays enclosed.
Step 3: Seaming the Pocket
- Using the long green tails left from the border, use a tapestry needle to whip stitch through the overlapping edges.
- Start at the bottom base and sew horizontally across all 5 layers to secure the bottom completely.
- Next, sew vertically up the “valleys” between the leaves for about 3.5 to 4 inches. You are securing the overlapping sides of the Outer leaves to the Inner leaves, and the Inner leaves to the Center leaf. This creates a secure, enclosed pocket cup at the base while leaving the top halves of the leaves free to fan out.
- Secure all knots tightly on the back of the wrap and weave in ends.
Step 4: The Tie Wrap
- Cut 6 strands of MC (Cream) yarn, each 24 inches long.
- Hold them together. Find the midpoint of the strands and tie a tight knot around the very bottom base of the assembled pocket.
- Wrap the strands around the base a few times to create a rustic, banded look, tying a secure knot at the front. Leave the tails hanging loose like a natural tassel. Trim the ends evenly.
Step 5: Final Check ✅
- ✅ Insert a standard fork, knife, and spoon into the pocket.
- ✅ Ensure the cutlery rests securely without slipping through the bottom.
- ✅ Adjust the fanned leaves so the green borders overlap beautifully.
💡 M. HELPFUL CROCHET TIPS
- 💡 Consistent Edging: When working the green border along the raw edges of the flat rows, insert your hook into the actual body of the stitches at the row ends rather than the large gaps. This prevents unsightly holes along the border.
- 💡 Blocking is Magic: Cotton yarn responds wonderfully to steam blocking. Before assembly, pin your individual leaves flat on a blocking mat and hit them with steam. This ensures your fan will lay perfectly flat on the table.
- 💡 Customizing Pocket Depth: If your cutlery handles are particularly long or heavy, sew the leaves together a little higher up (4.5 to 5 inches) to give the wrap more stability.
- 💡 Seamless Color Joins: When joining the green yarn, crochet over your starting tail for the first few stitches to save yourself from weaving in an extra end later.
- 💡 Tassel Variations: Swap the yarn tie for a thin leather cord, twine, or a silk ribbon to drastically change the vibe from rustic to elegant.
- 💡 Make it a Set: If crocheting a set of 4 or 6, make all your Center leaves first, then all Inner, then all Outer. Assembly-line production goes much faster!
🧼 N. CARE INSTRUCTIONS
Because this item will be used near food, washing is inevitable.
- Washing: Hand wash gently in cool water with a mild detergent. If using 100% cotton, you can machine wash it in a delicates bag on a cold setting, but hand washing preserves the flat leaf shape best.
- Drying: Do not tumble dry, as it may cause the leaf tips to curl. Lay flat on a dry towel, reshape the fan, and air dry completely.
- Ironing: If the leaves curl after washing, lay a thin cloth over the wrap and press gently with a warm iron (cotton setting).
❓ R. FAQ
❓ Can I use acrylic yarn instead of cotton? While you can use acrylic, it is not recommended for table linens. Acrylic doesn’t block as crisply, can melt if exposed to hot plates, and doesn’t hold the rigid leaf shape as well as cotton.
❓ The base of my wrap is too thick to sew through, what can I do? If sewing through 5 layers of crocheted fabric is too tough for your needle, you can sew the leaves together in stages: sew the two outer to the two inner first, then sew that entire unit to the center leaf.
❓ Can I make the leaves wider? Yes! To make wider leaves, increase the starting chain by 2 stitches, and add two extra rows of increasing (e.g., reaching 14 sts for the Center leaf instead of 12). Keep the rest of the proportion the same.
❓ How do I stop the cutlery from falling out the bottom? Ensure you are seaming tightly across the very bottom horizontal edge of all five leaves during assembly.
❓ Can this be used for chopsticks? Absolutely. You may want to narrow the pocket slightly by sewing the leaves closer together, giving the wrap a tighter, taller profile perfect for chopsticks and a reusable straw.
Thank you for making the Leaf & Vine Cutlery Wrap! If you loved this pattern, please share your beautiful table settings and tag us on social media. Happy crocheting!