PB Rice Krispie Treats
The Ultimate Gooey Peanut Butter Rice Krispie Treats with Swirled Chocolate Topping
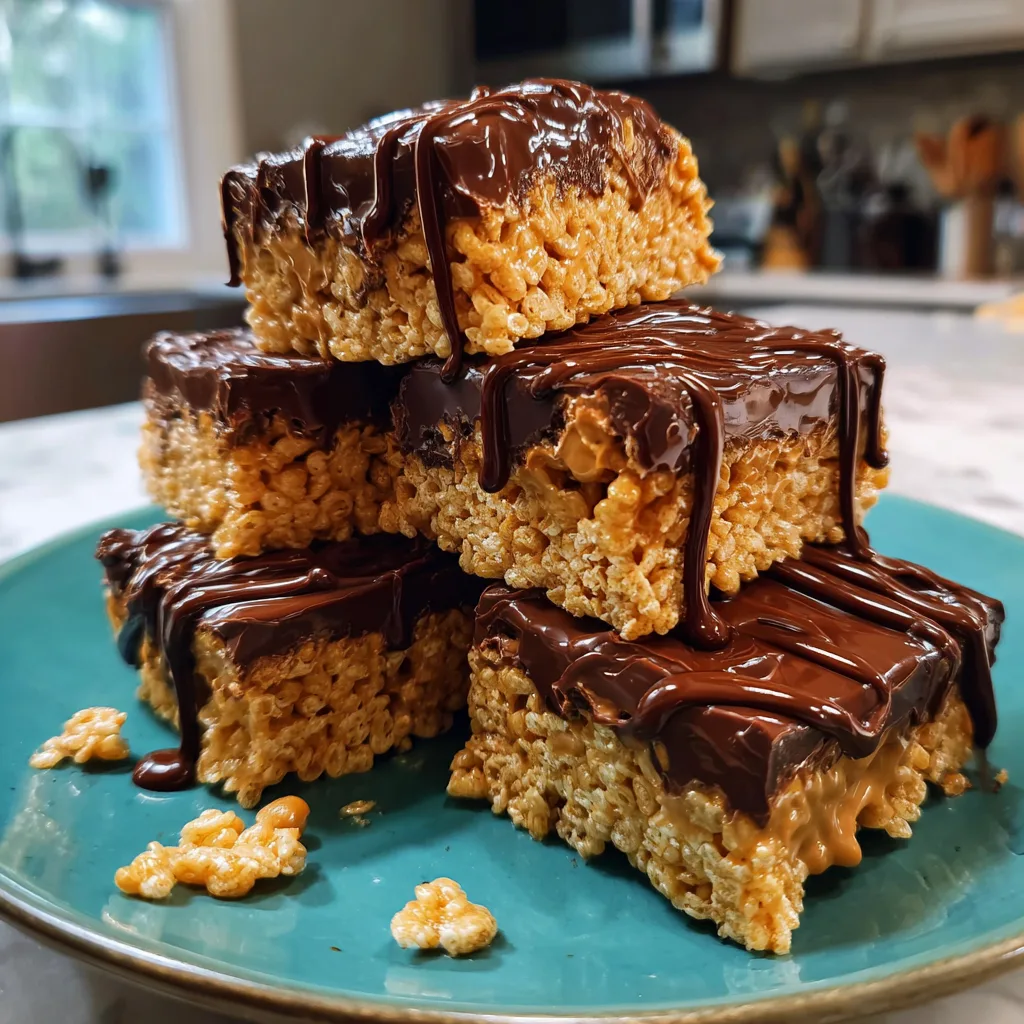
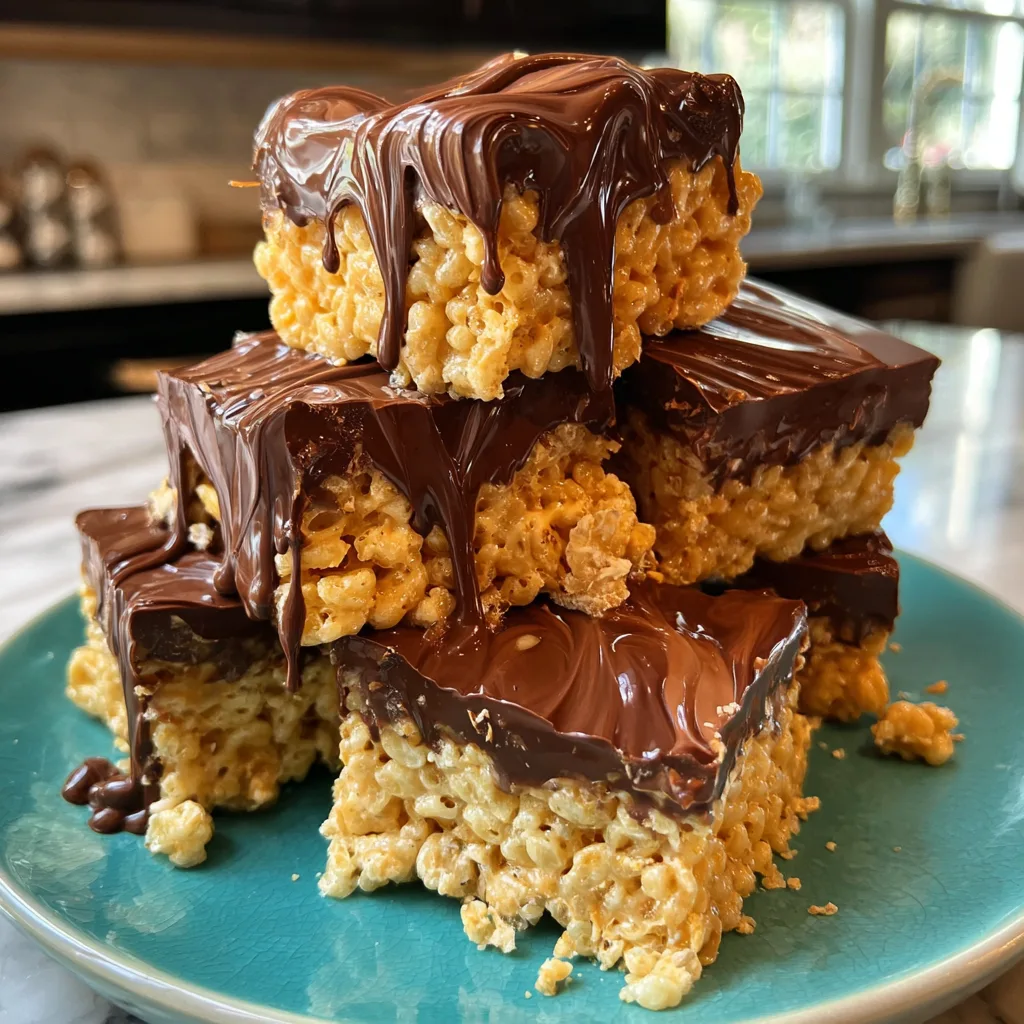
There is something inherently nostalgic about a Rice Krispie treat. It is the quintessential childhood snack—sticky, sweet, and crunchy. But when you elevate that classic base with a generous dose of creamy peanut butter and top it with a mesmerizing swirl of melted chocolate and peanut butter, you transform a simple lunchbox snack into a decadent dessert that rivals any bakery offering. These Peanut Butter Rice Krispie Treats are thick, chewy, and topped with a glossy layer of indulgence that makes them impossible to resist.
In this guide, we are diving deep into the art of the perfect no-bake treat. We aren’t just melting marshmallows; we are crafting a texture that stays soft for days, balancing the salty-sweet profile of peanut butter, and mastering the aesthetic swirl that makes these bars look as good as they taste. Whether you need a last-minute contribution for a potluck, a treat for a bake sale, or just a late-night sweet fix, this recipe is your new holy grail.
Why This Recipe Works
Most people think making cereal treats is foolproof, but we have all bitten into a bar that was rock hard or flavorless. This recipe solves those common issues. By increasing the ratio of butter and marshmallows to cereal, we ensure a soft, pull-apart texture. The addition of peanut butter directly into the marshmallow mixture infuses every bite with nutty richness, rather than just having it sit on top. Finally, the “tiger stripe” swirl of chocolate and peanut butter on top adds a necessary textural contrast—a smooth, creamy snap against the crispy, chewy base.
Ingredients
To make the best bars, you need the right building blocks. Here is what you will need:
For the Base
- Unsalted Butter – Using unsalted allows you to control the sodium level, which is important since peanut butter already contains salt. You will need a generous amount to keep the marshmallows melting smoothly.
- Mini Marshmallows – Mini marshmallows melt faster and more evenly than the jumbo ones. You want fresh marshmallows; stale ones will result in a harder treat.
- Creamy Peanut Butter – Avoid “natural” peanut butter where the oil separates. You need the stability and sugar content of a standard creamy peanut butter (like Jif or Skippy) for the best texture.
- Vanilla Extract – A splash of high-quality vanilla rounds out the flavors.
- Rice Krispies Cereal – The star of the show. Ensure your cereal is fresh for maximum crunch.
For the Swirled Topping
- Semi-Sweet Chocolate Chips – Semi-sweet balances the sweetness of the marshmallow base perfectly. Milk chocolate can make the dish cloyingly sweet.
- Creamy Peanut Butter – This will be melted separately and swirled into the chocolate.
- Butter – A small pat of butter added to the melting chocolate gives it a glossy shine and prevents it from cracking when cut.
Step-by-Step Instructions
Step 1: Prepare Your Pan
Line a 9×9 inch square baking pan with parchment paper or aluminum foil. Leave an overhang on the sides to act as “handles” for easy removal later. Lightly grease the lining with butter or non-stick spray.
Step 2: Melt the Base Mixture
In a large pot over low heat, melt the butter. Once melted, add the mini marshmallows. Stir constantly with a rubber spatula. Patience is key here—do not crank up the heat, or the sugar in the marshmallows will caramelize and turn hard later. Stir until the marshmallows are completely smooth and melted.
Step 3: Add Flavor
Remove the pot from the heat immediately. Stir in the peanut butter and vanilla extract until fully combined. The mixture should be a uniform golden-tan color.
Step 4: Fold in the Cereal
Gently fold in the Rice Krispies cereal. Use a folding motion to coat every single kernel without crushing the cereal. You want the mixture to be evenly distributed so there are no dry pockets.
Step 5: Press into Pan
Transfer the sticky mixture into your prepared pan. Pro Tip: Do not pack it down too hard! lightly press it into the corners and smooth the top. If you compress it too much, you will end up with a dense, hard brick. Use the back of a buttered spoon or your hands (lightly wet with water) to press gently.
Step 6: Melt the Toppings
In a small microwave-safe bowl, melt the chocolate chips with a teaspoon of butter in 30-second intervals, stirring in between until smooth. In a separate small bowl, melt the peanut butter for about 20-30 seconds until it is pourable.
Step 7: Create the Swirl
Pour the melted chocolate over the Rice Krispie base and spread it into an even layer. Immediately drop spoonfuls of the melted peanut butter on top of the wet chocolate. Take a butter knife or a toothpick and drag it through the dollops of peanut butter in a swirling motion to create a marbled effect. Do not overmix, or it will just turn light brown.
Step 8: Set and Serve
Let the bars sit at room temperature for about 1-2 hours until the chocolate is set. You can pop them in the fridge for 20 minutes to speed this up, but let them come back to room temperature before serving for the best gooey texture. Lift out of the pan using the parchment handles and cut into squares.
Tips for Success
Freshness Matters: The number one reason for hard treats is stale marshmallows. Always buy a new bag for this recipe. Marshmallows that have been sitting in the pantry for months have lost moisture and will not melt into that gooey ribbon we want.
Low and Slow: Never melt your marshmallows on high heat. High heat changes the structure of the sugar, creating a “toffee” effect that hardens significantly as it cools. Low heat ensures they stay soft and pliable.
Cutting Clean Lines: If you want bakery-perfect squares, let the treats set fully. Remove the entire slab from the pan. Run a sharp chef’s knife under hot water, wipe it dry, and then make your cut. The heat from the knife will glide through the chocolate and marshmallow without tearing.
Variations to Try
While the classic peanut butter chocolate combo is unbeatable, here are a few ways to switch it up:
- The “Scotcheroo” Style: Swap the peanut butter swirl on top for melted butterscotch chips mixed with the chocolate. This creates a sweeter, caramel-like flavor profile.
- Crunchy Textures: Stir in ½ cup of chopped roasted peanuts or pretzels into the cereal mixture for an added salty crunch.
- White Chocolate Drizzle: For a visually stunning tri-color treat, swirl white chocolate in with the semi-sweet and peanut butter toppings.
- Protein Boost: Believe it or not, you can stir a scoop of vanilla or peanut butter protein powder into the marshmallow base if you are looking for a post-workout snack (though let’s be honest, this is mostly for the soul!).
Serving and Storage
These treats are best enjoyed at room temperature. Cold temperatures make the marshmallow and butter mixture stiff.
Storage: Store leftovers in an airtight container on the counter for up to 3 days. If you layer them, place a sheet of wax paper between the layers to prevent the chocolate tops from sticking to the bottoms of the bars above them.
Freezing: You can freeze these! Wrap individual bars in plastic wrap and place them in a freezer bag. They will keep for up to 6 weeks. Thaw on the counter for an hour before eating.
Cultural Context: The Evolution of the Rice Krispie Treat
The original Rice Krispies Treat recipe was invented in 1939 by Malitta Jensen and Mildred Day at the Kellogg Company home economics department. It was originally created as a fundraiser item for a Camp Fire Girls bake sale. Since then, it has become a staple of American home baking due to its simplicity. Adding peanut butter and chocolate—often associated with the Midwest favorite “Scotcheroo”—bridges the gap between a simple cereal treat and a candy bar. This hybrid dessert represents the best of comfort food: easy execution with high-reward flavors.
Frequently Asked Questions
Can I use natural peanut butter?
It is not recommended. Natural peanut butter tends to be runnier and can separate, which might make your treats oily or prevent them from holding together properly. Stick to commercial creamy peanut butter for consistency.
Why are my treats hard?
You likely overheated the marshmallows or pressed the mixture too firmly into the pan. Remember: gentle heat and a gentle hand are the secrets to soft bars.
Can I use marshmallows creme (fluff)?
Yes, you can substitute a 7oz jar of marshmallow creme for the bag of marshmallows, but the texture will be slightly different—often a bit stickier and less chewy.
Enjoy making these Peanut Butter Rice Krispie Treats! They are the perfect combination of salty, sweet, crispy, and creamy. Once you try this version with the swirled top, you will never go back to plain treats again.
Peanut Butter Rice Krispie Treats
Ingredients
Equipment
Method
- Line a 9×9 inch baking pan with parchment paper and lightly grease with butter or cooking spray.
- In a large pot over low heat, melt the 3 tbsp butter. Add marshmallows and stir constantly until completely melted and smooth.
- Remove from heat. Stir in 1/2 cup peanut butter and vanilla extract until well combined.
- Gently fold in the Rice Krispies cereal until completely coated with the marshmallow mixture.
- Transfer mixture to the prepared pan. Lightly press into an even layer using a buttered spatula or wet hands. Do not pack tightly.
- In a microwave-safe bowl, melt chocolate chips and 1 tsp butter in 30-second intervals until smooth. Pour over the treats and spread evenly.
- In a separate small bowl, microwave the remaining 1/4 cup peanut butter for 20-30 seconds until liquid. Drop dollops over the wet chocolate.
- Use a knife or toothpick to swirl the peanut butter into the chocolate.
- Let sit at room temperature for 1 hour or refrigerate for 20 minutes to set. Cut into squares and serve.