Spiral Christmas Tree Ornament with Gold Star 🎄✨
📖 B. INTRODUCTION
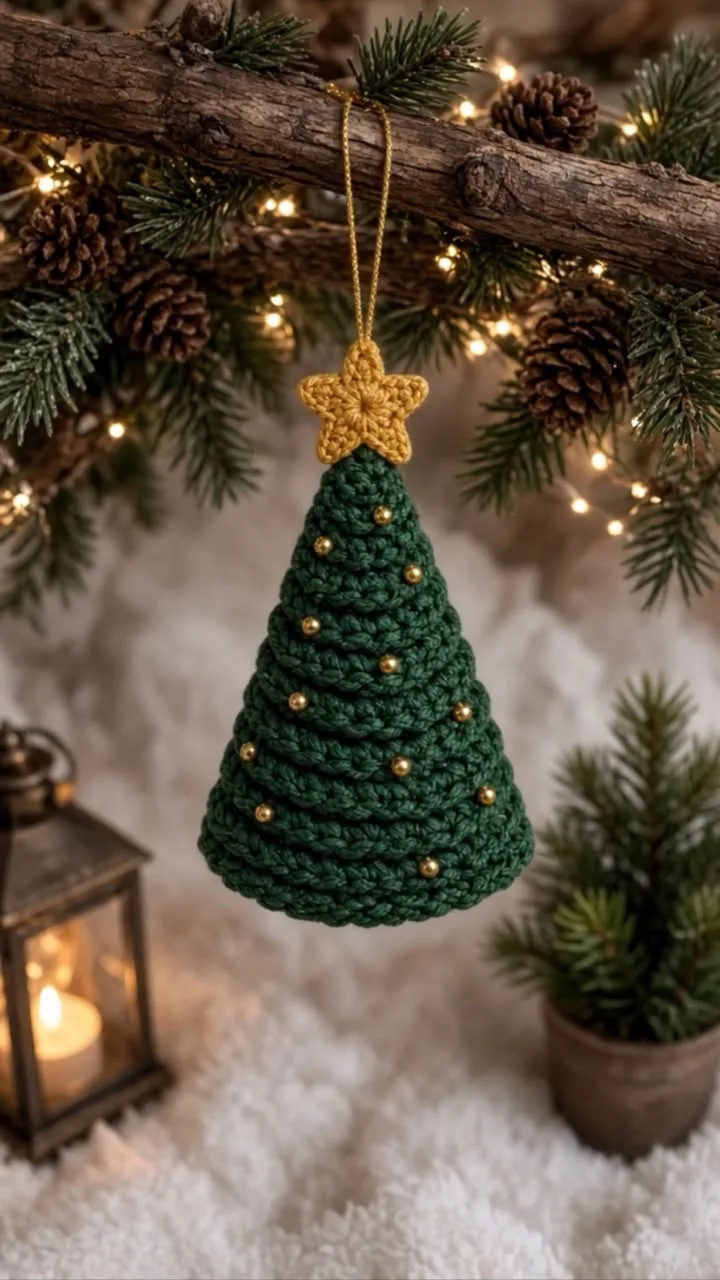
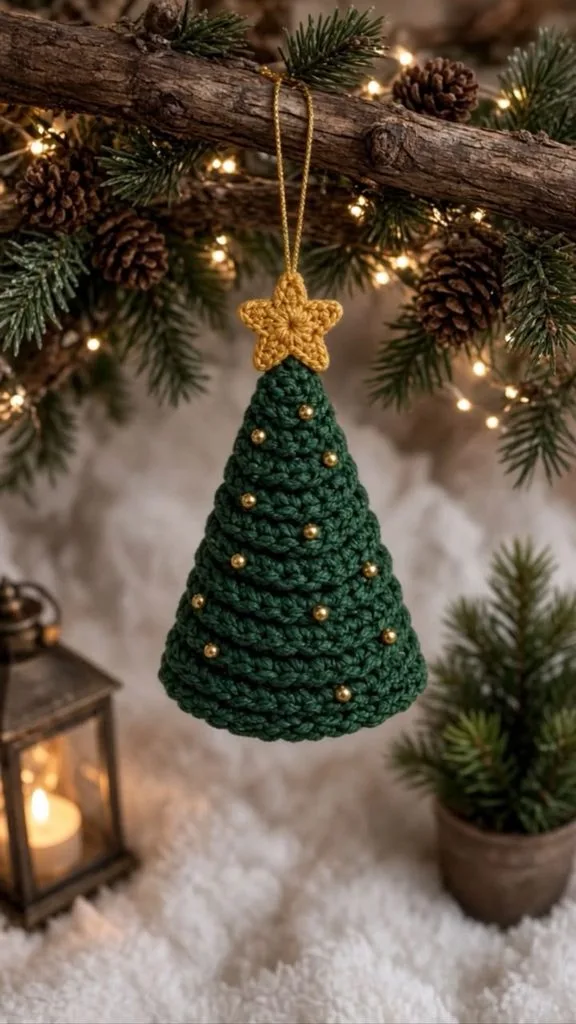
Bring a touch of rustic woodland elegance to your holiday decor with this DIY Spiral Christmas Tree Ornament! If you are looking to step away from overly bright or novelty decorations and embrace a more refined, minimalist aesthetic, this textured evergreen beauty is exactly what your Christmas tree needs. With its deep forest green color, delicate gold bead accents, and classic yellow star topper, this design captures the quiet magic of a winter night.
Crocheted ornaments are a joy to make—they work up incredibly quickly and are practically shatter-proof, making them a fantastic choice for households with playful cats or curious toddlers. They also make exquisite, thoughtful gifts for neighbors, teachers, or coworkers. Attach one to a beautifully wrapped package instead of a traditional bow for a personalized touch that the recipient can keep for years to come.
What makes this pattern truly special is the satisfying ribbed texture. By simply working your stitches into the back loops, you create a continuous, spiraling ridge that wraps around the cone, giving the tree a realistic, layered look without any complicated stitch patterns. Let’s get our hooks ready and crochet some holiday magic!
🔍 C. MAIN PATTERN OVERVIEW
This ornament is worked in three simple components. The main body is a continuous conical shape worked from the top down. By crocheting entirely in the back loops, a spiraling ridge is naturally formed, giving the tree its signature textured “branches.”
A flat, circular base is crocheted separately and sewn to the bottom of the cone to enclose the stuffing and give the tree a crisp, flat bottom. Finally, a small, five-pointed star is crocheted as an applique, sewn to the top, and finished with delicate gold beads and a metallic hanging cord.
🎯 D. SKILL LEVEL
Skill Level: Easy
This is an excellent project for adventurous beginners who are comfortable working in the round. The shape is straightforward, and the texturing technique is highly repetitive and meditative.
Techniques involved:
- Working in continuous rounds (amigurumi style)
- Working in the Back Loop Only (BLO)
- Basic amigurumi increasing
- Simple seaming and embroidery for the bead placements
📏 E. FINISHED SIZE
When crafted with the recommended DK/Light Worsted weight yarn and a 2.5mm hook, the finished tree measures approximately 4.5 inches (11.5 cm) tall from the flat base to the tip of the star, and 2.75 inches (7 cm) wide at the base.
Note: You can easily scale this pattern up or down by choosing a bulkier or finer yarn and adjusting your hook size accordingly.
🧮 F. GAUGE
Gauge: 6 sc and 6 rounds = 1 inch (2.5 cm)
While precise gauge is not critical for this decorative item, maintaining a tight, even tension is essential. You want a dense fabric so that the white fiberfill stuffing does not peek through your beautiful green stitches when the cone stretches.
🧶 G. REQUIRED YARN AMOUNTS
This project uses very little yarn, making it the perfect holiday stash-buster! Choose a sturdy cotton or acrylic blend for best results.
- Deep Green: Approximately 35 yards / 15 grams (For the tree body and base)
- Mustard Yellow / Gold: Approximately 5 yards / 2 grams (For the star)
- Total Project Estimate: ~40 yards
🧰 H. MATERIALS
- Yarn: DK or Light Worsted weight yarn in Deep Forest Green and Mustard Yellow.
- Hook: 2.5mm crochet hook.
- Stuffing: High-quality polyester fiberfill.
- Embellishments: 10-15 small gold beads (4mm size works best).
- Hanging Cord: A 10-inch piece of thin metallic gold cord or heavy thread.
- Tools: Tapestry needle, fine sewing needle (for beads), gold or green sewing thread, stitch markers, and sharp scissors.
⚠️ Safety Note: If making this ornament for young children or pets, skip the plastic/glass beads and embroider the gold ornaments using french knots with yellow or metallic yarn instead.
🔤 I. ABBREVIATIONS – US TERMS
- MR – Magic Ring
- ch – chain
- st(s) – stitch(es)
- sl st – slip stitch
- sc – single crochet
- hdc – half double crochet
- inc – increase (2 sc in the same stitch)
- BLO – Back Loop Only (work the stitch inserting your hook only into the back loop of the “V”)
- FO – fasten off
- ( … ) x N – repeat the instructions between parentheses N times
- [ … ] – total stitch count at the end of the round
📝 J. NOTES BEFORE YOU BEGIN
- Continuous Rounds: The tree body and base are worked in continuous spirals. Do not slip stitch or chain 1 at the end of rounds. Use a stitch marker to keep track of the first stitch.
- The BLO Technique: Starting on Round 3 of the tree body, you will work exclusively in the Back Loop Only. This leaves the front loops unworked, creating the distinct horizontal ridges seen in the reference image.
- Stuffing: Stuff the cone firmly as you go, especially pushing stuffing down into the narrow tip before the base gets too wide.
🪡 K. COMPLETE PATTERN
🌲 Tree Body
What it is for: The textured, conical main piece of the ornament. Color: Deep Green Quantity: Make 1
R1: MR 6. [6] R2: sc in each st around. [6] Note: From Round 3 until the end of the tree body, work all stitches in BLO. R3: (1 sc, inc) x3. [9] R4: sc in each st around. [9] R5: (2 sc, inc) x3. [12] R6: sc in each st around. [12] R7: (3 sc, inc) x3. [15] R8: sc in each st around. [15] R9: (4 sc, inc) x3. [18] R10: sc in each st around. [18] R11: (5 sc, inc) x3. [21] R12: sc in each st around. [21] R13: (6 sc, inc) x3. [24] R14: sc in each st around. [24] R15: (7 sc, inc) x3. [27] R16: sc in each st around. [27] R17: (8 sc, inc) x3. [30] R18: sc in each st around. [30] R19: (9 sc, inc) x3. [33] R20: sc in each st around. [33] R21: (10 sc, inc) x3. [36] R22: sc in each st around. [36] FO: Fasten off, leaving a long tail (about 15 inches) for sewing the base to the tree.
🪵 Tree Base
What it is for: The flat circular bottom that seals the cone. Color: Deep Green Quantity: Make 1
Note: Work in standard both loops. R1: MR 6. [6] R2: inc in each st around. [12] R3: (1 sc, inc) x6. [18] R4: (2 sc, inc) x6. [24] R5: (3 sc, inc) x6. [30] R6: (4 sc, inc) x6. [36] FO: Fasten off and weave in the tail.
⭐ Gold Star Topper
What it is for: The decorative star sitting at the peak of the tree. Color: Mustard Yellow Quantity: Make 1
R1: MR, ch 1. Work the following sequence into the ring 5 times: (sc, ch 2, sl st in the 2nd ch from hook). Join with a sl st to the very first sc. FO: Pull the magic ring closed tightly. Fasten off, leaving a long tail for sewing the star to the top of the tree.
🎨 L. STYLING / ASSEMBLY / STABILITY / FINAL SHAPING
1. Closing the Tree: Stuff the tree cone firmly, ensuring the pointy tip is well-filled so it doesn’t collapse. Pin the flat Tree Base to the open bottom of the Tree Body. Using the long green tail left from the cone, whipstitch the two pieces together, matching them stitch for stitch (both have 36 stitches). Add a little extra stuffing just before you close the gap entirely. Fasten off and hide the knot inside the tree.
2. Attaching the Star: Thread the yellow tail from the star onto your tapestry needle. Position the star flat against the front of the tree’s pointy tip. Sew through the center of the star and directly into the tree tip. Secure it tightly so it stands upright.
3. Adding the Gold Beads: Using a fine sewing needle and standard sewing thread (matching the green yarn or invisible thread), securely sew the gold beads sporadically around the tree body. Nestle them slightly into the indented ridges (the BLO rows) so they look like they are sitting on the branches.
4. The Hanging Loop: Take your metallic gold cord and thread it through the very top point of the yellow star. Tie a secure double knot at the top to create a loop for hanging on your Christmas tree.
✅ Finishing Checklist:
- ✅ Cone is firmly stuffed with a flat, stable base.
- ✅ Star is securely attached to the very top point.
- ✅ Beads are sewn tightly and distributed evenly around the front and sides.
- ✅ Hanging cord is securely looped through the star.
💡 M. HELPFUL CROCHET TIPS
- 💡 Mind your stuffing: When stuffing cones, it’s easy to accidentally create a lump. Stuff in small, bite-sized pinches rather than large clumps to maintain a smooth triangular silhouette.
- 💡 Keep the base flat: Do not overstuff the very bottom of the tree, or your base will bulge outward. You want it to sit perfectly flat if placed on a table.
- 💡 Bead placement: Before sewing, use regular sewing pins with colored heads to map out exactly where you want your beads to go. This ensures a balanced, random distribution.
- 💡 Crisp star points: When making the star, tug firmly on the slip stitch of the “ch 2, sl st” point to make the points look sharp rather than rounded.
🧼 N. CARE INSTRUCTIONS
This ornament is designed to be a long-lasting keepsake.
- Cleaning: Spot clean only. Using a damp cloth, gently dab any dirty areas. Do not soak, as the metal finish on the beads or hanging cord may tarnish, and the fiberfill can warp.
- Storage: Store in a rigid container or ornament box during the off-season. Avoid crushing the cone under heavier decorations, as it can permanently alter the shape of the amigurumi.
❓ R. FAQ
❓ Can I use a metallic yarn for the star? Absolutely! Metallic yarn adds a beautiful twinkle. Just be aware that metallic yarns can be slightly stiffer and more prone to splitting, so take your time on the small stitches of the star.
❓ I don’t have beads. How else can I decorate it? If you don’t have beads (or are making this for a baby), use yellow or gold yarn to embroider French knots all over the tree. It gives the exact same dotted effect but is 100% child-safe!
❓ My tree leans to one side. How do I fix it? Amigurumi cones can occasionally curve if your tension changes halfway through or if the stuffing is uneven. Roll the finished (stuffed and sealed) tree firmly between your palms like you are rolling a piece of clay. This helps distribute the stuffing and straighten the spine of the cone.
❓ Can I make this into a standing table decoration instead of an ornament? Yes! To make it a standing decoration, simply omit the gold hanging cord. If you want to ensure it is very sturdy on a table, cut a circle of stiff cardboard the same size as your Tree Base and insert it into the bottom of the cone right before you finish sewing the base shut.