Spiral Christmas Tree Ornaments — 5 Colorways
📖 Introduction
Bring a touch of modern whimsy to your holiday decor with these charming spiral Christmas tree ornaments. Designed to look like delicate, twisting evergreens, these ornaments are a fast and satisfying project perfect for the busy holiday season. The natural spiraling effect is created using basic crochet stitch height graduation and strategic increases, resulting in a flexible, spring-like shape that catches the eye.
These ornaments are incredibly versatile. They make phenomenal last-minute gifts, beautiful package toppers in place of traditional bows, or stunning additions to a festive window garland. Because they require very little yarn, they are the ultimate stash-busting project for those partial skeins of worsted weight yarn left over from larger winter blankets or sweaters.
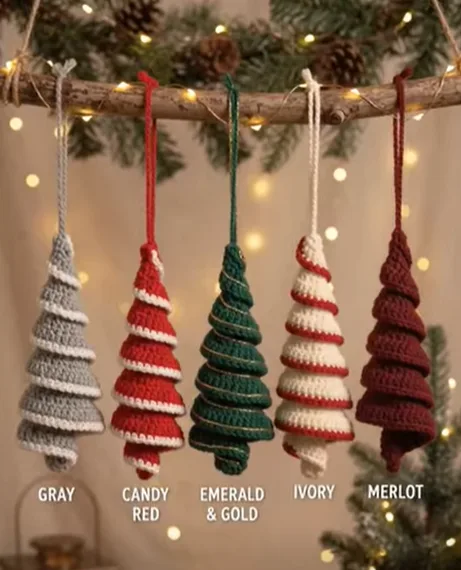
With five distinct colorway options provided—ranging from a playful Candy Red to an elegant Emerald & Gold—you can easily customize a whole forest of these little trees to match any aesthetic. Whether you prefer a classic rustic look or a bold, contemporary palette, this continuous-strip design is simple to adapt, memorize, and crochet in under an hour.
🔍 Main Pattern Overview
This pattern consists of a single, continuous crocheted strip that naturally coils into a conical tree shape. You will start with a foundation chain, then work a row of varying stitch heights (from slip stitches at the top to treble crochet at the base) to create a tapered wedge. The second row utilizes mathematical increases (placing multiple stitches into one) to force the fabric to curl naturally—a technique known as hyperbolic crochet.
Finally, a contrasting or matching edging is applied along the outer rim of the spiral to give the tree definition and a finished, polished look. The hanging loop is created directly from the top of the tree, requiring absolutely no sewing or complicated assembly.
🎯 Skill Level
Beginner-Friendly / Easy
This project is suitable for ambitious beginners who are comfortable with basic stitches and maintaining consistent tension.
Techniques Involved:
- Chain (ch)
- Slip stitch (sl st)
- Single crochet (sc)
- Half double crochet (hdc)
- Double crochet (dc)
- Treble crochet (tr)
- Working basic increases (placing 2 stitches in the same space)
- Changing colors at the end of a row
📏 Finished Size
- Length: Approximately 5 inches (12.5 cm) from the top point to the bottom edge, excluding the hanging loop.
- Bottom Width: Approximately 2.5 inches (6.5 cm) across the widest coiled base.
- Note: The final size will vary slightly depending on your tension, the specific worsted weight yarn used, and how tightly you coil the finished piece. Using a thicker yarn and larger hook will yield a larger tree, while a sport weight yarn and smaller hook will create a miniature version.
🧮 Gauge
Gauge is not strictly critical for this project, as it is an ornamental piece. However, you should aim for tight, consistent stitches so the spiral holds its shape and doesn’t stretch out under its own weight. If your fabric is very loose or floppy, consider dropping down half a hook size.
Suggested Gauge: 4 sts and 3 rows in sc = 1 inch (2.5 cm).
🧶 Required Yarn Amounts
These measurements are estimates per individual ornament.
- Main Tree Color: Approximately 15–20 yards (14–18 meters) of medium #4 worsted weight yarn.
- Edging/Contrast Color: Approximately 4–6 yards (3.5–5.5 meters) of medium #4 worsted weight yarn, or metallic thread/crochet cotton for the gold accent.
- Total Project Estimate: 100 yards is more than enough to create a full set of 5 ornaments.
🧰 Materials
- Hook: US G/6 (4.0 mm) crochet hook (or size needed to achieve a sturdy fabric).
- Yarn: Medium #4 worsted weight acrylic or cotton yarn in your chosen colorways (see Section K for specific color assignments).
- Accent Thread: Size 10 metallic crochet thread (for the Emerald & Gold colorway).
- Tapestry Needle: For weaving in ends.
- Scissors: Small snips for clean cuts.
- Stitch Marker (Optional): To mark the beginning of rows if desired, though not strictly necessary for this flat-worked pattern.
- ⚠️ Safety Note: If making these as toys for pets or very young children, ensure all ends are securely woven in and avoid the metallic thread option, as it can be abrasive or easily unraveled.
🔤 Abbreviations – US Terms
- ch – chain
- sl st – slip stitch
- sc – single crochet
- hdc – half double crochet
- dc – double crochet
- tr – treble (triple) crochet
- inc – increase (work 2 stitches into the indicated stitch)
- st(s) – stitch(es)
- yo – yarn over
- MC – Main Color
- CC – Contrast Color
📝 Notes Before You Begin
- Turning Chains: The turning chain at the beginning of Row 2 does not count as a stitch.
- The Curl: Do not panic when your work begins to twist violently during Row 2. This is the intended hyperbolic effect. The piece will look like a chaotic ruffle until you manually twist it into the neat, stacked cone shape at the end.
- Color Changes: When changing colors for the final edging row, pull the new color through the final step of the last stitch of the previous row for a seamless transition.
- Hanging Loop: We will create the hanging loop at the very top (the narrowest point) of the spiral during the finishing steps. Leave a long starting tail if you prefer to use that for your loop instead of chaining one.
🪡 Complete Pattern
🌲 The Spiral Base (Make 1 per ornament)
This foundational structure is identical for all five colorways. You will crochet the strip, and it will naturally curl.
Yarn/Color: Choose your Main Color (MC) based on the colorway list below.
Starting Point: The narrow top of the tree.
Row 1 (Foundation & Taper): With MC, ch 40.
Working into the back bumps of the chain for a cleaner edge: Sl st in the 2nd ch from hook and the next 3 ch. sc in the next 6 ch, hdc in the next 8 ch, dc in the next 11 ch, tr in the last 10 ch.
Stitch count: 39 sts (4 sl st, 6 sc, 8 hdc, 11 dc, 10 tr).
Row 2 (The Curl): Ch 3 (does not count as a st), turn.
Work an increase (2 sts in the same space) in every stitch across, maintaining the stitch heights established in Row 1.
Instructions: 2 tr in each of the first 10 sts, 2 dc in each of the next 11 sts, 2 hdc in each of the next 8 sts, 2 sc in each of the next 6 sts, 1 sl st in each of the last 4 sts.
Stitch count: 74 sts.
Fasten off MC. Weave in the bottom tail. Leave the top tail (near the slip stitches) unworked for now.
✨ The Edging
The edging defines the spiral and locks the shape into place.
Row 3 (Edging):
With the right side of Row 2 facing you, attach your Contrast Color (CC) to the first stitch at the bottom (widest part) of the tree.
Ch 1, sc in the first st and in each st across the entire edge, working your way up to the narrow top point.
Stitch count: 74 sc.
Fasten off CC, leaving a short tail for weaving. Do not weave in the top tails yet.
🎨 The 5 Colorways
Follow the color pairings below to replicate the exact looks from the reference photo.
- Gray: MC is Light Heather Gray. CC is Ivory/White.
- Candy Red: MC is Bright Cherry Red. CC is Ivory/White.
- Emerald & Gold: MC is Deep Emerald Green. CC is Gold Metallic Crochet Thread (hold the thread double if it is very thin, and work the edging as slip stitches instead of single crochet for a delicate look).
- Ivory: MC is Ivory/Cream. CC is Bright Cherry Red.
- Merlot: MC is Dark Burgundy/Merlot. CC is the same Dark Burgundy/Merlot (work the edging in the exact same color for a thick, solid silhouette).
🔗 Creating the Hanging Loop
- Thread the top tail of your MC onto your tapestry needle.
- Pass the needle through the very top point of the tree (where the slip stitches meet the edging) to secure the tip.
- Remove the needle. Insert your hook into that top point, pick up your MC yarn, and chain 25 (or until your loop is roughly 4 inches long).
- Slip stitch back into the top point of the tree to close the loop.
- Fasten off and weave in all remaining ends securely inside the top coils.
🎨 Styling / Assembly / Stability / Final Shaping
Because this is a flexible, spring-like structure, how you style it dictates the final appearance.
- Twisting into Shape: Hold the top of the tree (where the loop is) in one hand, and gently pull the bottom of the tree downward. Twist the fabric in the direction of the natural curl until the layers stack neatly on top of one another. The contrasting edge should form a perfect, continuous spiral staircase down the outside.
- Blocking (Optional): If your yarn is stiff or the spiral is stubbornly folding in on itself, you can steam block it. Pin the tree to a blocking mat in its neatly stacked conical shape. Hold a steamer or steam iron a few inches away (do NOT touch acrylic yarn with the iron) and let the steam relax the fibers. Let it dry completely before unpinning.
- Stability: If you want the tree to remain permanently elongated and resist compressing like a spring, you can take a needle and a strand of matching MC yarn and run a single, invisible straight stitch vertically down the inner core of the spiral, tacking each layer to the one below it. This locks the height in place.
💡 Helpful Crochet Tips
- 💡 Count Your Chains: The taper depends on having the correct number of stitches in each height category. Double-check your initial foundation chain count before proceeding to Row 1.
- 💡 Tension at the Top: When working the slip stitches and single crochets at the narrow top of the tree, keep your tension tight. This ensures a sharp, neat point.
- 💡 Invisible Edging Joins: When finishing your CC edging at the top point, use an invisible fasten-off to make the tip look perfectly seamless.
- 💡 Yarn Substitution: You can use cotton yarn for a stiffer, more structured tree, or acrylic for a softer, fluffier look. Just ensure your hook size matches the yarn weight.
- 💡 Working in the Back Bump: Crocheting Row 1 into the back bump of the foundation chain leaves the front “V”s exposed. This makes adding a bottom border easier if you ever decide to customize the base.
- 💡 Taming the Metallic Thread: If working the Emerald & Gold colorway, metallic thread can be slippery. Work slowly, and ensure you catch the entire thread (especially if holding it double) with your hook to avoid snags.
🧼 Care Instructions
- Acrylic Ornaments: Spot clean with a damp cloth and mild soap. If deeply soiled, hand wash gently in cool water, gently squeeze out excess water in a towel (do not wring), and lay flat to dry, manually reshaping the spiral before it sets.
- Cotton Ornaments: Hand wash in cold water. Cotton may require re-blocking (pinning into shape) after washing to restore its crisp edges.
- Storage: Store flat in a shallow box to prevent the spirals from being permanently crushed under heavier decorations.
❓ FAQ
❓ Can I make these bigger for a centerpiece?
Yes! To make a larger tree, increase your starting chain (e.g., chain 60). You will need to expand the taper by adding more stitches to each height category (more sc, more hdc, more dc, more tr, and you can even introduce double-treble crochets at the very bottom).
❓ Why is my tree curling the wrong way?
Hyperbolic crochet will naturally curl toward the side that has the tightest tension. Once you finish the edging, manually manipulate and twist the fabric into a cone. The fabric will comply and hold the stacked shape once coaxed into place.
❓ Do I have to cut the yarn between the base and the edging?
If you are making the Merlot solid colorway where the base and edging are the same color, you do not need to cut the yarn! Simply chain 1, turn, and immediately begin the edging row along the top of Row 2.
❓ Can I add beads or sequins?
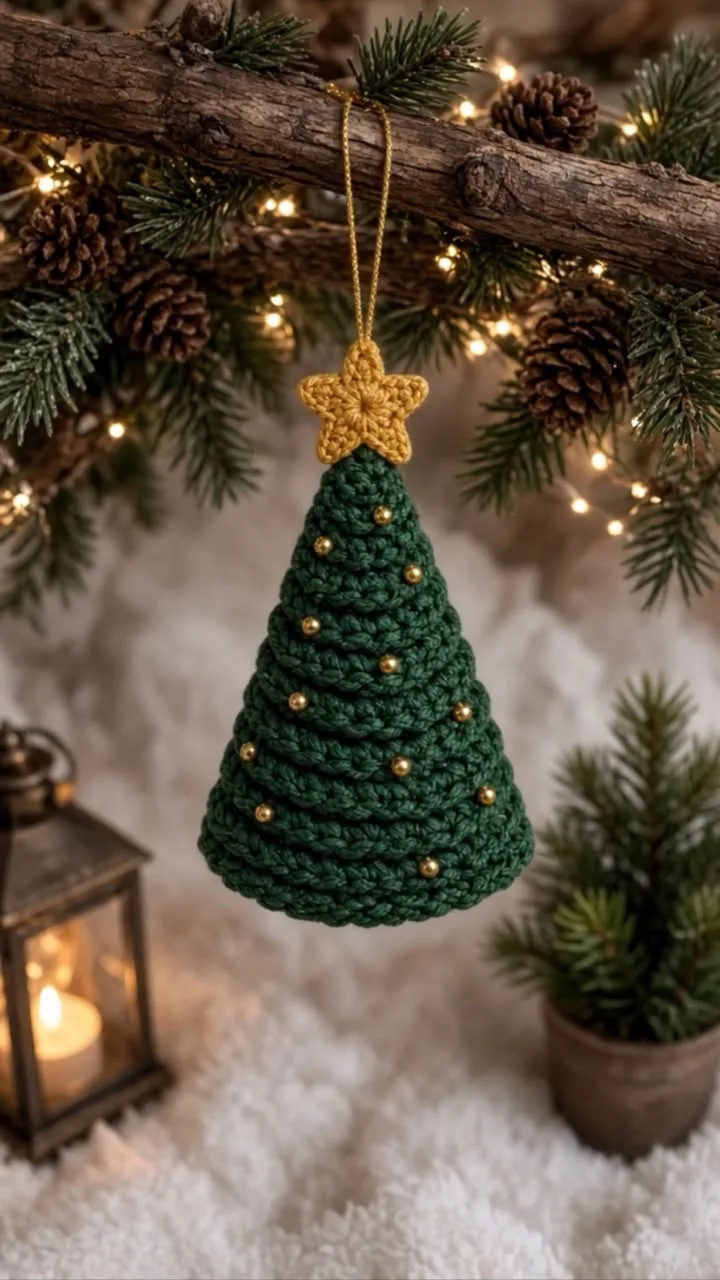
Absolutely. You can sew small seed beads or sequins onto the finished tree to act as “ornaments.” Add them after the shaping process so you know exactly which parts of the spiral will be visible.
❓ What if I don’t have metallic thread for the Emerald tree?
If you lack metallic thread, a very thin yellow or mustard-colored embroidery floss, or even a fingering-weight yellow yarn, will give a similar festive contrast.