Jolly Santa Spiral Ornament & Keychain Crochet Pattern
📖 B. INTRODUCTION
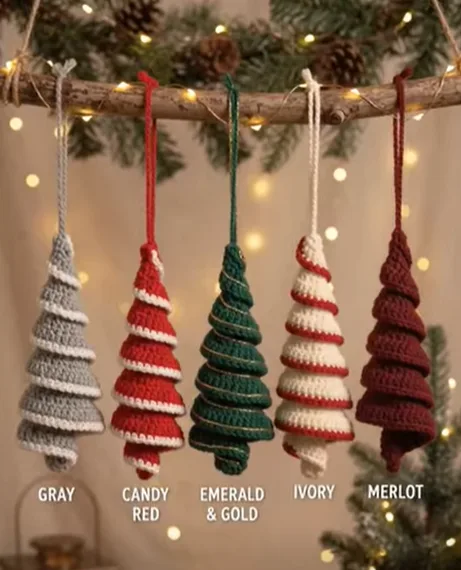
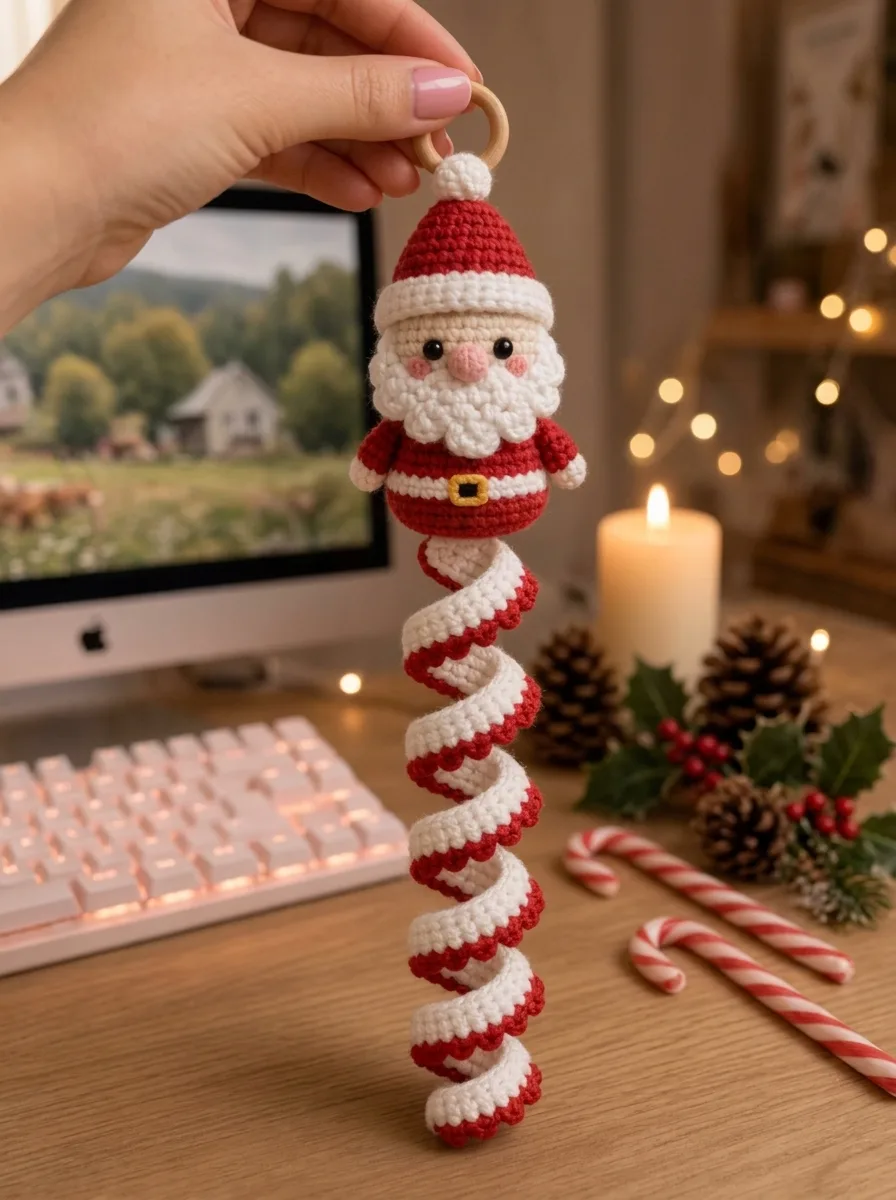
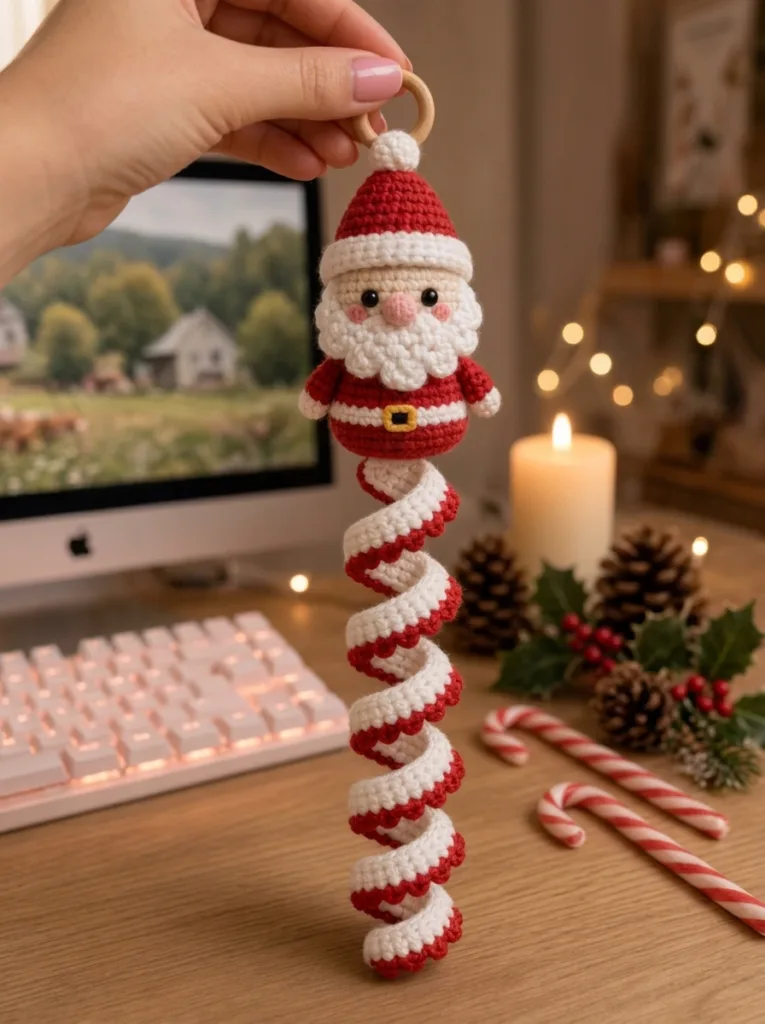
Get ready to add a whimsical touch of holiday magic to your crafting queue! This adorable Santa spiral keychain pattern features a classic, chubby-cheeked Saint Nick perched atop a long, eye-catching red and white twirling curly-cue. Whether you want to hang him from your Christmas tree, dangle him from your car mirror, or attach him to your favorite winter tote bag, this quick and delightful project is sure to spread smiles.
This design was inspired by the cheerful aesthetic seen combining a traditional round amigurumi figure with a playful, interactive spiral tail. Crocheting this piece offers the perfect balance of simple sphere-shaping and the deeply satisfying rhythm of working spiral corkscrews.
Because of its modular nature, it’s highly customizable. You can easily swap the wooden ring for a metal keychain finding, adjust the length of the spiral tail by chaining more or fewer stitches, or even change Santa’s hat color to match a specific holiday theme. It’s a wonderful scrap-busting project that works up in just a few hours!
🔍 C. MAIN PATTERN OVERVIEW
This project is constructed in several manageable modules that are crocheted separately and then securely assembled.
- The Main Figure: Santa’s body and head are crocheted as a single continuous piece from the bottom up, featuring a color change for his iconic white belt.
- The Details: His hat is a classic cone with a textured brim and a mini pom-pom, complete with an attached wooden ring for hanging.
- The Face & Beard: A custom, textured beard frames his face, completed with a tiny round nose, safety eyes, and a dab of pink blush. Small arms are sewn to the sides.
- The Spirals: The bottom dangle consists of two separate, tightly coiled crochet strips (one red, one white) that are intertwined into a stunning double-helix and sewn to the base of Santa’s body.
🎯 D. SKILL LEVEL
Easy to Intermediate This pattern is accessible to confident beginners who have mastered basic amigurumi techniques, though the assembly and textured beard require a bit of patience.
Techniques you will use:
- Working in a magic ring
- Continuous spirals and joined rounds
- Single crochet, half double crochet, and double crochet
- Increases and invisible decreases
- Basic color changing
- Sewing amigurumi parts together
📏 E. FINISHED SIZE
When made with the recommended DK weight yarn and a 2.5 mm hook, the finished project measures approximately:
- Santa Figure (Top of pom-pom to base of body): 3.5 inches (9 cm)
- Spirals (Unstretched): 5 inches (12.5 cm)
- Total Length (including wooden ring): 9.5 inches (24 cm)
Note: Your choice of yarn weight, hook size, and personal tension will directly affect the final size.
🧮 F. GAUGE
Gauge: 6 sc and 6 rows = 1 inch (2.5 cm) While exact gauge is not critical for this amigurumi project, it is very important to maintain tight, consistent stitches. You should not be able to see the fiberfill stuffing through your fabric. If your stitches are too loose, consider dropping down half a hook size.
🧶 G. REQUIRED YARN AMOUNTS
This pattern is an excellent stash-buster! Estimates are based on standard DK weight (Light 3) cotton or cotton-blend yarn.
- 🔴 Main Color (Red): Approx. 25 yards (23 m)
- ⚪ Contrast Color (White): Approx. 20 yards (18 m)
- 🍑 Skin Tone (Peach/Beige): Approx. 8 yards (7 m)
- 🟡 Accent Color (Yellow/Gold): Just a 12-inch scrap for the belt buckle.
- 🌸 Accent Color (Pink): Just a 12-inch scrap for the cheeks (or use real makeup blush).
🧰 H. MATERIALS
- 🧶 Yarn: DK weight cotton yarn in Red, White, Skin Tone, Yellow, and Pink.
- 🪝 Crochet Hook: 2.5 mm (or size needed to achieve a tight fabric).
- 👀 Safety Eyes: One pair of 6 mm black safety eyes.
- ☁️ Stuffing: High-quality polyester fiberfill.
- 🪵 Wooden Ring: One 1.5-inch (4 cm) smooth wooden ring (or a standard metal keychain ring).
- ✂️ Scissors
- 🪡 Tapestry Needle: For sewing parts and weaving in ends.
- 📍 Pins: For holding pieces in place during assembly.
- 🧵 Stitch Markers: To mark the beginning of your rounds.
(Safety Note: If making this item for a child under 3 years old, replace the plastic safety eyes with embroidered black yarn eyes to prevent a choking hazard.)
🔤 I. ABBREVIATIONS – US TERMS
- MR: Magic Ring
- ch: chain
- st(s): stitch(es)
- sl st: slip stitch
- sc: single crochet
- hdc: half double crochet
- dc: double crochet
- inc: increase (2 sc in the same stitch)
- dec: invisible decrease (sc 2 together using front loops only)
- BLO: back loops only
- FLO: front loops only
- [ … ] x N: repeat the instructions inside the brackets N times
- ( … ): total number of stitches at the end of the round/row
📝 J. NOTES BEFORE YOU BEGIN
- Continuous Rounds: Unless otherwise stated, work in a continuous spiral without joining or turning. Use a stitch marker to mark the first stitch of each new round.
- Invisible Decreases: Always use the invisible decrease method for amigurumi to prevent gaps.
- Color Changes: When changing colors, complete the final yarn over of the previous stitch with the new color.
- Stuffing: Stuff the head and body firmly as you go, shaping it into a nice round sphere. Do not overstuff to the point that stitches stretch.
🪡 K. COMPLETE PATTERN
👕 Body & Head
Started from the bottom base of the body in Red, working up to the Head.
- R1: In Red, 6 sc in a MR. (6)
- R2: inc in each st around. (12)
- R3: [1 sc, inc] x 6. (18)
- R4: [2 sc, inc] x 6. (24)
- R5: [3 sc, inc] x 6. (30)
- R6-R8: sc in each st around. (30) [3 rounds]
- R9: Change to White. sc in each st around. (30)
- R10: Change to Red. sc in each st around. (30)
- R11: [3 sc, dec] x 6. (24)
- R12: [2 sc, dec] x 6. (18)
- Stop to stuff the body firmly.
- R13: Change to Skin Tone. [2 sc, inc] x 6. (24)
- R14: [3 sc, inc] x 6. (30)
- R15-R19: sc in each st around. (30) [5 rounds]
- Insert safety eyes between R16 and R17, about 5 stitches apart. Stuff the neck area very firmly to prevent wobbling.
- R20: [3 sc, dec] x 6. (24)
- R21: [2 sc, dec] x 6. (18)
- Finish stuffing the head firmly.
- R22: [1 sc, dec] x 6. (12)
- R23: dec x 6. (6)
- Fasten off. Weave the yarn tail through the front loops of the remaining 6 stitches, pull tight to close the hole, and weave in the end.
🎓 Hat
Worked top-down in Red.
- R1: In Red, 4 sc in a MR. (4)
- R2: [1 sc, inc] x 2. (6)
- R3: sc in each st around. (6)
- R4: [1 sc, inc] x 3. (9)
- R5: sc in each st around. (9)
- R6: [2 sc, inc] x 3. (12)
- R7: [3 sc, inc] x 3. (15)
- R8: [4 sc, inc] x 3. (18)
- R9: [5 sc, inc] x 3. (21)
- R10: [6 sc, inc] x 3. (24)
- R11: [3 sc, inc] x 6. (30)
- R12: [4 sc, inc] x 6. (36)
- R13: Change to White. Working in FLO: sc in each st around. (36)
- Fasten off, leaving a long tail for sewing the hat to the head.
⚪ Hat Pom-Pom & Ring Attachment
- R1: In White, 6 sc in a MR. (6)
- R2: inc in each st around. (12)
- R3: sc in each st around. (12)
- R4: dec x 6. (6)
- Stuff lightly. Fasten off, leaving a long tail. Sew the pom-pom to the tip of the hat. Using the same yarn tail, securely sew the wooden ring to the top of the pom-pom, looping the yarn around the wood tightly several times.
🧔 Beard
Worked in rows to create a textured, scalloped framing for the face.
- Row 1: In White, ch 17.
- Row 2: Starting in the 2nd ch from the hook, sl st in next ch, skip 1 ch, 4 dc in the next ch, skip 1 ch. Repeat from * to * 3 more times. sl st in the last ch.
- Fasten off, leaving a long tail for sewing. This will create a curved piece with 4 distinct scallops (bobbles) that will cup the bottom of Santa’s face.
👃 Nose
- R1: In Pink or Skin Tone, 5 sc in a MR. sl st to the first sc.
- Fasten off, leaving a tail for sewing.
💪 Arms (Make 2)
- R1: In White, 5 sc in a MR. (5)
- R2: Change to Red. sc in each st around. (5)
- R3-R5: sc in each st around. (5) [3 rounds]
- Do not stuff. Pinch the top flat and sc 2 across both sides to close.
- Fasten off, leaving a tail for sewing.
🌀 Spirals (Make 2: One Red, One White)
- Row 1: ch 45. (To make a longer or shorter spiral, adjust the starting chain).
- Row 2: Starting in the 3rd ch from the hook, work 3 hdc in EVERY chain across.
- Note: As you crochet, the piece will naturally start to curl. Let it curl and gently twist it in the correct direction to help it along.
- Fasten off, leaving a long tail for sewing.
🎨 L. STYLING / ASSEMBLY / STABILITY / FINAL SHAPING
Follow this order for the neatest finish:
- Embroider the Belt Buckle: Using a tapestry needle and yellow yarn, stitch a small square over the white belt (R9) on the front center of the body.
- Attach the Nose & Cheeks: Sew the nose perfectly centered right below the eyes. If using pink yarn for blush, embroider a small horizontal line directly under the outer edge of each eye.
- Attach the Beard: Pin the beard so it wraps under the nose and curves up the sides of the face towards the eyes. Sew it securely into place using the white yarn tail.
- Attach the Hat: Lightly stuff the red cone of the hat. Position it on top of the head at a slight angle backwards. Sew it securely using the back loops of the white brim (R12/13 intersection) to the head.
- Attach the Arms: Sew the flattened tops of the arms to the sides of the body, right at the neckline where the red meets the skin tone.
- Intertwine and Attach the Spirals:
- Take the red spiral and the white spiral. Hold them side by side at the top.
- Carefully twist them together so they interlock like a double helix.
- Using the long yarn tails from the spirals, sew the top of the intertwined pair firmly to the absolute bottom center (MR base) of Santa’s body. Ensure the stitches go deep into the body base so the spirals can support gentle pulling without tearing out.
✅ Final Finishing Checklist:
- ✅ Belt buckle centered on the front?
- ✅ Spirals securely anchored to the base?
- ✅ Hat firmly attached so the wooden ring can support the weight of the keychain?
- ✅ All loose ends woven in and hidden inside the body?
💡 M. HELPFUL CROCHET TIPS
- 💡 Yarn Under: For amigurumi, using the “yarn under” technique instead of “yarn over” creates tighter, more block-like single crochets that hide stuffing brilliantly.
- 💡 Stuffing Tool: Use the back of your crochet hook or a wooden chopstick to push stuffing firmly into small spaces like the neck.
- 💡 Perfect Spirals: When crocheting the curly cues, they will twist wildly. Once finished, run your fingers down the length, twirling them in the direction of the curl to “set” the shape before intertwining them.
- 💡 Symmetry is Key: Always pin your facial features and arms in place before sewing. Look at the item from the front, sides, and top down to ensure everything is aligned.
- 💡 Invisible Finish: Use an invisible fasten-off for the nose and cheeks to avoid a harsh knot on the front of the face.
- 💡 Reinforce the Ring: Because this is a hanging ornament/keychain, make sure to pass your sewing yarn through the wooden ring and the pom-pom at least 4-5 times for structural security.
🧼 N. CARE INSTRUCTIONS
Due to the wooden ring and safety eyes, this item should not be machine washed. Spot clean only with a damp cloth and mild soap. Gently dab the soiled area and let it air dry completely. Do not wring or soak, as this can warp the wooden ring and warp the tightly coiled spirals.
❓ R. FAQ
❓ Can I use worsted weight (Size 4) yarn instead of DK? Yes, absolutely! If you use worsted weight yarn, just be sure to size up your hook (a 3.5 mm or 4.0 mm is usually best) to match. Your finished Santa keychain will be noticeably larger, making it a great statement ornament.
❓ How do I keep the spirals from untwisting? The spirals naturally want to coil due to the 3 hdc in each stitch. By intertwining the red and the white together, they actually lock each other in place! Just ensure you sew them tightly together at the base of the body.
❓ Are safety eyes safe for babies? No. Despite the name, safety eyes can be pulled off over time and pose a choking hazard for children under 3. If making this for a baby or toddler, please embroider the eyes using black yarn.
❓ I don’t have a wooden ring. What else can I use? You can use a standard split metal keyring, a lobster clasp, or simply crochet a chain loop (ch 15, slip stitch back into the first chain) to create a soft hanging mechanism.
❓ Can I make the spiral tail longer? Definitely! The pattern calls for a starting chain of 45. To make it longer, simply increase your starting chain (for example, chain 60 or 75) and continue following the pattern instructions to work 3 hdc in each chain.