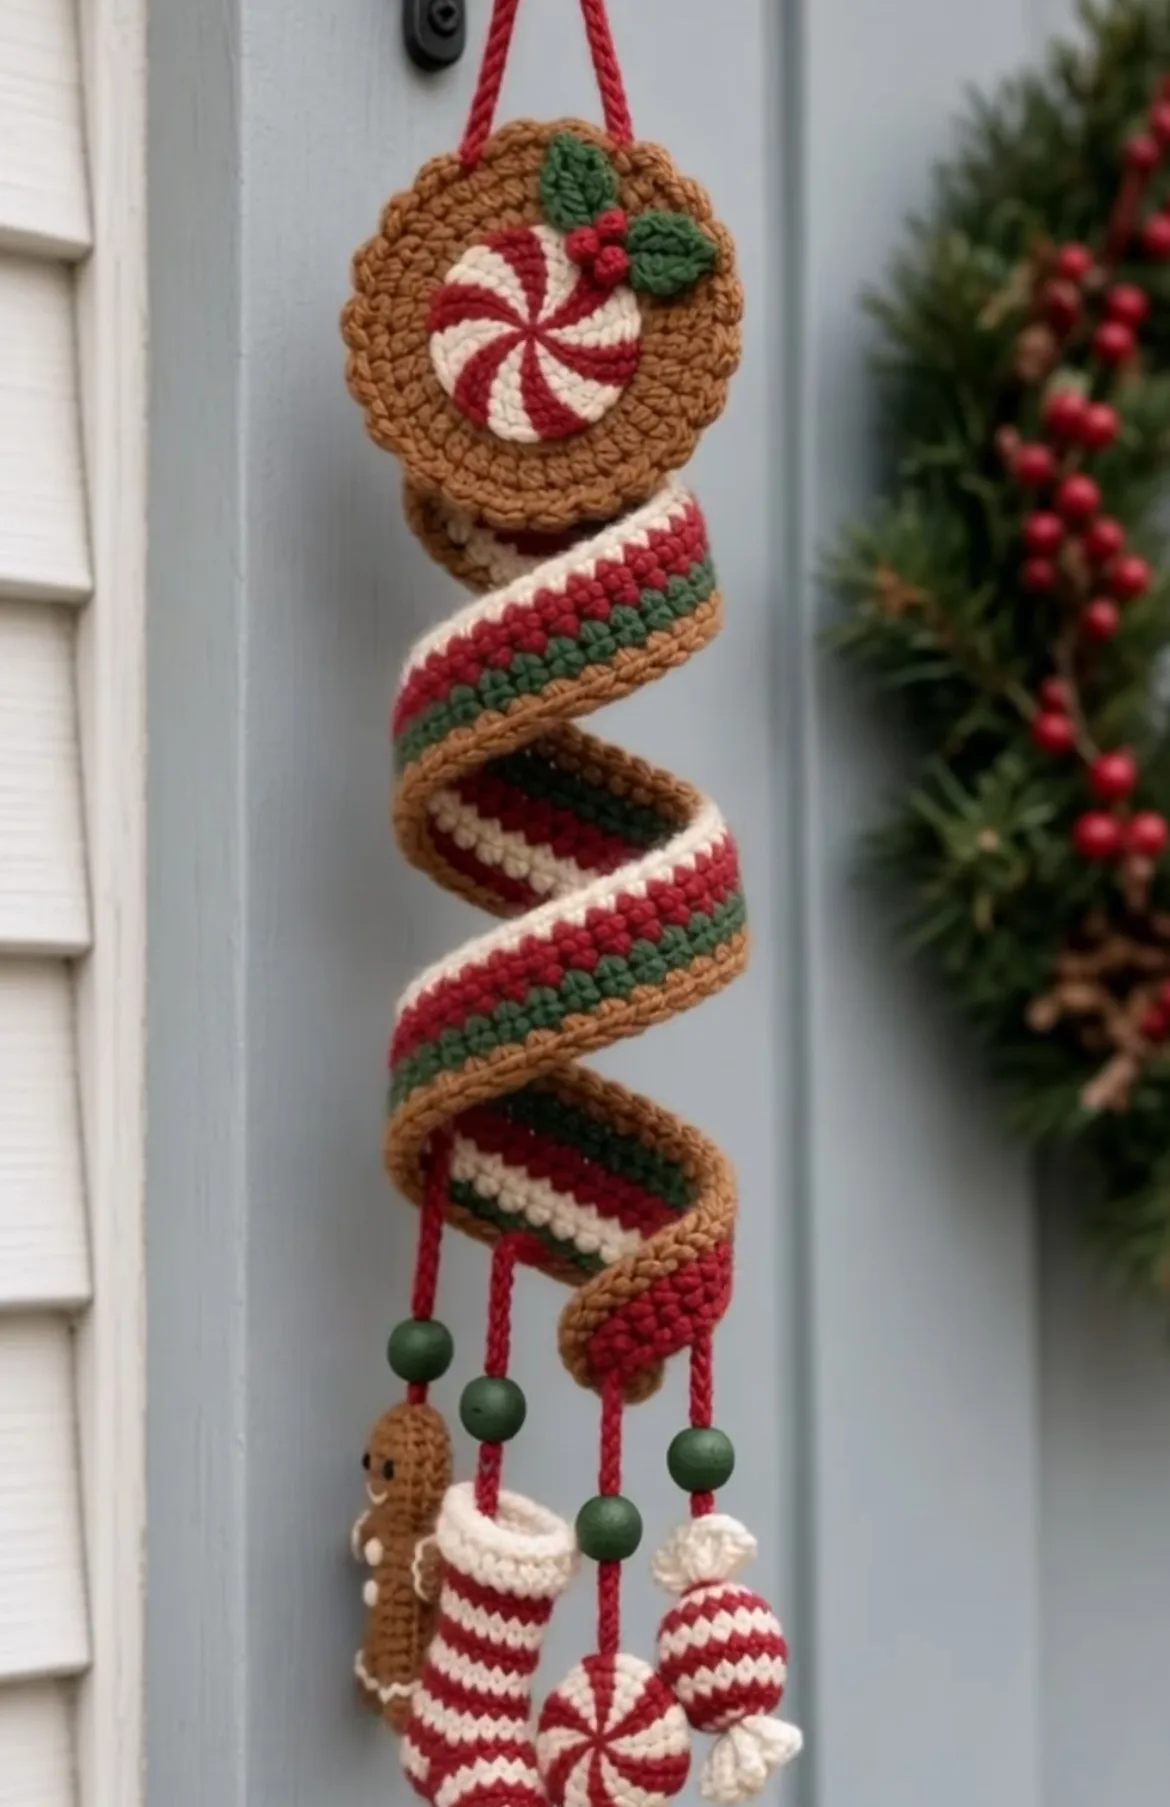
Gingerbread & Peppermint Spiral Door Hanging
📖 ## INTRODUCTION
Welcome the holiday season with a burst of sweet, whimsical charm! The Gingerbread & Peppermint Spiral Door Hanging is a magical, eye-catching decoration that brings the cozy joy of a Christmas bakery right to your front door or living room wall. Inspired by classic holiday treats, this design combines rich gingerbread browns with bright cherry reds, deep forest greens, and snowy white accents to create a piece that feels both nostalgic and totally unique.
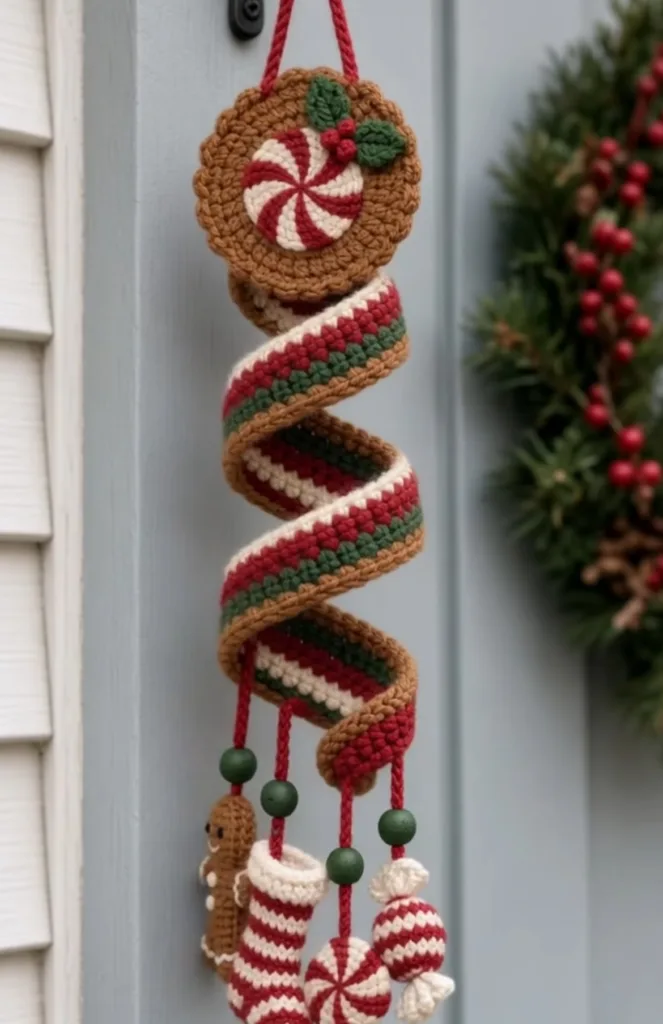
This beautiful hanging features a delightful scalloped gingerbread cookie medallion at the top, adorned with a classic peppermint candy and crisp holly leaves. Below it, a striped, multi-colored spiral gently curls and bounces, giving the piece a lively, dynamic feel. Finally, four sweet miniature amigurumi ornaments—a gingerbread man, a striped stocking, a peppermint disc, and a wrapped candy—dangle merrily from the bottom, accented by chunky green wooden beads.
Whether you are crafting a standout piece for your own holiday decor, creating a beautiful handmade gift for a teacher, or looking for a show-stopping item for your next winter craft fair, this pattern is a joy to crochet. Because it’s built in small, manageable pieces, it’s a wonderful project for using up leftover yarn from your stash!
🔍 ## MAIN PATTERN OVERVIEW
This festive door hanging is an assembly of several fun components. You will begin by crocheting the top “cookie” medallion, made of two scalloped circles sandwiched together for stability, and decorate it with a peppermint appliqué and holly leaves. Next, you will crochet the dramatic main spiral using strategic increases in the foundation row to force the yarn to curl naturally into a helix. Finally, you will crochet the four miniature amigurumi danglers, thread them with wooden beads, and construct the final hanging piece.
🎯 ## SKILL LEVEL
Intermediate This pattern requires familiarity with shaping, color changes, and amigurumi techniques.
Techniques Involved:
- Crocheting in joined rounds and continuous spirals
- Forcing a curl by working multiple stitches into a foundation chain
- Tapestry crochet or neat color switching (for the peppermint stripes)
- Basic amigurumi shaping and stuffing
- Surface sewing and multi-part assembly
📏 ## FINISHED SIZE
Measurements:
- Total Length (including hanger and danglers): Approximately 22 inches (56 cm) long, depending on how tightly the spiral springs.
- Top Medallion Width: 4.5 inches (11.5 cm)
- Spiral Length (curled): 9 inches (23 cm)
Note: The length is easily adjustable. You can make the spiral longer or shorter by adjusting the starting foundation chain.
🧮 ## GAUGE
- Medallion: First 3 rounds of the gingerbread circle = 2.5 inches (6.5 cm) across.
Gauge is not critical for this decorative item. However, ensure your stitches are tight enough on the miniature amigurumi danglers so the white fiberfill stuffing does not show through.
🧶 ## REQUIRED YARN AMOUNTS
A sturdy Worsted Weight (Size 4) yarn—either acrylic or cotton—works best to help the piece keep its shape and the spiral hold its bounce.
- 🟤 Main Color (MC) – Gingerbread Brown: Approx. 80 yards (73 meters)
- 🤍 Contrast Color 1 (CC1) – Cream/White: Approx. 60 yards (55 meters)
- ❤️ Contrast Color 2 (CC2) – Cherry Red: Approx. 60 yards (55 meters)
- 🌲 Contrast Color 3 (CC3) – Forest Green: Approx. 40 yards (36 meters)
🧰 ## MATERIALS
- Hook: 4.0 mm (US Size G) crochet hook
- Yarn: Worsted weight (Size 4) in Brown, White, Red, and Green
- Beads: 4 large green wooden or acrylic craft beads (approx. 12mm – 15mm with a wide hole)
- Stuffing: A small amount of polyester fiberfill for the danglers
- Needle: Tapestry needle for sewing parts and weaving ends
- Scissors: Craft scissors
- Optional: A piece of plastic canvas or stiff cardboard to put inside the top medallion for extra rigidity.
🔤 ## ABBREVIATIONS – US TERMS
- ch: chain
- sl st: slip stitch
- sc: single crochet
- hdc: half double crochet
- dc: double crochet
- inc: single crochet increase (2 sc in one stitch)
- dec: single crochet decrease (sc 2 together)
- MR: magic ring
- sk: skip
- st(s): stitch(es)
- BLO: back loop only
📝 ## NOTES BEFORE YOU BEGIN
- Spiral Mechanics: The long spiral is created by putting 2 half double crochets into every single chain of the foundation row. It will look like a wavy mess at first—don’t panic! As you add the striped rows, the weight and width will force it into a beautiful, neat coil.
- Color Changes: For the peppermint motifs, change colors on the last pull-through of the previous stitch to keep the lines crisp.
- Assembly: Leave long yarn tails when fastening off your appliqués and danglers; you will use these tails for sewing.
🪡 ## COMPLETE PATTERN
🍪 1. Top Gingerbread Medallion (Make 2)
You will make a front and a back piece to give the top structure.
R1: With MC (Brown), make a MR. ch 2 (does not count as st), 12 dc into the ring. sl st to first dc to join. (12) R2: ch 2, 2 dc in each st around. sl st to join. (24) R3: ch 2, 1 dc, 2 dc in next st. Repeat from * around. sl st to join. (36) R4 (Scallops): ch 1. sk 1 st, 5 dc in the next st, sk 1 st, sl st in the next st. Repeat from * exactly 9 times around. Fasten off. On the second piece (the back), do not fasten off; leave the yarn attached for assembly later.
🍬 2. Peppermint Appliqué (Make 1)
Worked in alternating red and white to create the candy swirl.
R1: With CC1 (White), make a MR. ch 2. Work 12 dc into the ring, alternating colors every 2 stitches (2 dc White, 2 dc CC2 Red, 2 dc White, etc.). sl st to first dc to join. (12) R2: Continuing the color pattern, ch 2. Work 2 dc in each st around, matching White over White and Red over Red. sl st to join. (24) Fasten off, leaving a long White tail for sewing.
🌿 3. Holly Leaves & Berries
Leaves (Make 2): With CC3 (Green), ch 7. sc in 2nd ch from hook, hdc in next, dc in next 2, hdc in next, 3 sc in last ch. Rotate to work down the other side of the chain: hdc in next, dc in next 2, hdc in next, sc in last ch. sl st to the first sc to join. Fasten off, leaving a tail for sewing. Berries: Thread your tapestry needle with CC2 (Red). You will embroider three French knots directly onto the medallion during assembly.
🌀 4. The Striped Spiral Body
This piece starts very long and curls up on itself.
Row 1 (White): With CC1, ch 100. Work 2 hdc in the 3rd ch from the hook, and work 2 hdc in every remaining ch across. (196 sts). Fasten off CC1. (Note: It will look like a ruffled snake. This is correct!) Row 2 (Red): Join CC2 (Red) to the first st of Row 1. ch 2, hdc in each st across. Fasten off CC2. Row 3 (Green): Join CC3 (Green) to the first st of Row 2. ch 2, hdc in each st across. Fasten off CC3. Row 4 (Brown Edge): Join MC (Brown) to the first st of Row 3. ch 1, sc in each st across to create a clean, finished edge. Fasten off MC.
🧸 5. Miniature Gingerbread Man
Worked continuously. Head: With MC (Brown), MR 6 sc. (6) R2: inc x6. (12) R3-R4: sc in each st around. (12) R5: dec x6. (6) Stuff the head lightly. Body: R6: inc x6. (12) R7-R8: sc in each st around. (12) R9: dec x6. (6) Stuff the body. Fasten off, weave tail to close. Details: Using CC1 (White) yarn on a tapestry needle, embroider tiny lines for arms, legs, and a smile.
🧦 6. Miniature Stocking
R1: With CC1 (White), MR 6 sc. (6) R2: inc x6. (12). R3: Change to CC2 (Red). BLO sc in each st around. (12) R4: Change to CC1 (White). sc around. (12) R5: Change to Red. sc around. (12) R6: Change to White. sc around. (12) R7: Change to Red. sc around. (12) Cuff: Change to White. ch 1, 2 sc in each st around. (24). Fasten off, fold cuff down.
🍭 7. Miniature Peppermint Disc
R1: With CC1 (White), MR 6 sc. (6) R2: inc with White, inc with Red. Repeat around. (12). R3: * (sc 1, inc) in White, (sc 1, inc) in Red *. Repeat around. (18) Fasten off. Make a solid white circle of the same size, place them wrong-sides together, and sc around the edges in Red to join them, stuffing lightly before closing.
🍬 8. Miniature Wrapped Candy
R1: With CC2 (Red), MR 6 sc. (6) R2: inc x6. (12) R3-R5: sc in each st around, alternating one stitch Red, one stitch White. (12) R6: With Red, dec x6. (6). Stuff lightly. Fasten off. Wrappers: Join White to the remaining front loops of R1. ch 3, sl st in next st around to create a ruffle. Repeat on the front loops of R6.
🎨 ## L. STYLING / ASSEMBLY / STABILITY / FINAL SHAPING
Now, bring your gingerbread masterpiece to life!
- Medallion Assembly:
- Sew the Peppermint Appliqué to the exact center of the front Gingerbread Medallion.
- Sew the two Green Holly Leaves near the top edge of the peppermint.
- Using Red yarn, embroider 3 large French knots at the base of the leaves to create the berries.
- Attaching the Spiral:
- Take the top, widest end of your coiled spiral.
- Place the back Medallion behind the front Medallion (wrong sides facing).
- Insert the top edge of the spiral between the two medallions at the bottom center.
- Using the brown yarn still attached to your back medallion, sc the two medallions together around the outer edges, catching the top of the spiral in your stitches to secure it firmly inside the “sandwich.” (Optional: slip a cardboard circle inside before closing completely for extra stiffness).
- Hanger:
- Join Red yarn to the top center of the joined medallion. ch 20, sl st back into the same space to create a hanging loop. Secure and weave in ends.
- Dangling Ornaments:
- Cut four 8-inch lengths of Red yarn.
- Attach one string to the top of each amigurumi miniature (Gingerbread, Stocking, Peppermint, Wrapped Candy).
- Thread one large green wooden bead onto each string, sliding it down to sit directly on top of the ornament.
- Tie the top of each string evenly along the bottom-most curve of the main spiral. Space them about 1 inch apart so they hang without tangling.
- Final Shaping: ✅ Give your spiral a gentle twist with your fingers so the colors wrap cleanly like a barber pole.
💡 ## M. HELPFUL CROCHET TIPS
- 💡 Spiral Twist: If your spiral twists the “wrong” way and hides the brown edging, simply untwist it by hand and twist it in the opposite direction. The tension of the stitches will eventually memorize the new direction!
- 💡 Stiffening the Top: Because door hangings are subject to movement, putting a plastic canvas circle or a stiff piece of felt inside the cookie medallion keeps it from flopping forward.
- 💡 Weaving Ends: Weave the ends of the striped spiral under their matching colors to keep the back side looking as neat as the front.
- 💡 Bead Holes: If your yarn is too thick to pass through the green beads, thread a regular sewing needle with strong thread, tie it to the end of your yarn, and use the needle to pull the yarn through the bead.
🧼 ## N. CARE INSTRUCTIONS
- Cleaning: Spot clean only using a damp cloth and mild detergent. Do not machine wash, as the agitation will warp the spiral and the wooden beads may swell or bleed color.
- Storage: When packing away for the season, lay the spiral flat in a box rather than stretching it out. Stuff acid-free tissue paper around the dangling ornaments to prevent them from crushing.
❓ ## R. FAQ
❓ My spiral is just wavy, not curling into a tight spring. What did I do wrong? You may not have added enough stitches in Row 1. Ensure you put exactly two half double crochets into every single chain. If you crochet very loosely, you may need to drop down a hook size to force the tension tighter, which creates the curl.
❓ Can I use acrylic yarn instead of cotton? Absolutely! Acrylic yarn actually works brilliantly for this project because it is lightweight, which stops the spiral from stretching down too far under its own weight.
❓ How can I make it longer? For a longer door hanging, simply start with a longer foundation chain. For every extra inch of curled spiral you want, add approximately 12-15 chains to your starting row.
❓ The amigurumi danglers are spinning backward when it hangs. How do I fix this? When tying the red cords to the bottom of the spiral, use a tiny dot of hot glue or fabric glue on the knot once the ornaments are facing forward. This locks the string in place so they won’t spin backwards.