Free Amigurumi Holiday Decor Pattern
📖 INTRODUCTION
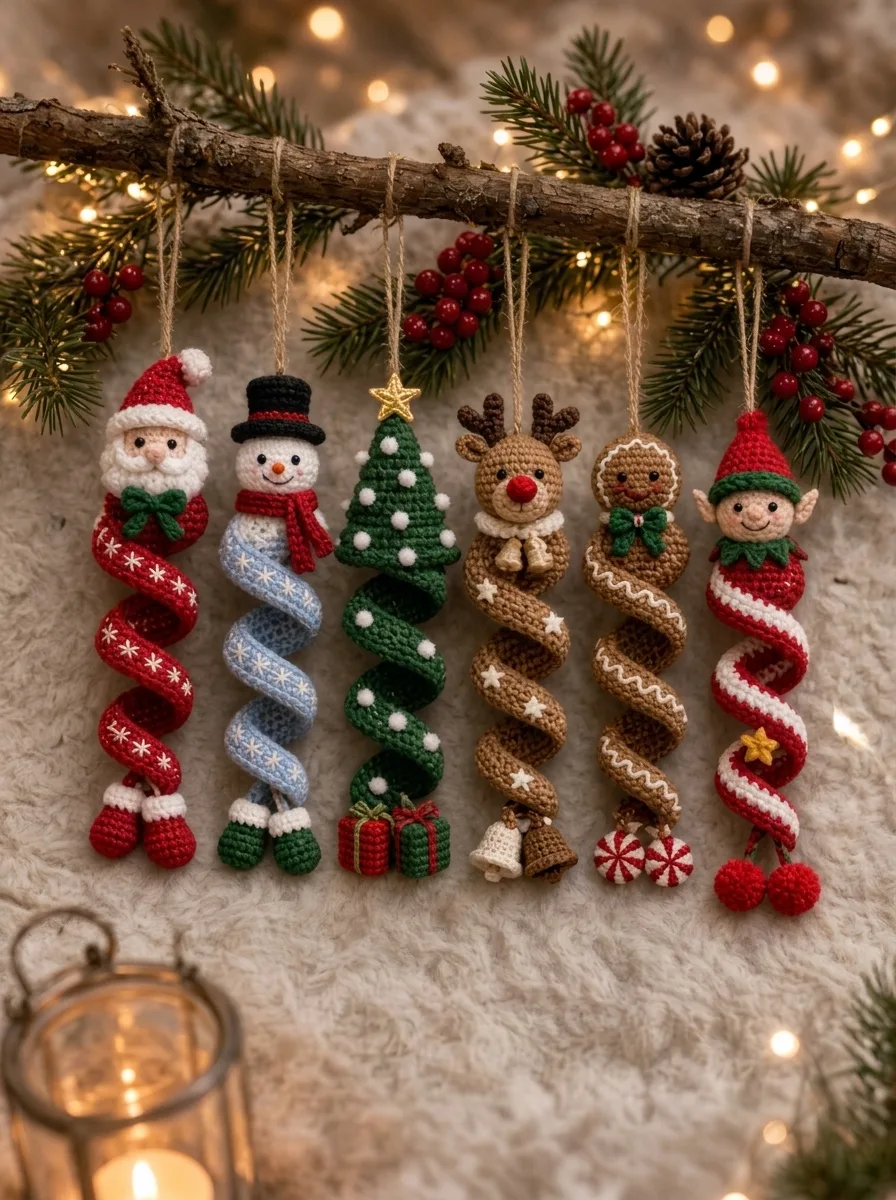
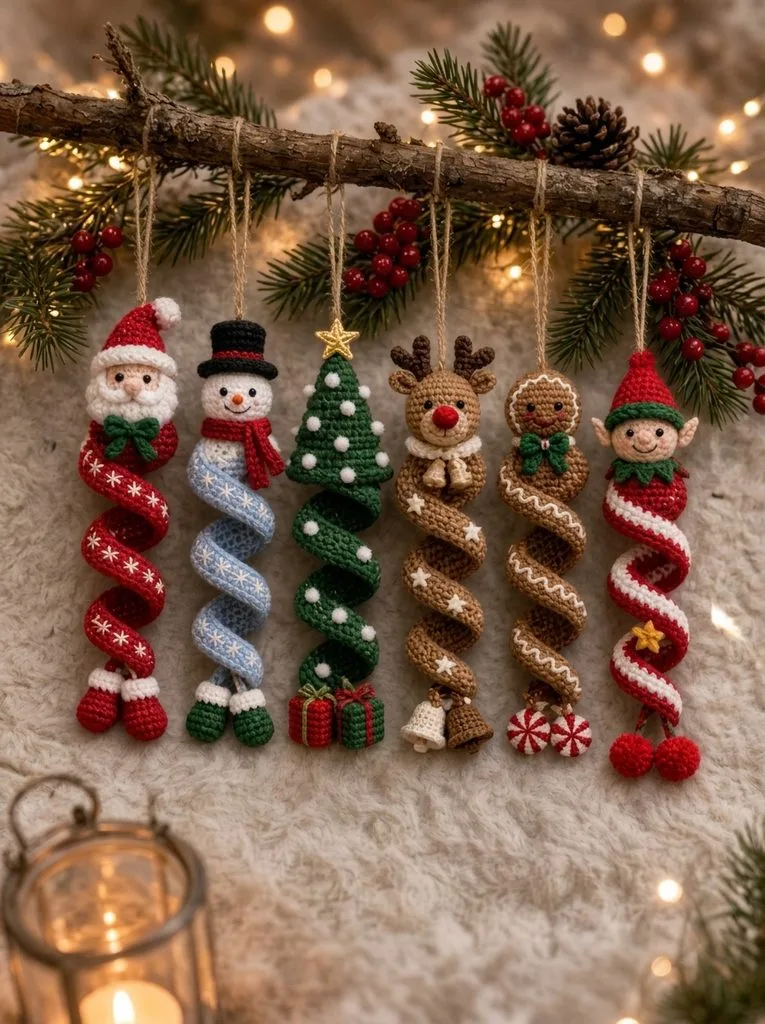
These six whimsical spiral ornaments—Santa, Snowman, Christmas Tree, Reindeer, Gingerbread Man, and Elf—bring dynamic shape and festive charm to holiday decorating. Each features a classic amigurumi character head or topper, a bouncy curlicue body adorned with themed embroidery, and miniature weighted dangles at the base to ensure they hang perfectly straight.
Perfect for statement tree decorations, playful garland additions, or interactive stocking stuffers, these ornaments rely on the natural curling tendency of crochet increases to create their signature spiral shape. You can easily customize the embroidery motifs, swap accessory colors, or mix-and-match the bottom dangles (like wrapped presents, bells, or peppermint candies) to suit your unique holiday aesthetic.
🔍 MAIN PATTERN OVERVIEW
- The Curlicue Body: The foundation of every ornament is a simple chain with multiple stitches worked into each chain to force a tight, springy coil.
- The Character Heads: Santa, Snowman, Reindeer, Gingerbread, and Elf all use the same universal spherical head base, adapted with different yarn colors, hats, and facial details.
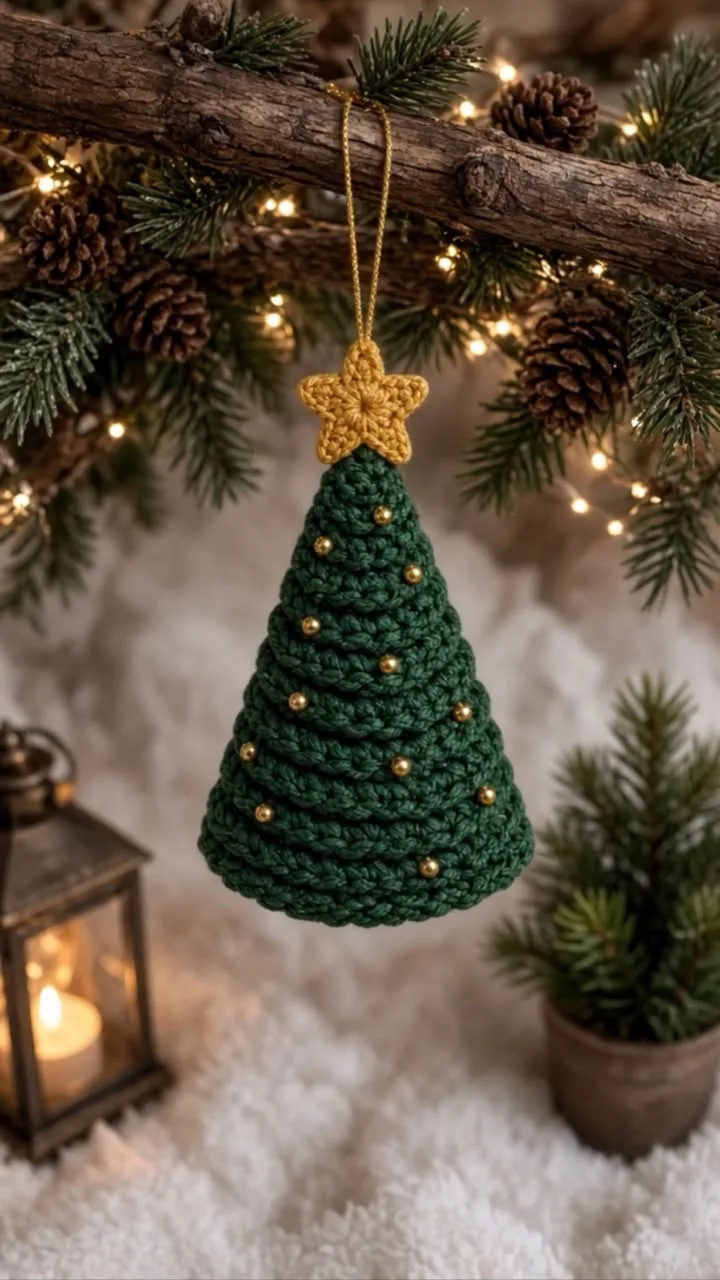
- The Christmas Tree: A unique variation featuring a conical top and a solid green spiral base, decorated entirely with French knot “ornaments” and star appliques.
- The Dangles: Each spiral is anchored by two small weighted bottom attachments (boots, presents, bells, or candies) that provide tension to open up the spiral gracefully when hanging.
🎯 SKILL LEVEL
Intermediate
This pattern requires comfortable knowledge of working in the round, shaping tight spirals, and applying small embroidered details.
- Working in continuous rounds and flat rows
- Amigurumi assembly and basic sewing
- Surface embroidery (French knots, backstitch, cross stitch)
- Frequent color changes (for the Elf spiral and hats)
📏 FINISHED SIZE
Measurements: Approximately 7.5 inches (19 cm) tall from the top of the head/hat to the bottom of the dangles, when hanging naturally.
Variations: The length of the spiral can be easily adjusted by chaining more or fewer stitches in the foundation chain. Heavier yarn will result in a larger, thicker ornament.
🧮 GAUGE
Amigurumi Gauge: 6 sts x 6 rounds = 1 inch (2.5 cm) in single crochet.
Consistent, tight tension is required for the character heads so no stuffing shows through. The tension on the spiral body should be slightly more relaxed to allow the curl to drape naturally.
🧶 REQUIRED YARN AMOUNTS
| Yarn Color | Purpose | Estimated Yardage per Ornament |
| Skin Tone / White / Brown | Character heads | ~ 15 yards (14 m) |
| Red / Green / Blue / Brown | Spiral bodies | ~ 30 yards (27 m) |
| Accent Colors | Hats, scarves, bows, dangles | ~ 10 yards (9 m) |
| White/Gold Thread | Embroidery (snowflakes, stars) | ~ 2 yards (1.8 m) |
Yarn used is a smooth DK weight (Category 3) cotton/acrylic blend to ensure crisp stitch definition on the spirals.
🧰 MATERIALS
- Hook: 2.5 mm (C) or 3.0 mm (D) crochet hook
- Yarn: DK weight (Category 3) in various holiday colors (Red, White, Green, Light Blue, Brown, Light Brown, Skin Tone, Black)
- Eyes: 6 pairs of 6mm safety eyes (or black embroidery thread)
- Stuffing: High-quality polyfill stuffing
- Hanger: Rustic twine or jute cord
- Tools: Tapestry needle, embroidery needle, stitch markers, pins, scissors
- Embellishments: Tiny gold star button/applique (for Tree), mini bells (optional)
🔤 ABBREVIATIONS – US TERMS
| Abbreviation | Definition |
| MR | Magic Ring |
| ch | Chain |
| st(s) | Stitch(es) |
| sc | Single Crochet |
| hdc | Half Double Crochet |
| inc | Increase (2 sts in one st) |
| dec | Invisible Decrease (sc 2 together) |
| BLO | Back Loop Only |
| FO | Fasten Off |
📝 NOTES BEFORE YOU BEGIN
- Spiral Physics: To get a tight, bouncy spiral, you must place 3 sc into every single chain. Do not skip chains.
- Embroidery First: It is highly recommended to embroider the stars, snowflakes, and zig-zags onto the spiral body before attaching the head and dangles, as the piece is easier to handle.
- Stuffing: Stuff the heads firmly to maintain their round shape. The spiral bodies and small dangles are not stuffed.
🪡 COMPLETE PATTERN
🌀 1. Universal Spiral Body
Applies to Santa (Red), Snowman (Light Blue), Tree (Green), Reindeer (Light Brown), and Gingerbread (Brown).
Row 1: ch 46.
Row 2: Starting in the 2nd ch from hook, work 3 sc in each ch across. (135 sts)
FO, leaving a long tail for sewing. The strip will naturally twist into a tight curlicue.
🍭 2. Elf Striped Spiral Body
Uses Red and White.
Row 1: With Red, ch 46.
Row 2: Starting in 2nd ch from hook, work 3 sc in each ch across. (135 sts). FO Red.
Row 3: Attach White to the first st of Row 2. sl st loosely in each st across to create a white candy-cane edge.
FO, leaving a long tail for sewing.
🧠 3. Universal Character Head Base
Make 5. Use Skin Tone (Santa, Elf), White (Snowman), Light Brown (Reindeer), or Brown (Gingerbread).
R1: MR 6 sc. (6)
R2: inc x 6. (12)
R3: (1 sc, inc) x 6. (18)
R4: (2 sc, inc) x 6. (24)
R5: (3 sc, inc) x 6. (30)
R6-R10: sc around. (30)
Insert safety eyes between R7 and R8, spaced about 5 sts apart. Embroider noses and mouths.
R11: (3 sc, dec) x 6. (24)
R12: (2 sc, dec) x 6. (18)
Stuff head firmly.
R13: (1 sc, dec) x 6. (12)
R14: dec x 6. (6)
FO, cinch hole closed.
🎅 4. Santa Specifics
- Hat: With Red: MR 4, (1 sc, inc)x2 (6), sc around (6), (2 sc, inc)x2 (8)… continue increasing by 2 sts each round until you reach 24 sts. Change to White, sc 24 for two rounds. FO. Add a white pom-pom.
- Beard: Embroider loops of white yarn around the lower half of the face.
- Boots (Make 2): With Red: MR 6, inc (12), sc 12 for 3 rounds. Change to White, sc 12 for 1 round. FO. Flatten and sew to bottom of red spiral.
- Details: Embroider white snowflakes on the red spiral. Add a green bow under the chin.
⛄ 5. Snowman Specifics
- Top Hat: With Black: MR 6, inc (12), (1 sc, inc) (18). BLO sc 18 for 1 round. sc 18 for 3 rounds. FLO inc x 18 for brim (36). FO.
- Scarf: With Red, ch 25. hdc across. Tie around the neck.
- Boots (Make 2): Same as Santa boots, but using Green.
- Details: Embroider white snowflakes on the blue spiral.
🎄 6. Christmas Tree Specifics
- Tree Top: With Green: MR 4. R2: inc, 3 sc (5). R3: inc, 4 sc (6). R4: (1 sc, inc) x 3 (9). R5: (2 sc, inc) x 3 (12). R6: (3 sc, inc) x 3 (15). R7: (4 sc, inc) x 3 (18). R8: (5 sc, inc) x 3 (21). R9: (6 sc, inc) x 3 (24). FO, stuff lightly.
- Presents (Make 2): With Red/Green: ch 5, sc 4 across. Work 4 rows. FO. Wrap with contrasting yarn to look like ribbon.
- Details: Embroider white French knots on both the Tree Top and the Green Spiral. Attach a gold star to the top.
🦌 7. Reindeer Specifics
- Snout & Antlers: Snout: White MR 6, inc (12), sew to face with red nose. Antlers: Dark brown ch 5, sl st back, branch off with ch 3, sl st back. Sew to head.
- Ruffle Collar: With White: ch 15. 3 dc in every ch across. Sew under head.
- Bells (Make 2): With White: MR 4, inc (8), (1 sc, inc) (12), sc 12 for 2 rounds. FO. Attach tiny metal bells inside if desired.
- Details: Embroider white stars on the light brown spiral.
🍪 8. Gingerbread Specifics
- Icing Details: Surface slip stitch or embroider white wavy lines across the forehead.
- Peppermints (Make 2): With Red: MR 6, inc (12), (1, inc) (18). Embroider white asterisk/spokes on top.
- Details: Embroider white zig-zags (rick-rack) all down the brown spiral. Add a green bow under the chin.
🧝 9. Elf Specifics
- Ears (Make 2): With Skin Tone: ch 3, sl st in 2nd ch, sc in last ch. Sew to sides of head.
- Elf Hat: Same pattern as Santa’s hat, using Green with a Red brim and a gold star or bell on top.
- Pom-Pom Shoes (Make 2): With Red: MR 6, inc (12), sc 12, dec (6). FO and cinch closed.
- Details: Attach a green bow under the chin.
🎨 STYLING / ASSEMBLY / STABILITY / FINAL SHAPING
1. Attaching Head to Spiral
Thread the long tail from the top of the spiral body onto your tapestry needle. Sew it securely to the direct bottom center (R14) of the character head. Ensure the face is pointing directly “forward” relative to how the spiral naturally hangs.
2. Attaching the Dangles
Take the two bottom dangles (boots, presents, etc.) and sew them to the very bottom point of the spiral. Position them slightly offset from one another so they cluster nicely when hanging. These act as weights to pull the spiral down slightly, preventing it from curling too tightly into a ball.
3. Hanging Loop
Cut a 10-inch length of rustic twine. Thread it through the very top center of the character’s hat or head, pull through, and tie a secure overhand knot to create a hanging loop.
✅ Final Finishing Checklist
- ✅ Safety eyes are secure and even.
- ✅ Spiral curls naturally and evenly; manually twist it around your finger to “set” the shape.
- ✅ Bottom weights hang balanced and prevent the ornament from rotating wildly.
- ✅ All embroidery is visible on the outer edge of the spiral.
💡 HELPFUL CROCHET TIPS
- 💡 Fixing Flat Spirals: If your spiral won’t curl, you likely missed stitches in your foundation chain or your tension was too loose. Ensure you have exactly 3 stitches in every chain.
- 💡 Embroidery Placement: When embroidering the snowflakes or stars, hold the spiral suspended so you can see which parts of the coil naturally face outward, and embroider only on those visible outward curves.
- 💡 Twine Trick: Dip the very ends of your twine hanger in clear nail polish or glue before threading to prevent it from fraying as you pull it through the amigurumi head.
- 💡 Batch Making: If making the whole set, crochet all 6 spiral bodies first, then all 5 standard heads. Assembly line crafting makes these go much faster!
🧼 CARE INSTRUCTIONS
Spot clean the yarn gently with a damp cloth if necessary. Do not machine wash, as the friction will pill the yarn and ruin the tight curl of the spirals. Store them lying flat or gently coiled in a tissue-lined box during the off-season; do not store heavy items on top of them, as it can permanently crush the spring shape.
❓ FAQ
❓ Can I make the spiral longer?
Yes! Simply start with a longer foundation chain. Keep in mind that longer spirals will stretch out more under their own weight, so you may want to use lighter bottom dangles.
❓ My spiral is twisting the wrong way. How do I fix it?
Crochet spirals naturally curl inward toward the front of your stitches. You can manually twist the finished piece around your index finger in the direction of the natural curl to “train” the yarn to sit correctly.
❓ Is it safe to use safety eyes for this project?
If these are strictly hung on a tree out of reach, safety eyes are fine. If you are gifting these to young children or using them as toys, embroider the eyes using black thread to eliminate any choking hazard.
❓ Can I use a different yarn weight?
Absolutely. Worsted weight (Category 4) or even bulky velvet yarn works beautifully for this pattern; just remember to size up your hook appropriately. The resulting ornaments will simply be larger.