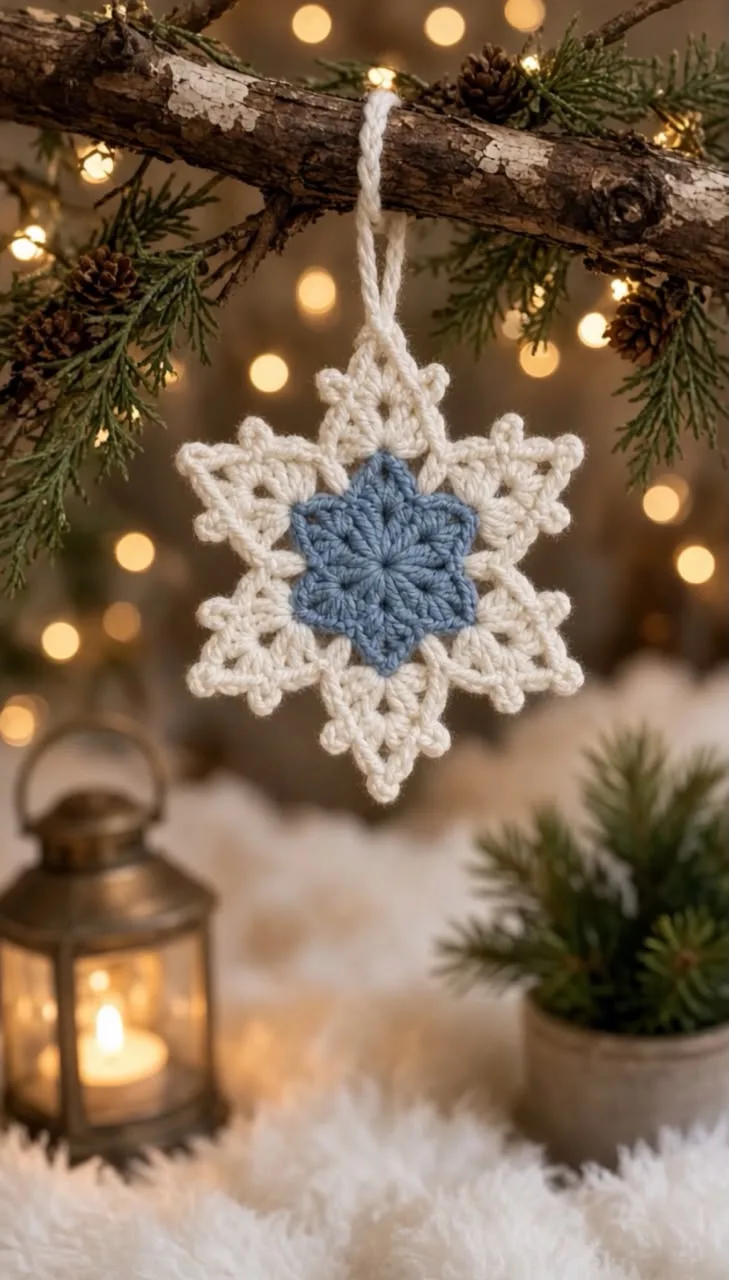
Dusty-Blue Star Snowflake Ornament ❄️✨
📖 B. INTRODUCTION
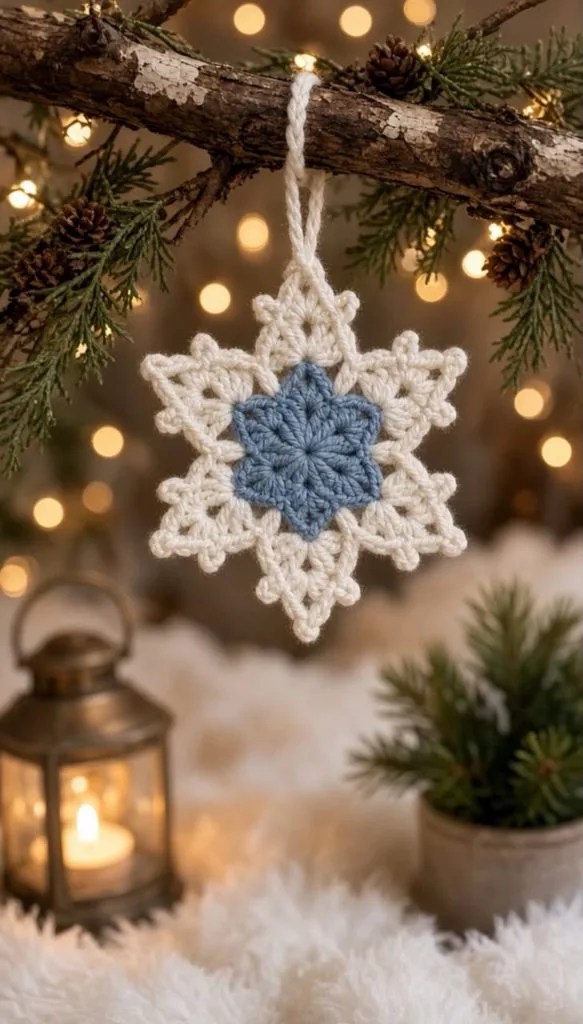
The Dusty-Blue Star Snowflake Ornament combines a solid geometric center with lacy, picot-trimmed outer points to create a striking two-tone design. Finished with a simple crocheted hanging loop, this ornament is ideal for trimming the tree, decorating winter wreaths, or attaching to holiday gift wrap.
🔍 C. MAIN PATTERN OVERVIEW
- Center Star: Crocheted in dusty blue yarn, forming a distinct six-pointed base.
- Snowflake Border: Crocheted in cream yarn, adding lacework, chains, and multi-picot tips to create the frost-like edges.
- Hanging Loop: A sturdy chain loop seamlessly integrated into the top point of the cream border.
🎯 D. SKILL LEVEL
Easy / Advanced Beginner
- Working in a magic ring
- Basic stitches (sc, hdc, dc)
- Creating chain spaces and picots
- Simple color changes
📏 E. FINISHED SIZE
| Dimension | Measurement |
| Diameter (Point to Point) | 4.5 inches (11.5 cm) |
| Hanging Loop Length | 3 inches (7.5 cm) |
Size will vary slightly based on yarn weight, hook size, and blocking method.
🧮 F. GAUGE
Gauge is not critical for this pattern. Tight, consistent tension is recommended so the star points hold their shape without curling.
🧶 G. REQUIRED YARN AMOUNTS
| Color | Function | Est. Yardage |
| Dusty Blue (Color A) | Inner Star | ~5 yards |
| Cream (Color B) | Outer Border & Loop | ~10 yards |
Estimates based on medium (#4) worsted weight cotton or acrylic yarn.
🧰 H. MATERIALS
- Yarn: Medium (#4) worsted weight yarn in Dusty Blue and Cream. (Cotton is highly recommended for crisp stitch definition).
- Hook: 4.0mm (US G/6) crochet hook.
- Tools: Yarn needle, scissors.
- Optional: Fabric stiffener or spray starch, rust-proof pins, blocking mat.
🔤 I. ABBREVIATIONS – US TERMS
- MR: Magic Ring
- ch: chain
- sl st: slip stitch
- sc: single crochet
- hdc: half double crochet
- dc: double crochet
- sp: space
- st(s): stitch(es)
- picot: ch 3, sl st in 3rd ch from hook
📝 J. NOTES BEFORE YOU BEGIN
- 🧵 Joined Rounds: This pattern is worked in joined rounds. Always sl st to the first stitch of the round to join, not the beginning chain.
- ⚠️ Starting Chains: The starting ch-2 in Round 1 does not count as a stitch.
- ✅ Color Changes: Fasten off Color A completely and weave in ends before attaching Color B to keep the back neat.
🪡 K. COMPLETE PATTERN
🌟 Center Star (Color A: Dusty Blue)
R1: MR, ch 2. 12 dc into the ring. Pull ring tightly closed. Sl st to the first dc to join. (12 dc)
R2: sc in next st. (hdc, dc, ch 2, dc, hdc) in the next st. Repeat from * to * 6 times. Sl st to the first sc to join. (6 points made)
Fasten off Color A and weave in the ends.
❄️ Snowflake Border (Color B: Cream)
R3: Join Color B with a sl st in any ch-2 tip of the blue star. ch 1. (sc, ch 3, sc) in the ch-2 tip. ch 4, sl st into the sc from R2 (the “valley” between the blue points), ch 4. Repeat from * to * 6 times. Sl st to the first sc to join.
R4: Sl st into the first ch-3 sp.
- Make 5 regular snowflake points: (ch 3 picot, ch 5 picot, ch 3 picot, sl st back into the same ch-3 sp). 4 sc in the next ch-4 sp. sl st in the valley sl st. 4 sc in the next ch-4 sp. sl st into the next ch-3 sp. Repeat this sequence 5 times.
- Make the 6th point (with hanger): (ch 3 picot, ch 20, sl st in the 20th ch from hook to form the loop, ch 3 picot, sl st back into the same ch-3 sp). 4 sc in the next ch-4 sp. sl st in the valley sl st. 4 sc in the last ch-4 sp. sl st to the first st to join.Fasten off Color B and weave in ends.
🎨 L. STYLING / ASSEMBLY / STABILITY / FINAL SHAPING
- ✅ Flattening: Gently pull each of the six cream points outward to open up the picots and chain spaces.
- ✅ Blocking: For a professional, rigid finish, pin the snowflake face-down on a blocking board, pinning each of the 6 outer tips and the hanging loop.
- ✅ Stiffening: Lightly mist the back with spray starch or a 50/50 water-and-PVA glue mixture and let dry completely.
💡 M. HELPFUL CROCHET TIPS
- 💡 Use cotton yarn instead of acrylic if you want the sharpest geometric lines; cotton holds blocking beautifully.
- 💡 When making the multi-picot tips in Round 4, ensure your slip stitches are pulled tight so the branches fan out cleanly instead of clumping together.
- 💡 Weave in your ends as you go, particularly the magic ring tail, to prevent the center from coming undone when stretched during blocking.
- 💡 If your chain loop twists, iron it flat under a protective cloth on a low heat setting.
🧼 N. CARE INSTRUCTIONS
- Spot clean only with a damp cloth and mild soap.
- Do not machine wash, as this will destroy the blocked shape and stiffener.
- Store flat in a rigid box during the off-season to prevent the delicate picot points from bending.
❓ R. FAQ
❓ Can I make this with bulky yarn?
Yes. Using bulky yarn and a larger hook (e.g., 6.0mm) will create a much larger motif, perfect as a coaster, bunting element, or decorative trivet.
❓ Why are my points curling inward?
Curling usually means your tension is very tight on the chains, or the piece simply needs to be wet-blocked. Pinning it out will fix most curling issues.
❓ Can I skip the hanging loop?
Absolutely. Simply work the 6th point exactly the same as the first 5 points. You can then use it as a flat applique.
Share the love!
If you make this Dusty-Blue Star Snowflake, be sure to tag your creations on social media so we can see your beautiful winter makes!