Crochet Snowflake Christmas Ornament
📖 B. INTRODUCTION
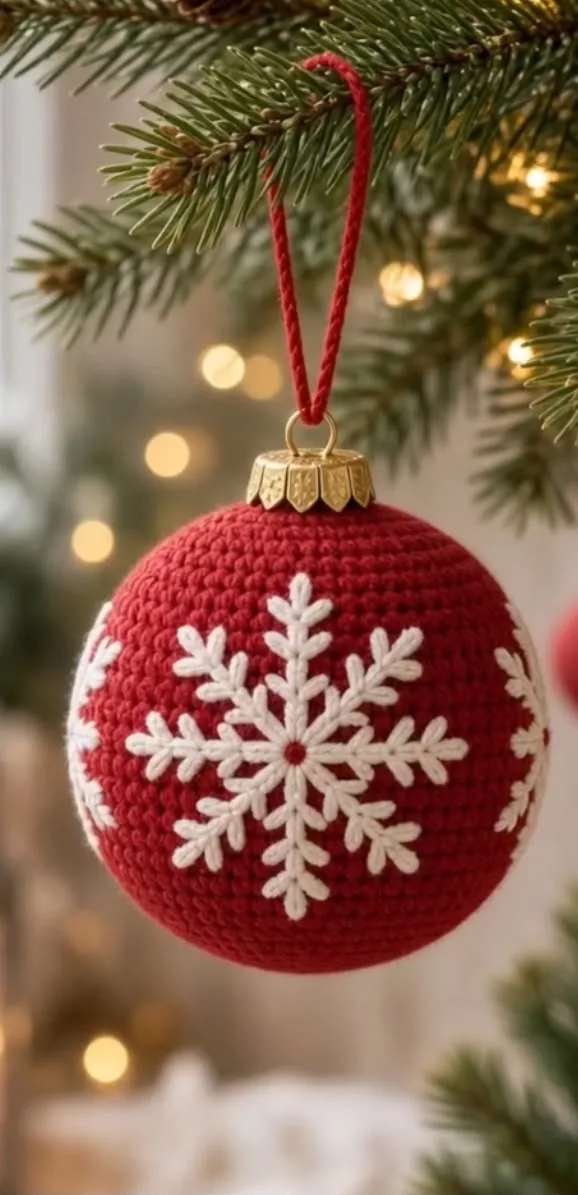
Capture the magic of a traditional winter wonderland with an ornament that is both elegant and completely shatterproof. Based on the classic holiday aesthetic seen in the “Crochet Snowflake Christmas Ornament ❄️.jpeg” reference image, this original design brings together a bold, solid background and intricate, frosty details. Creating your own baubles allows you to enjoy the look of high-end, vintage glass ornaments without the worry of them breaking if they take a tumble from the tree.
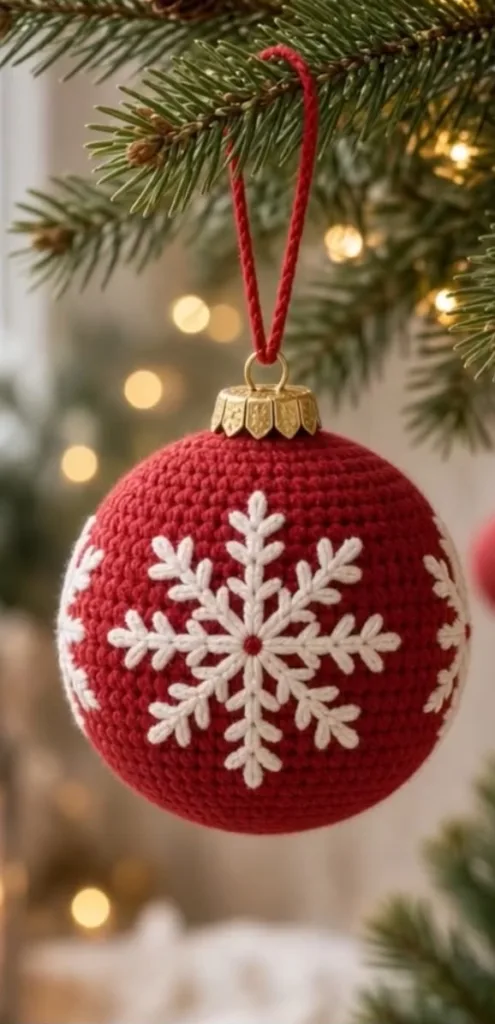
The finished project features a perfectly round, stuffed red sphere that serves as a canvas for a striking, eight-pointed white snowflake. The snowflake itself is crafted using surface crochet or chain-stitch embroidery, giving it a raised, textured appearance that pops beautifully against the red yarn. It is finished off with a realistic-looking metallic cap and a simple red hanging string.
Whether you are decorating a family tree, creating heirloom gifts, or looking for a way to use up bright, festive yarn scraps, this pattern is a wonderful project. It is highly customizable; while the deep red and crisp white offer a timeless look, you can easily swap these for icy blues, silver, or modern pastels to match your personal holiday theme.
🔍 C. MAIN PATTERN OVERVIEW
This project is broken down into three main components: the solid sphere base, the decorative cap, and the snowflake embroidery. You will begin by crocheting a classic amigurumi sphere using continuous rounds. Once the sphere is firmly stuffed and closed, you will use a contrast yarn to embroider the large, eight-armed snowflake directly onto the surface. Finally, you will crochet a small, metallic-colored cap to sit at the top of the bauble, mimicking a traditional metal ornament fitting, and attach a hanging string.
🎯 D. SKILL LEVEL
Level: Intermediate 🟡
While the crocheted sphere is quite simple, achieving a neat, symmetrical 8-point snowflake requires steady tension and basic embroidery or surface crochet skills.
Required Techniques:
- Magic Ring (MR)
- Single Crochet (sc)
- Increases (inc) and Invisible Decreases (dec)
- Working in continuous spirals
- Working in Back Loop Only (BLO)
- Surface slip stitch crochet or Chain-stitch embroidery
📏 E. FINISHED SIZE
When using worsted weight yarn and a 3.5mm hook, the finished ornament measures approximately:
- Diameter: 3.5 inches (9 cm)
- Circumference: 11 inches (28 cm)
Note: The size will vary based on your tension and yarn choice. You can easily scale this pattern down by using sport-weight yarn and a 2.5mm hook, or scale it up with bulky yarn.
🧮 F. GAUGE
Gauge is not critical for the dimensions, but fabric density is crucial. Your single crochet stitches on the red sphere must be tight enough that the white polyfil stuffing does not stretch or show through the fabric. If you can see gaps, drop down a hook size.
🧶 G. REQUIRED YARN AMOUNTS
You will need medium (worsted) weight yarn. A smooth mercerized cotton or a sleek acrylic will provide the cleanest look and best stitch definition for the embroidery.
- 🧵 Color A (Sphere – e.g., Deep Red): Approximately 60 yards (55 meters)
- 🧵 Color B (Snowflake – e.g., Crisp White): Approximately 15 yards (14 meters)
- 🧵 Color C (Ornament Cap – e.g., Metallic Gold or Mustard Yellow): Approximately 5 yards (4.5 meters)
🧰 H. MATERIALS
- Crochet Hook: US Size E/4 (3.5 mm)
- Yarn: Medium weight (Worsted, #4) in Red, White, and Gold.
- Stuffing: Firm polyester fiberfill.
- Tapestry Needle: A sharp-tipped yarn needle (chenille needle) is highly recommended for piercing the crocheted fabric during embroidery.
- Pins: Several sewing pins for marking the snowflake points.
- Scissors: Sharp scissors.
- Stitch Marker: To track continuous rounds.
🔤 I. ABBREVIATIONS – US TERMS
- BLO: Back Loop Only
- ch: Chain
- dec: Invisible Single Crochet Decrease
- inc: Single Crochet Increase (2 sc in the same st)
- MR: Magic Ring
- R: Round
- sc: Single Crochet
- sl st: Slip Stitch
- st(s): Stitch(es)
- ([action]) x#: Repeat the instructions within the brackets the specified number of times.
- ([count]): The total number of stitches at the end of the round.
📝 J. NOTES BEFORE YOU BEGIN
- Continuous Rounds: The main red sphere is worked in a continuous spiral. Do not join with a slip stitch at the end of rounds.
- Stuffing: Stuff the sphere very firmly. A perfectly round, firm surface is much easier to embroider on than a squishy, under-stuffed one. Roll it between your palms as you stuff to encourage a spherical shape.
- Symmetry: An 8-point snowflake is essentially a cross (+) overlaid with an (x). Using pins to map this out before you begin stitching with yarn will save you a lot of frustration.
🪡 K. COMPLETE PATTERN
🔴 The Main Bauble (Sphere)
Color: Color A (Red)
R1: MR 6. (6)
R2: inc in each st around. (12)
R3: (1 sc, inc) x6. (18)
R4: (2 sc, inc) x6. (24)
R5: (3 sc, inc) x6. (30)
R6: (4 sc, inc) x6. (36)
R7: (5 sc, inc) x6. (42)
R8: (6 sc, inc) x6. (48)
R9: (7 sc, inc) x6. (54)
R10-18: sc in each st around. (54) (9 rounds total of straight sc)
R19: (7 sc, dec) x6. (48)
R20: (6 sc, dec) x6. (42)
R21: (5 sc, dec) x6. (36)
R22: (4 sc, dec) x6. (30)
Start stuffing the sphere firmly and continue stuffing as you close.
R23: (3 sc, dec) x6. (24)
R24: (2 sc, dec) x6. (18)
R25: (1 sc, dec) x6. (12)
R26: dec x6. (6)
Fasten off, leaving a 6-inch tail. Weave the tail through the front loops of the remaining 6 stitches and pull tight to close the hole perfectly. Weave the end deep into the sphere.
🟡 The Ornament Cap
Color: Color C (Gold/Metallic)
R1: MR 6. (6)
R2: inc in each st around. (12)
R3: (1 sc, inc) x6. (18)
R4: ⚠️ In BLO: sc in each st around. (18) (This creates the sharp folded edge of the cap)
R5: sc in each st around. (18)
Fasten off, leaving a long 12-inch tail for sewing the cap to the bauble.
🎨 L. STYLING / ASSEMBLY / STABILITY / FINAL SHAPING
The most striking feature of this ornament is the crisp, white snowflake. Take your time with this section.
1. Mapping the Snowflake
- Locate the center point on the side (equator) of your red sphere. This will be the center of your snowflake. Place a pin here. (Notice that the center shows a tiny dot of the red background).
- Place 8 pins radiating outward from the center point, forming a large star.
- Place 4 pins forming a cross (+): North, South, East, West.
- Place 4 pins perfectly between those to form an (x).
- Ensure all 8 pins are an equal distance from the center point (about 1.5 inches / 4 cm out).
2. Embroidering the Main Arms
Using Color B (White) and your tapestry needle, or using a crochet hook for surface slip stitches:
- Chain Stitch Method (Recommended): Thread your needle with a long piece of white yarn. Insert it from the back of the bauble and bring it out at the center pin.
- Create a line of connected chain stitches (or simple straight backstitches) from the center outward to your first pin.
- Insert the needle at the end of the line, route it through the stuffing, and bring it back up at the center point.
- Repeat this process for all 8 main arms of the snowflake.
3. Adding the Details (The “V” Branches)
- Looking at the design, each of the 8 arms has small arrow-like branches pointing outward.
- Starting about halfway up one of the main arms, stitch a small straight line angling outward and upward. Stitch a matching one on the opposite side of the arm to form a “V”.
- Add a second, slightly smaller “V” closer to the outer tip of the arm.
- Repeat this detailing on all 8 arms.
- Once finished, tie off your white yarn securely and bury the knot deep inside the stuffing of the sphere.
4. Attaching the Cap & Loop
- Place the Gold Cap over the top pole (the R1 starting point) of the red sphere.
- Using the long gold tail and your tapestry needle, sew the edge of the cap securely to the sphere.
- Cut a 10-inch length of Color A (Red) yarn for the hanging string.
- Thread it through the center of the Gold Cap (R1 of the cap). Tie a secure knot at the top to form a loop.
✅ Final Finishing Checklist
- ✅ Is the sphere perfectly round? (Roll it firmly between your hands to distribute stuffing).
- ✅ Are there exactly 8 arms on the snowflake?
- ✅ Are the branches symmetrical on each arm?
- ✅ Is the cap sewn on securely?
💡 M. HELPFUL CROCHET TIPS
- 💡 Surface Slip Stitches: If you prefer crochet over embroidery, you can use a technique called surface crochet. Insert your hook into the finished sphere, pull up a loop of white yarn, and slip stitch directly across the surface of the red fabric. This creates a very neat, chain-like line.
- 💡 Pre-made Baubles: To save time and ensure a perfect sphere, you can crochet the red cover around a standard 3-inch plastic shatterproof ornament instead of using polyfil stuffing. Just slip the plastic bauble inside around R20 before the hole gets too small!
- 💡 Recycled Caps: For an ultra-realistic look, skip crocheting the gold cap. Instead, pop the metal or plastic cap off an old, cheap ornament and hot-glue it directly to the top of your crocheted sphere.
- 💡 Hiding Ends: When finishing your embroidery, run the needle completely through the stuffed sphere and out the other side. Pull the yarn slightly taut, snip it close to the fabric, and the end will snap back and hide forever inside the stuffing.
🧼 N. CARE INSTRUCTIONS
- 🧼 Spot Clean: Use a damp cloth and mild soap to dab away any stains.
- 🧼 Storage: Store in a dry box. If packed tightly with heavy items, the stuffed sphere may dent, so store them on top of heavier decorations.
- ⚠️ Snag Warning: The embroidered surface stitches can catch on sharp pine needles or pet claws. Handle carefully when placing on the tree.
❓ R. FAQ
Q: My sphere looks like an egg, not a round ball. How do I fix it?
A: This usually means you under-stuffed it. Amigurumi spheres require a surprising amount of polyfil to stretch the fabric into a perfect globe. Try stuffing it much firmer, and roll it aggressively between your palms to shape it. If it still looks oval, your tension may be taller than it is wide; try a smaller hook.
Q: Can I cross-stitch the snowflake instead? A: You can, but amigurumi stitches (which sit at a slight angle) don’t align into perfect squares like Aida cloth does. Chain stitching or surface crochet gives you the freedom to draw straight, smooth lines regardless of the underlying crochet stitch grid.
Q: The white yarn is leaving fuzz on the red yarn. What should I do?
A: This happens frequently with acrylic yarns. Use a lint roller gently over the ornament once finished. For future projects, using mercerized cotton for both colors eliminates the fuzz-transfer issue completely and yields a very polished finish.