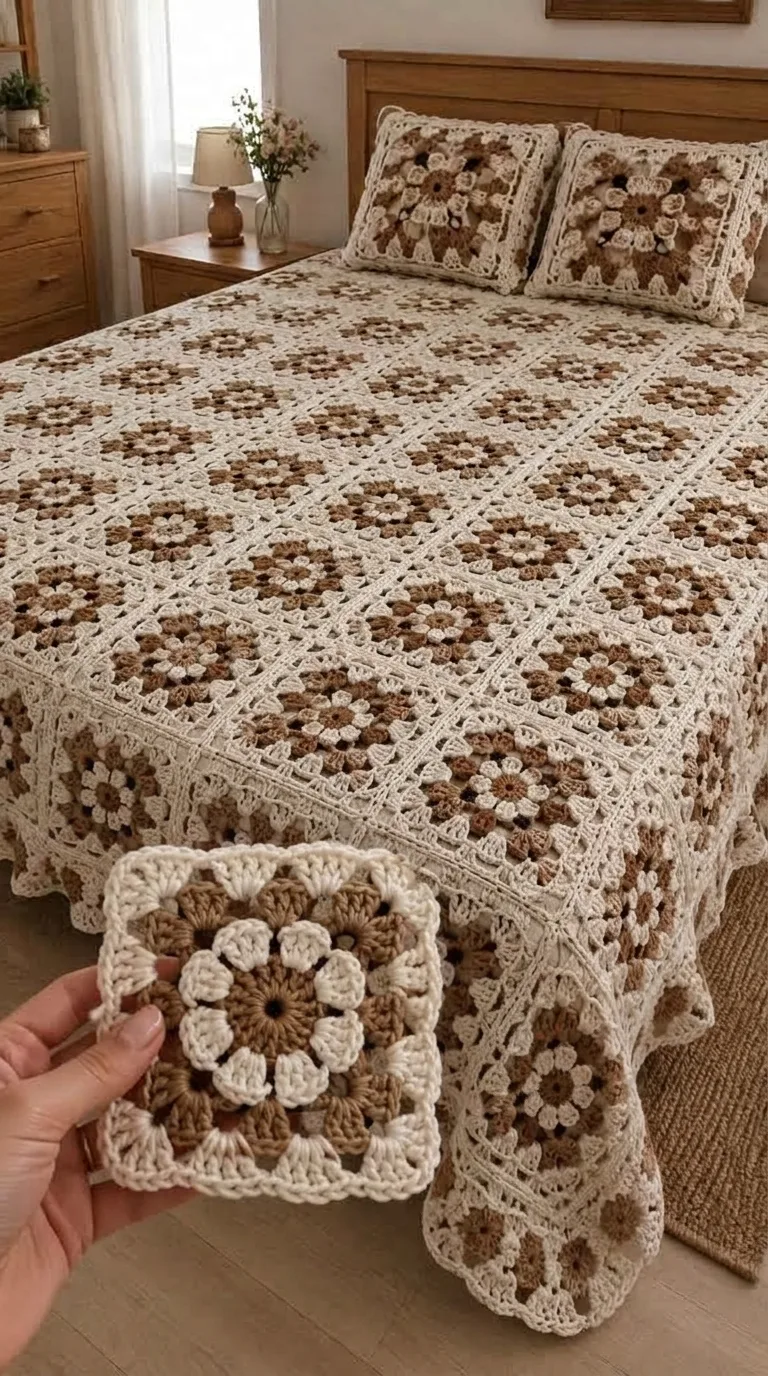
Modern Boho Floral Sunburst Granny Square Bedspread & Pillow Set Pattern
📖 B. INTRODUCTION
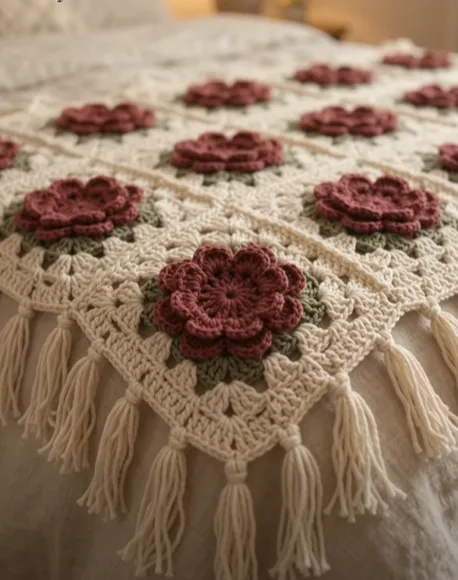
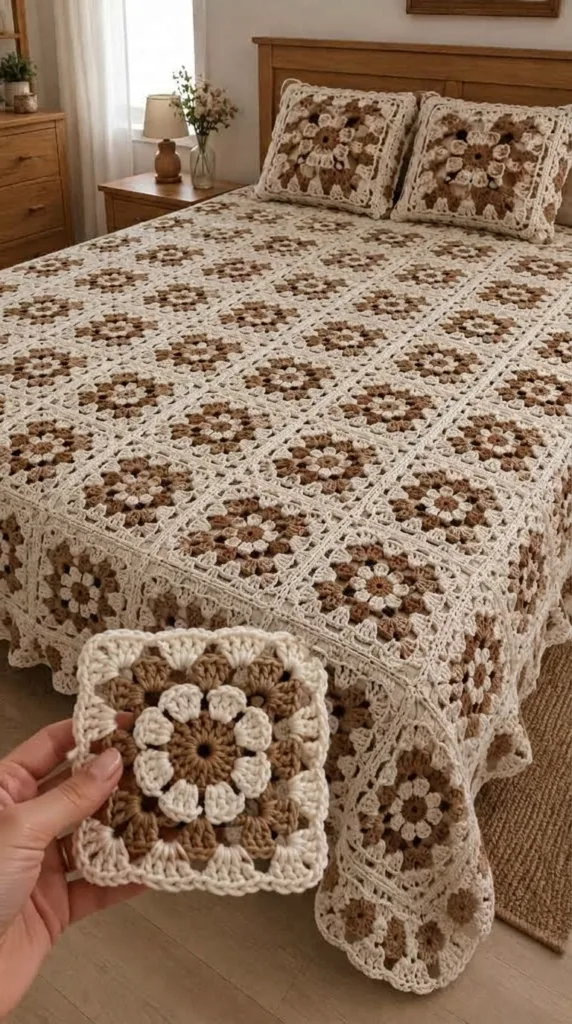
The Modern Boho Floral Sunburst Granny Square Bedspread & Pillow Set brings warmth, vintage texture, and artisanal craftsmanship into any bedroom decor. Inspired by classic 1970s sunburst motifs updated with a serene earthy palette, this design pairs rich espresso brown centers with cream floral petals, warm camel brown background clusters, and clean ivory framing.
Each square is constructed around a dimensional 8-petal daisy hub that blooms outward into a traditional granny cluster expansion. Joined together in a repeating grid, these motifs create a dramatic full-coverage bedspread accented by a draped, scalloped outer border. The set is completed by matching square pillow sham covers that feature a four-motif (2×2) face grid and a tailored envelope back.
Whether styled across a hardwood bedframe for a cozy boho aesthetic or draped over a linen couch as a heritage throw, this project offers a relaxing, repetitive project build. Because it is modular, you can complete individual squares on the go before assembling the final blanket.
This pattern is easily adaptable: customize the grid size to make anything from a cozy nursery crib blanket to a sprawling California King coverlet, or swap the warm chocolate and camel hues for sage green, terracotta, or dusty blue.
🔍 C. MAIN PATTERN OVERVIEW
This bedding set is constructed modally through individual square units assembled into a large blanket grid and structured pillow cushions:
- 🌻 Sunburst Floral Granny Square Motif: An 8-petal cream flower with a deep espresso center, framed by warm camel double-crochet clusters and finished with an ivory border.
- 🛏️ Full Bedspread Assembly: A 120-motif grid (10 squares wide by 12 squares long) forming a Queen/King coverlet blanket.
- 🌾 Scalloped Granny Border: A three-round continuous border worked around the outer perimeter of the assembled bedspread to create a soft, wave-draped edge.
- 🛋️ Matching Pillow Sham Covers (Make 2): Square cushion covers featuring a 4-motif (2×2) front panel joined to a solid back panel with an envelope button closure.
🎯 D. SKILL LEVEL
Level: Easy to Intermediate
This project is ideal for adventurous beginners who have mastered basic stitches and are ready to tackle motif construction, color switching, and seaming.
- ➰ Magic Ring & Central Ring: Starting circular rounds smoothly without gaps.
- 🍿 4-DC Cluster Petals: Working multi-dc cluster stitches into a single space to create 3D flower petals.
- 📐 Squarifying a Circle: Converting an 8-sided floral motif into a flat 4-corner square using varying stitch heights.
- 🧵 Seamless Motif Seaming: Whipstitching or using join-as-you-go (JAYG) slip stitches to assemble large blanket grids.
📏 E. FINISHED SIZE
| Component / Measurement | Imperial | Metric |
| Single Sunburst Motif | 6.0 in x 6.0 in | 15.0 cm x 15.0 cm |
| Full Queen Bedspread (10×12 Grid + Border) | 64.0 in x 76.0 in | 162.0 cm x 193.0 cm |
| Pillow Sham Cover (Set of 2) | 18.0 in x 18.0 in | 45.0 cm x 45.0 cm |
Note: You can easily adjust the blanket size by adding or subtracting columns and rows of motifs.
🧮 F. GAUGE
- Motif Size: Rounds 1–6 of a completed Sunburst Granny Square measure exactly 6.0 inches x 6.0 inches (15 cm x 15 cm) using a 4.0 mm hook.
- Cluster Density: 4 granny clusters (3-dc groups) = 4 inches (10 cm) along Round 4.
Tension Note: Consistent tension is critical so all 128 squares match in size, making assembly smooth and even.
🧶 G. REQUIRED YARN AMOUNTS
Yarn Weight: Worsted Weight / Medium (#4), 100% Soft Premium Acrylic or 80/20 Cotton-Acrylic Blend.
| Color Code & Name | Role / Component | Skeins (100g) | Estimated Yardage | Estimated Grams |
| 🟤 Color A: Espresso Brown | Flower Centers (Rnd 1) | 3 Skeins | ~520 Yards (475 m) | 300 g |
| 🍦 Color B: Cream Ivory | Petals (Rnd 2) & Borders (Rnds 5-6) | 12 Skeins | ~2,400 Yards (2,195 m) | 1,200 g |
| 🐪 Color C: Warm Camel | Background Clusters (Rnds 3-4) | 9 Skeins | ~1,800 Yards (1,645 m) | 900 g |
| 📊 Project Total | Combined Bedspread & 2 Shams | 24 Skeins | ~4,720 Yards (4,315 m) | 2,400 g |
🧰 H. MATERIALS
- 🪡 Crochet Hook: 4.0 mm (US G-6) ergonomic aluminum hook.
- 🧶 Yarn: Worsted weight yarn in Espresso Brown, Cream Ivory, and Warm Camel.
- ✂️ Scissors: Thread snips or yarn scissors.
- 🪡 Tapestry Needle: Size 16 or 18 steel yarn needle for weaving in ends and whipstitching motifs.
- 📌 Blocking Tools: Foam blocking board and T-pins (optional but recommended for flattening individual motifs).
- 🔘 Buttons (for Pillow Shams): 6 wooden or acrylic 1-inch (2.5 cm) buttons for the envelope closures.
🔤 I. ABBREVIATIONS – US TERMS
| Abbreviation | Stitch / Technique |
| ch | Chain |
| sl st | Slip stitch |
| sc | Single crochet |
| hdc | Half double crochet |
| dc | Double crochet |
| 4-dc cl | 4-double-crochet cluster (petal stitch) |
| st(s) | Stitch(es) |
| sp(s) | Space(s) |
| MR | Magic Ring / Magic Circle |
| corner sp | Ch-2 space at the corner of a motif |
| [ ] / ( ) | Repeat instructions within brackets as directed |
📝 J. NOTES BEFORE YOU BEGIN
- 📊 Total Square Count: Make 120 squares for the main bedspread (10 wide x 12 long) plus 8 squares for the two pillow shams (4 squares per sham face) = 128 total Sunburst Motifs.
- 🔄 Color Switch Technique: Fasten off at the end of each color section with a seamless join to keep the centers tidy.
- 🧵 Tail Management: Weave in color tails for Rounds 1–3 as you go so you aren’t overwhelmed by loose ends during assembly!
- 📐 Squarifying Arithmetic: Round 2 forms 8 circular petal spaces. Round 3 turns these into 16 cluster spaces, and Round 4 divides these 16 spaces into 4 corners and 12 side spaces for a flat square.
🪡 K. COMPLETE PATTERN
🌻 Component 1: Sunburst Floral Granny Square Motif
Make 128 total across the full set.
R1 (Espresso Brown): MR, ch 2 (does not count as st), 16 dc into ring. Sl st to 1st dc. Fasten off Espresso Brown. (16 dc)

R2 (Cream Ivory): Join Cream Ivory in top of any R1 dc.
  Ch 2, work 4-dc cluster in same st [yarn over, insert hook, pull up loop, YO, pull through 2 loops] x4 in same st, YO, pull through all 5 loops on hook.
  *Ch 2, skip 1 st, 4-dc cluster in next st*; repeat from * 6 more times, ch 2. Sl st to top of 1st cluster. Fasten off Cream Ivory. (8 Petals, 8 ch-2 sps)

R3 (Warm Camel): Join Warm Camel in any ch-2 sp between petals.
  Ch 3 (counts as dc), (2 dc, ch 1, 3 dc) in same sp.
  *(3 dc, ch 1, 3 dc)* in each of the remaining 7 ch-2 sps. Sl st to top of starting ch-3. (16 3-dc clusters, 16 ch-1 sps)

R4 (Warm Camel): Sl st across to the next ch-1 sp between clusters.
  Ch 3 (counts as dc), 2 dc in same sp (1st side cluster).
  *(3 dc, ch 2, 3 dc) in next ch-1 sp [CORNER 1], 3 dc in each of next 3 ch-1 sps*;
  repeat from * 3 more times ending with 3 dc in last 2 ch-1 sps. Sl st to top of ch-3. Fasten off Warm Camel. (4 corners, 12 side clusters = 20 clusters total)

R5 (Cream Ivory): Join Cream Ivory in any corner ch-2 sp.
  Ch 3, (2 dc, ch 2, 3 dc) in same sp [CORNER].
  *3 dc in each of the next 4 spaces between side clusters, (3 dc, ch 2, 3 dc) in next corner sp*;
  repeat from * 2 more times, 3 dc in last 4 side spaces. Sl st to top of ch-3. (4 corners, 16 side clusters = 24 clusters total)

R6 (Cream Ivory Edging): Ch 1, sc in each st across sides, working (1 sc, ch 2, 1 sc) in each corner ch-2 sp around. Sl st to 1st sc. Fasten off Cream Ivory leaving a short tail. (18 sc per side + 4 corner ch-2 sps)
- 🧶 Finishing: Weave in all ends on the back side of the motif.
🛏️ Component 2: Bedspread Assembly (10 x 12 Grid)
Take 120 finished Sunburst Motifs and arrange them on a clean surface in a grid 10 motifs wide by 12 motifs long.
                     [GRID LAYOUT: 10 SQUARES WIDE x 12 SQUARES LONG]
           Col 1   Col 2   Col 3   Col 4   Col 5   Col 6   Col 7   Col 8   Col 9  Col 10
  Row 01   [ 01 ]  [ 02 ]  [ 03 ]  [ 04 ]  [ 05 ]  [ 06 ]  [ 07 ]  [ 08 ]  [ 09 ]  [ 10 ]
  Row 02   [ 11 ]  [ 12 ]  [ 13 ]  [ 14 ]  [ 15 ]  [ 16 ]  [ 17 ]  [ 18 ]  [ 19 ]  [ 20 ]
  ...
  Row 12   [111 ]  [112 ]  [113 ]  [114 ]  [115 ]  [116 ]  [117 ]  [118 ]  [119 ]  [120 ]
- Seaming Method (Whipstitch): Place two adjacent motifs right-sides together. Using Cream Ivory yarn and a tapestry needle, whipstitch through the back loops only (BLO) across matching stitches from corner space to corner space.
- Seaming Sequence: Join all 10 squares of each row horizontally to form 12 long strips. Next, whipstitch the 12 strips together vertically across the blanket.
🌾 Component 3: Scalloped Granny Edge Border
Worked around the entire outer perimeter of the assembled 120-square bedspread using Cream Ivory and Warm Camel yarn.
Rnd 1 (Cream Ivory): Join Cream Ivory in any outer blanket corner ch-2 sp.
  Ch 3, (2 dc, ch 2, 3 dc) in corner sp.
  Work 3 dc into every space between granny clusters along the edge, working 3 dc into each square-to-square seam junction.
  Work (3 dc, ch 2, 3 dc) in each outer blanket corner. Sl st to 1st dc.

Rnd 2 (Warm Camel): Switch to Warm Camel yarn.
  Ch 3, (2 dc, ch 2, 3 dc) in corner sp.
  Work 3 dc in each space between clusters around the entire blanket.
  Work (3 dc, ch 2, 3 dc) in all 4 corners. Sl st to 1st dc. Fasten off Warm Camel.

Rnd 3 (Cream Ivory Scalloped Border): Switch to Cream Ivory.
  Join in any corner ch-2 sp. Work (1 sc, ch 3, 1 sc) in corner sp.
  *Skip 1 dc, 5 dc in center st of next 3-dc cluster, skip 1 dc, sl st in space between clusters*;
  repeat from * along the blanket edges to create a wave scallop edge. Fasten off Cream Ivory.
- 🧶 Finishing: Weave in all outer border tails.
🛋️ Component 4: Matching Pillow Sham Cover (Make 2)
Each pillow sham consists of a 4-motif front panel and a two-piece overlapping envelope back panel.
FRONT PANEL (2x2 Grid):
1. Take 4 Sunburst Motifs and join them in a 2x2 square grid using whipstitch. (Front measures 12 in x 12 in).
2. Border Extension: Join Cream Ivory yarn in any corner. Work 4 rounds of standard granny cluster (3 dc per space, with [3 dc, ch 2, 3 dc] in corners) to expand the front panel to 18 in x 18 in. Fasten off.

BACK ENVELOPE PANELS (Warm Camel Yarn):
Make 2 back panels per sham (Upper Flap and Lower Flap).

Upper Flap:
  Row 1: Ch 56. Hdc in 2nd ch from hook and in each ch across. Turn. (55 hdc)
  Rows 2–18: Ch 1, hdc in each st across. Turn. (55 hdc)
  Row 19 (Buttonhole Row): Ch 1, hdc 8, [ch 2, skip 2 sts, hdc 12] x3, ch 2, skip 2 sts, hdc 7. Turn. (3 buttonholes)
  Row 20: Ch 1, hdc across (working 2 hdc in each ch-2 sp). Fasten off.

Lower Flap:
  Row 1: Ch 56. Hdc in 2nd ch from hook and in each ch across. Turn. (55 hdc)
  Rows 2–22: Ch 1, hdc in each st across. Turn. (55 hdc). Fasten off.

SHAM ASSEMBLY:
1. Lay the Front Panel right-side up.
2. Overlay the Lower Flap right-side down along the bottom edge.
3. Overlay the Upper Flap right-side down along the top edge (flaps will overlap by 3 inches in the middle).
4. Single-crochet around all 4 outer edges through both layers to join the front and back panels together.
5. Turn the pillow sham right-side out through the envelope opening. Sew 3 buttons on the lower flap aligning with the buttonholes.
🎨 L. STYLING / ASSEMBLY / STABILITY / FINAL SHAPING
📐 Assembly Layout & Grid Alignment
When laying out your 120 motifs, ensure all flowers face the same direction (Right Side facing up).
   [Motif 01] --- (Whipstitch BLO) --- [Motif 02] --- (Whipstitch BLO) --- [Motif 03]
       |                                   |                                   |
   (Whipstitch)                        (Whipstitch)                        (Whipstitch)
       |                                   |                                   |
   [Motif 11] --- (Whipstitch BLO) --- [Motif 12] --- (Whipstitch BLO) --- [Motif 13]
- Block Motifs First: Pin individual motifs out to 6.0″ x 6.0″ on blocking mats and steam them lightly before seaming. This ensures sharp corners and prevents puckering along seam lines.
- Join Rows First: Assemble motifs into 12 horizontal strips of 10 squares each.
- Join Strips: Connect the 12 long strips vertically using long lengths of Cream Ivory yarn.
- Add Border: Work the 3-round outer border along the entire perimeter to unify the design.
✅ Final Shaping Checklist
- ✅ All 120 bedspread motifs and 8 sham motifs measure 6.0″ x 6.0″.
- ✅ All central flower petals (Round 2) pop forward with dimensional 3D texture.
- ✅ Horizontal and vertical whipstitch seams lie completely flat.
- ✅ Blanket border drapes smoothly without rippling or pulling inward.
- ✅ Pillow sham envelope opening overlaps flat with buttons securely attached.
- ✅ All yarn tails are woven into matching color zones on the back.
💡 M. HELPFUL CROCHET TIPS
- 💡 Consistent Petal Height: Keep your tension loose on the yarn-overs for the 4-dc cluster stitch in Round 2 so all 8 petals match in height.
- 💡 Color Switching Neatness: Fasten off and join new colors with a standing stitch rather than a long chain to avoid visible seam lines.
- 💡 Preventing Square Warping: If your squares twist, make sure you turn your work or alternate starting corners on Rounds 4 and 5.
- 💡 Batch Production Strategy: Complete all 128 Round 1 centers first, then all Round 2 petals, and so on. Working in factory-style batches speeds up blanket production!
- 💡 Tail Weaving Trick: Crochet over your starting tails during Round 1 and Round 3 to eliminate half of your weaving work.
- 💡 Flat Seaming Secret: Whipstitch through the back loops only (BLO) of Round 6 stitches to create a flat join on the front face.
- 💡 Steaming Acrylic Yarn: If using acrylic yarn, steam block carefully from 2 inches away without touching the iron directly to the fiber to relax the stitches.
- 💡 Customizing Blanket Weight: For a lighter summer throw, use a DK weight (#3) cotton yarn with a 3.5 mm hook.
🧼 N. CARE INSTRUCTIONS
- 🧼 Washing: Machine wash on a gentle, cool cycle in a mesh laundry bag, or hand wash in a tub with mild detergent.
- 🧽 Drying: Lay flat to dry on dry towels or a drying rack to prevent stretching the heavy wet blanket out of shape. Do not tumble dry on high heat.
- 📦 Storage: Store folded neatly in a breathable linen storage bag with cedar blocks to protect cotton fibers during off-season months.
❓ R. FAQ
❓ How long will it take to complete this entire bedspread set?
For an intermediate crocheter, each square takes approximately 15 to 20 minutes. Completing all 128 squares, seaming, and adding borders takes roughly 45 to 60 total crafting hours.
❓ Can I resize this pattern for a Twin or King size bed?
Yes! For a Twin blanket (approx. 48″ x 72″), make an 8 x 12 grid (96 squares). For a California King (approx. 84″ x 90″), make a 14 x 15 grid (210 squares).
❓ My square corners are rounding instead of staying sharp. What should I do?
Ensure you work (3 dc, ch 2, 3 dc) in every corner space during Rounds 4 and 5. The ch-2 space is necessary to form a crisp 90-degree corner.
❓ Should I steam block my squares before or after joining them?
Steam blocking individual squares before joining makes seaming much easier because all stitch edges line up evenly. A quick final steam block after assembly unifies the entire blanket.
❓ What type of yarn is best for a heavy bedspread?
A cotton-acrylic blend (50/50 or 80/20) is ideal. It provides the soft, breathable weight of cotton with the lightweight durability and washability of acrylic.
❓ Can I use the join-as-you-go (JAYG) method instead of whipstitching?
Yes! You can replace Round 6’s single-crochet border with a slip-stitch JAYG join on the final round of each square to eliminate sewing entirely.