Mini Holly Berry Wreath Ornament Trio 🎄🎀
🧸 A. TITLE + category/tag line
Mini Holly Berry Wreath Ornament Trio 🎄🎀 Free Holiday Crochet Pattern & Traditional Christmas Tree Decor Guide
📖 B. INTRODUCTION
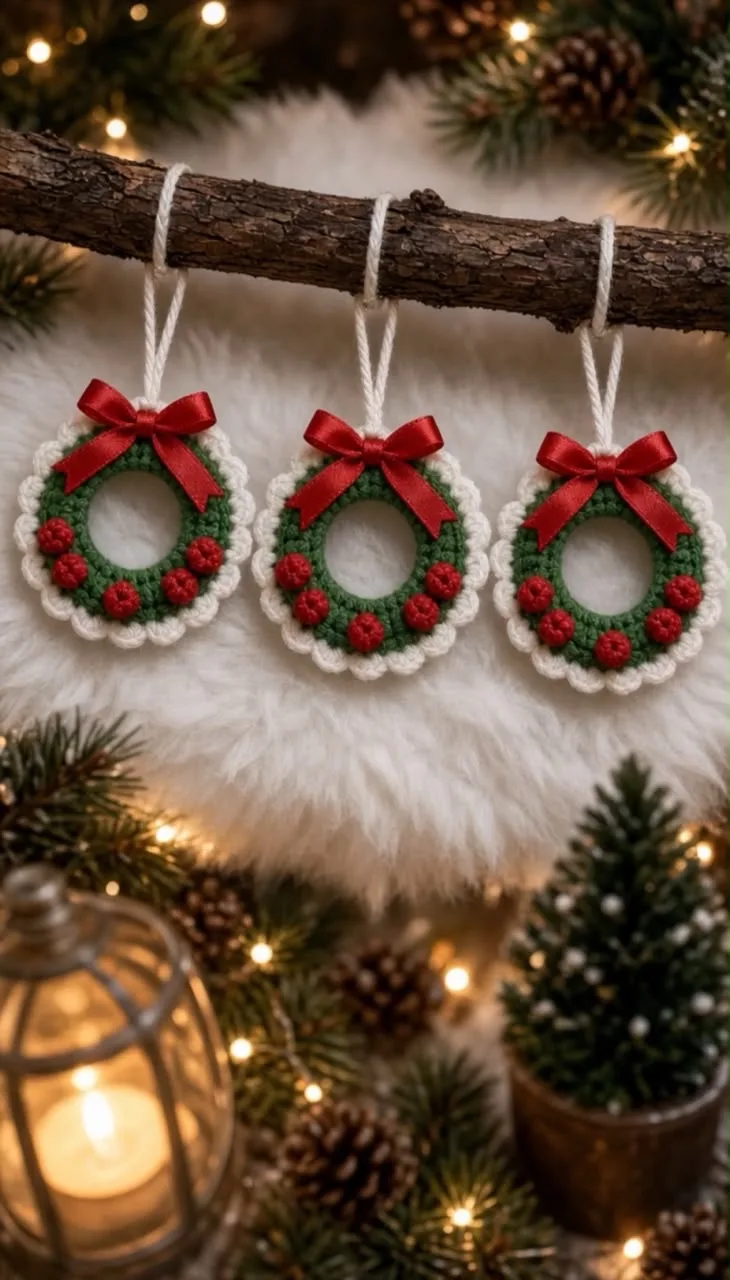
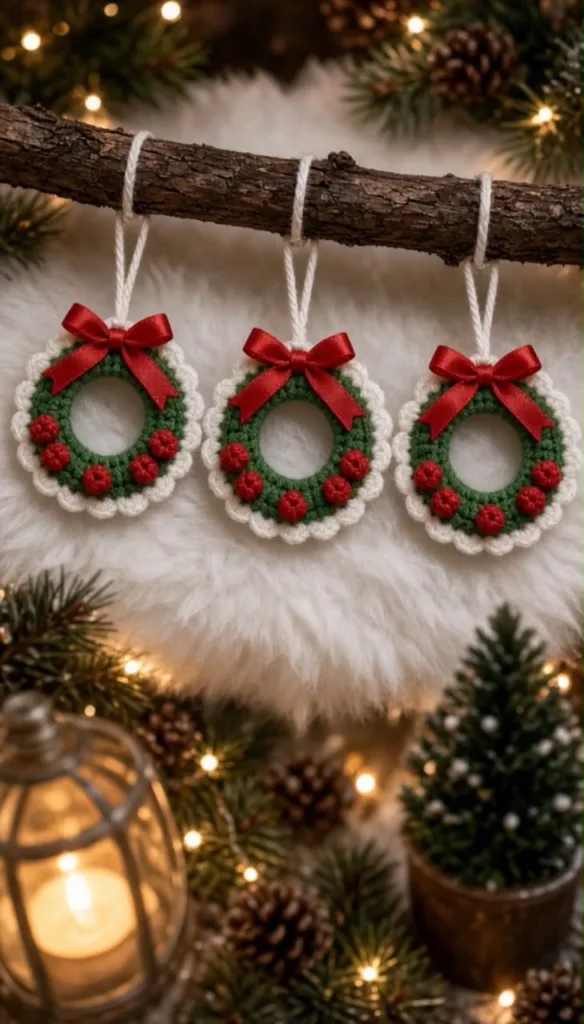
Capture classic Christmas warmth with this Mini Holly Berry Wreath Ornament pattern. Designed with a sturdy green ring base, each wreath features raised red bobble berries, a delicate cream scalloped border, and a neat red satin bow topper suspended from a white hanging cord.
These ornaments work up quickly using small yarn scraps, making them an ideal project for holiday craft fairs, gift tags, festive garland strands, or handmade tree decorations. The dense single crochet ring construction ensures each wreath keeps its flat circular shape without sagging over time.
Customize your trio by choosing metallic gold trim, adding tiny bell charms to the bottom, or swapping the satin ribbon for rustic jute twine.
🔍 C. MAIN PATTERN OVERVIEW
- The Wreath Base: A structured green circular band worked either around a craft ring or over a foundation chain loop.
- The Berry Accents: Six evenly spaced red bobble stitches worked directly into the face of the wreath ring.
- The Scalloped Rim: A light cream shell stitch border that frames the outer circumference of the green foliage.
- The Bow & Loop Assembly: A pre-tied red satin ribbon bow glued or stitched at the top anchor point with a hanging loop.
🎯 D. SKILL LEVEL
Easy / Advanced Beginner Uses standard stitches, basic bobble textures, simple color changes, and minimal assembly.
- Magic Ring (MR) or foundation chain ring
- Single crochet (sc) and double crochet (dc) shells
- 4-dc Bobble Stitch (Bo) for berries
- Color switching between rows
📏 E. FINISHED SIZE
Measurements: 3.5 inches (8.9 cm) outer diameter; 1.5 inches (3.8 cm) inner ring opening. Size Factors: Using worsted weight yarn with a 4.0 mm hook yields a larger 4.5-inch wreath, while fingering weight yarn with a 2.0 mm hook produces 2-inch mini package toppers.
🧮 F. GAUGE
Ring Gauge: 30 sc worked into the center ring loop = 3.5-inch outer diameter after border. Maintain firm, even tension so the ring remains rigid without needing internal wiring.
🧶 G. REQUIRED YARN AMOUNTS
| Yarn Color | Component | Estimated Yardage (For 3 Wreaths) |
| Forest Green (MC) | Wreath base ring | ~ 30 yards (27 m) |
| Cream / Off-White (CC1) | Outer scalloped edging | ~ 15 yards (14 m) |
| Crimson Red (CC2) | Popcorn berries | ~ 10 yards (9 m) |
Yarn used is standard Sport or DK weight mercerized cotton yarn.
🧰 H. MATERIALS
- Hook: 2.75 mm (C) or 3.0 mm crochet hook
- Ribbon: 3 yards of 3/8-inch red satin ribbon (cut into three 8-inch strips for bows)
- Hanger Cord: Thin white cotton yarn or silver embroidery thread for hanging loops
- Optional Ring Core: 3 plastic or wooden 1.5-inch curtain rings (optional; pattern includes soft-ring option)
- Tools: Tapestry needle, sharp scissors, hot glue gun (or sewing needle and thread)
🔤 I. ABBREVIATIONS – US TERMS
| Abbreviation | Definition |
| MR | Magic Ring |
| ch | Chain |
| st(s) | Stitch(es) |
| sl st | Slip Stitch |
| sc | Single Crochet |
| dc | Double Crochet |
| Bo | Bobble Stitch (4 dc worked into same st, closed together) |
| FO | Fasten Off |
📝 J. NOTES BEFORE YOU BEGIN
- Bobble Stitch Stitching: Work the 4-dc bobble stitches so the textured berry pops out toward the front face of the ornament.
- Foundation Options: You can crochet directly over a 1.5-inch plastic/wooden ring for extra rigidity, or follow the chain-loop instructions below for a yarn-only wreath.
- Tension: Keep single crochet stitches tight around the inner loop to prevent gaps.
🪡 K. COMPLETE PATTERN
🌿 Wreath Base Ring (Make 3)
Start with Forest Green (MC).
Foundation: ch 18. Join with a sl st to the first ch to form a ring (ensure the chain is not twisted).
R1 (Inner Ring): ch 1, work 30 sc directly into the center of the chain ring (crocheting over the chain loop itself). Join with sl st to first sc. (30 sc)
R2 (Berry Round): ch 1, sc in next 4 sts; switch to Crimson Red (CC2), work 1 Bo st in next st; switch back to Forest Green (MC). Repeat from * to * 5 more times. Join with sl st to first sc. (30 sts total: 24 sc, 6 Red Berries)
Note on Bo (Bobble Stitch): [Yarn over, insert hook in st, yarn over, pull up loop, yarn over, pull through 2 loops] 4 times in same st. Yarn over with green yarn, pull through all 5 loops on hook.
R3 (Outer Surface Round): ch 1, sc in each st around (including the tops of the bobbles). Join with sl st to first sc. (30 sc) FO Forest Green yarn.
🍦 Scalloped Cream Border
Join Cream/Off-White (CC1) into any stitch along the outer edge of R3.
R4 (Shell Edging): skip 1 st, 4 dc in next st, skip 1 st, sl st in next st. Repeat from * to * around the outer ring (approx. 7–8 scalloped shells around). Join with sl st to base of first shell. FO, weave in all ends securely at the back of the wreath.
🎀 Ribbon Bow & Hanging Loop
- Tying the Bow: Cut an 8-inch piece of 3/8-inch red satin ribbon. Tie it into a neat 1.5-inch bow with trimmed diagonal tails.
- Attaching the Bow: Using a hot glue gun or red sewing thread, attach the satin bow to the top center of the wreath ring, overlapping the inner green band.
- Hanging Loop: Thread an 8-inch strand of white yarn or cord through the back stitches behind the bow. Tie the open ends in a double knot to form a 3-inch hanging loop.
🎨 L. STYLING / ASSEMBLY / STABILITY / FINAL SHAPING
1. Flattening & Shaping Gently press the wreath flat with your fingers. Push each red bobble forward from the back so all six berries pop prominently off the green background.
2. Blocking (Optional) If using yarn without a solid plastic core, lightly spray the back of the finished wreath with fabric starch and pin it flat on a blocking board for 2 hours to ensure a round shape.
✅ Final Finishing Checklist
- ✅ All 6 red berries are popped out toward the front face.
- ✅ Scalloped cream border lies flat without curling.
- ✅ Red satin bow is glued or sewn securely at the top.
- ✅ White hanging cord is centered directly behind the bow.
💡 M. HELPFUL CROCHET TIPS
- 💡 Clean Color Pop: Pull the green yarn tight when finishing each red bobble to keep the red berry contained in its stitch space without bleeding into neighboring stitches.
- 💡 Ribbon Seal: Lightly singe the raw edges of your satin ribbon tails with a lighter to prevent fraying over time.
- 💡 Tighter Ring Option: If working around a plastic curtain ring, work 36 sc over the ring in R1 for a smooth, covered surface.
- 💡 Garland Idea: Omit individual hanging loops and string 6–8 mini wreaths along a 5-foot strand of jute twine for a mantel garland.
🧼 N. CARE INSTRUCTIONS
Spot clean gently with a damp cloth if needed. Do not submerge completely in hot water, as liquid heat can loosen hot glue holding the satin bows. Store flat inside a dry box between tissue paper during the off-season.
❓ R. FAQ
❓ Can I embroider the berries instead of using bobble stitches? Yes! You can work R2 entirely in green single crochet, then embroider 6 French knots using red embroidery floss or yarn.
❓ What size wooden ring works best for this pattern? A 1.5-inch to 2-inch outer diameter wood or plastic ring fits this stitch count.
❓ Can I use velvet yarn for this ornament? Plush/velvet yarn works well, but reduce your hook size slightly to keep the inner ring opening visible.
Share the love! Did you make this Mini Holly Berry Wreath Ornament Trio? Tag your photos on social media so we can share your festive creations!
Categories: Holiday Decor, Christmas Ornaments, Quick Crochet, Free Patterns Tags: mini wreath crochet, christmas ornament pattern, crochet wreath ornament, holly berry ornament, quick holiday crafts
You might also like:
- Amigurumi Santa Bauble Ornament
- Frosted Icicle Spiral Garland
- Lacy Snowflake Star Ornament Trio
- Rustic Peppermint Swirl Coasters