Snowman Spiral Ornament
📖 INTRODUCTION
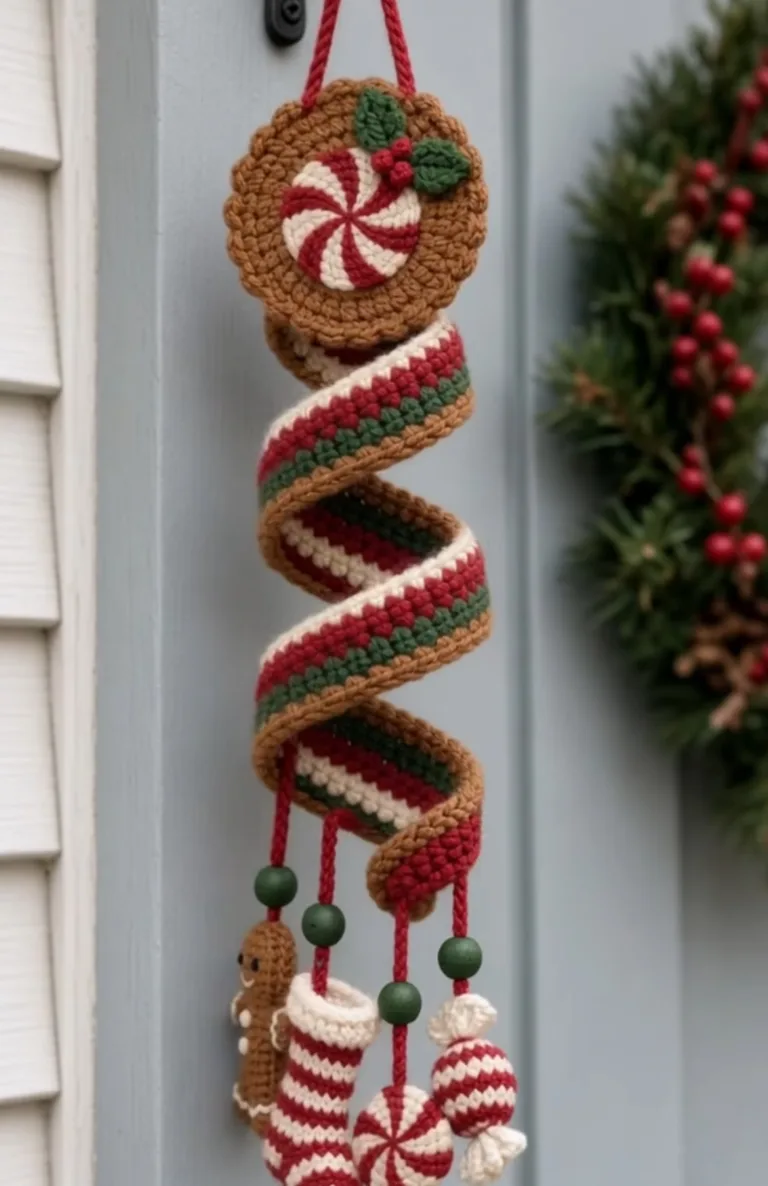
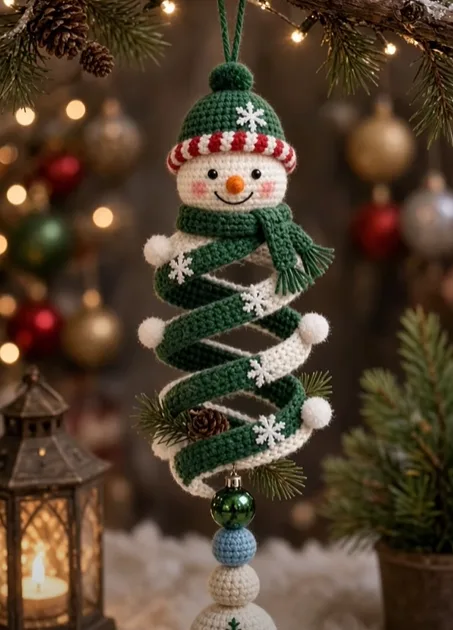
Add a playful, kinetic twist to your winter wonderland with this 3D Kinetic Snowman Spiral Ornament. Merging classic amigurumi character design with a striking structural element, this ornament features a traditional, smiling snowman head atop a mesmerizing, two-toned bouncing spiral body.
The design is packed with charming, rustic details. The snowman wears a cozy green beanie with a red and white striped brim, topped with a matching green pom-pom, and a fringed green winter scarf. The magic of the piece lies in the coiled body—a flat, wired ribbon that is forest green on top and snowy white on the bottom, decorated with embroidered snowflakes and tiny white pom-poms. A sprig of faux pine and a miniature pinecone add a touch of woodland realism.
Hanging from the center of the spiral is a delightful pendulum of dangles: a shiny green bauble followed by three crocheted spheres in blue and white. Because of its internal wire and central string structure, the snowman bounces playfully when touched, making it a show-stopping addition to any Christmas tree or holiday display.
🔍 MAIN PATTERN OVERVIEW
This pattern is highly modular, consisting of several distinct pieces that come together during a careful assembly phase:
- The Head & Accessories: A classic stuffed amigurumi sphere featuring a friendly embroidered face, a carrot nose, and blush. The head is accessorized with a striped-brim hat and a flat-row scarf with fringe.
- The Spiral Ribbon: Unlike a tubular spiral, this body is a flat, thick ribbon. It is constructed by crocheting two long, flat strips (one green, one white) and crocheting them together around the edges, trapping a flexible craft wire inside to hold the coil shape.
- The Bottom Dangles: A combination of mixed media and crochet. A store-bought mini green bauble sits above a small blue crocheted sphere and two white crocheted spheres.
- The Assembly: A central cord runs straight down from the snowman’s head, through the center of the air within the coil, connecting to the dangles at the bottom to provide structural tension.
🎯 SKILL LEVEL
Intermediate
This project involves basic amigurumi shapes but requires confidence in multi-part assembly, working with wire, and fine embroidery details.
Techniques Involved:
- Working in continuous rounds (head, hat, beads)
- Working in flat rows (scarf, spiral ribbon)
- Crocheting two flat pieces together around a wire
- Surface embroidery (snowflakes, smile)
- Mixed-media assembly
📏 FINISHED SIZE
- Total Height: Approximately 9 to 10 inches (23-25 cm) from the top of the hat’s pom-pom to the bottom white sphere (excluding the hanging loop).
- Spiral Width: Approximately 3.5 inches (9 cm) across the widest coil.
🧮 GAUGE
- Exact gauge is not critical, but you must use a hook size small enough to create a tight, dense fabric so the white stuffing does not show through the head, and the wire does not poke through the ribbon.
🧶 REQUIRED YARN AMOUNTS
Estimates based on medium #4 worsted weight cotton or acrylic yarn:
- White: 40 yards (Head, bottom of spiral ribbon, bottom spheres).
- Forest Green: 40 yards (Hat, scarf, top of spiral ribbon).
- Red: 5 yards (Hat brim).
- Light Blue: 5 yards (Middle bottom sphere).
- Orange: Scrap amount (Carrot nose).
- Black/Pink: Scrap amounts (Embroidery).
🧰 MATERIALS
- Hook: US E/4 (3.5 mm) crochet hook.
- Wire: Approximately 30 inches (76 cm) of 12-gauge bendable craft wire.
- Central Support: 10 inches of strong, thin twine, clear nylon, or heavy-duty thread.
- Eyes: 6mm black safety eyes.
- Stuffing: Polyester fiberfill.
- Embellishments:
- Small white craft pom-poms (about 0.5 inch diameter).
- One small shiny green tree ornament (approx. 1 inch diameter).
- Small piece of faux pine greenery and a mini pinecone.
- Tools: Tapestry needle, wire cutters, needle-nose pliers.
🔤 ABBREVIATIONS – US TERMS
- MR – magic ring
- ch – chain
- sl st – slip stitch
- sc – single crochet
- inc – increase
- dec – invisible decrease
- st(s) – stitch(es)
- FO – fasten off
🪡 COMPLETE PATTERN BREAKDOWN
⛄ 1. The Snowman Head
Yarn: White
Work a standard amigurumi sphere.
- MR 6, inc around (12), (1 sc, inc) (18), (2 sc, inc) (24), (3 sc, inc) (30), (4 sc, inc) (36).
- Work 6-7 rounds of plain sc.
- Insert safety eyes roughly between rounds 10 and 11, about 4 stitches apart.
- Begin decreasing: (4 sc, dec) (30), (3 sc, dec) (24), (2 sc, dec) (18).
- Stuff firmly.
- (1 sc, dec) (12), dec around (6). FO and close hole.
- Details: Embroider a small orange French knot or stitch for the nose. Embroider a thin black smile and add pink blush to the cheeks.
🎩 2. The Hat & Scarf
Hat (Green, Red, White):
- Start with Forest Green. MR 6, inc to 12. Work 1 plain round. Inc to 18. Work 1 plain round. Inc to 24. Work 2 plain rounds.
- Brim: Switch to alternating Red and White yarn for the final two rounds to create the striped edge. FO and leave a long tail for sewing to the head.
- Hat Pom-Pom: Make a small MR 6 green sphere, stuff lightly, and sew to the top of the hat.
- Embroider a white snowflake onto the green section of the hat.
Scarf (Green):
- Ch 45. sc in 2nd ch from hook and across. (44)
- FO. Cut small strands of green yarn and attach them to the ends as fringe.
🌀 3. The Two-Toned Wired Spiral Ribbon
Strip 1 (White – Bottom Face) & Strip 2 (Green – Top Face):
- Make 2 identical strips. Ch 81.
- Row 1: sc in 2nd ch from hook and all the way across. (80)
- Row 2-3: ch 1, turn, sc across. (80). FO.
- Note: Adjust starting chain length depending on how long you want your spiral.
Joining & Wiring:
- Place the Green strip on top of the White strip.
- Take your craft wire and loop the ends with pliers for safety. Sandwich the wire between the two strips.
- Using Green yarn, sc through both thicknesses completely around the perimeter of the ribbon, trapping the wire inside. FO.
- Embellish: Embroider 4-5 white snowflakes spaced evenly along the Green side of the ribbon.
🔵 4. The Dangle Beads
- Blue Sphere: MR 6, inc to 12, plain round, dec to 6. Stuff and FO.
- White Spheres (Make 2): MR 6, inc to 12, plain round, dec to 6. Stuff and FO. Flatten them slightly with your fingers.
🎨 ASSEMBLY & FINAL SHAPING
1. Building the Head: Sew the hat to the top of the snowman’s head, stuffing it slightly before closing the seam. Tie the fringed green scarf securely around the “neck” area (the bottom of the white sphere).
2. Shaping the Spiral: Take your flat, wired ribbon. Carefully wrap it around a cylindrical object (like a rolling pin or thick cardboard tube) to create a perfect spiral shape. Ensure the Green side is facing UP and the White side is facing DOWN.
3. The Central Tension Cord:
- Thread your strong central twine onto a long needle.
- Start at the bottom: Thread up through the two white crocheted spheres, then the blue crocheted sphere, then the loop of the shiny green bauble. Tie a secure knot to hold them on the string.
- Run the needle up through the very center of the air inside the green/white spiral coil.
- Sew the top flat edge of the spiral ribbon securely to the bottom of the snowman’s head.
- Pull the central string up, thread it directly through the bottom of the snowman head, up through the center of the hat, and out the top pom-pom.
- Pull the string taut so the spiral is slightly compressed and bouncy, then tie a loop at the top of the pom-pom for hanging.
4. Final Embellishments:
- Hot glue or sew the small white craft pom-poms evenly along the outer edge of the spiral ribbon.
- Attach the faux pine sprig and miniature pinecone to the lower half of the spiral ribbon, nestling them against the edge.
💡 HELPFUL CROCHET TIPS
- 💡 Ribbon Width: If your flat ribbon is curling or twisting too much before you add the wire, your starting chain might be too tight. Go up half a hook size for the foundation chain only.
- 💡 Symmetrical Bouncing: When setting the tension of the central string, hang the ornament from a cabinet knob. This allows gravity to help you see exactly how far the coils will stretch before you tie the final top knot.
- 💡 Clean Embroidery: When embroidering the snowflakes on the spiral, do it before you crochet the green and white strips together. This allows you to hide all the ugly embroidery knots on the inside of the ribbon!
🧼 CARE INSTRUCTIONS
- Cleaning: Spot clean the yarn gently with a cotton swab dipped in mild soapy water. Keep water away from the metal bauble and the internal wire to prevent rust.
- Storage: Store flat in a rigid box. Avoid crushing the ornament, as it can be difficult to get the internal wire perfectly re-spiraled once bent out of shape.
❓ FAQ
❓ I don’t have a mini glass bauble for the bottom. What else can I use?
You can simply crochet another sphere (perhaps in red to match the hat brim), use a large wooden craft bead, or attach a small metal jingle bell to give the ornament some festive sound!
❓ My spiral looks like a triangle rather than a uniform spring. Why?
This happens if you wrapped the wired ribbon around a cone instead of a cylinder during the shaping phase. Unbend the ribbon flat, and re-wrap it around something uniformly straight, like a thick wooden dowel or a water bottle.
❓ Can I use pipe cleaners instead of heavy craft wire?
For this specific pattern, pipe cleaners are likely too weak. Because the ribbon is constructed of two layers of crocheted fabric, it is quite heavy. A 12-gauge or 14-gauge craft/floral wire is necessary to hold the rigid, bouncy shape without sagging.