Lavender and Cream Classic Granny Square Blanket – Step-by-Step Crochet Pattern
Introduction
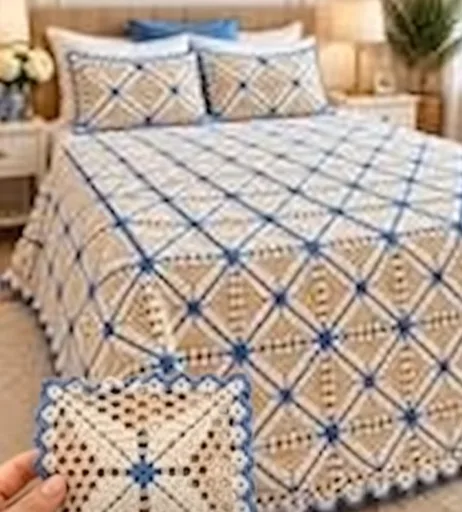
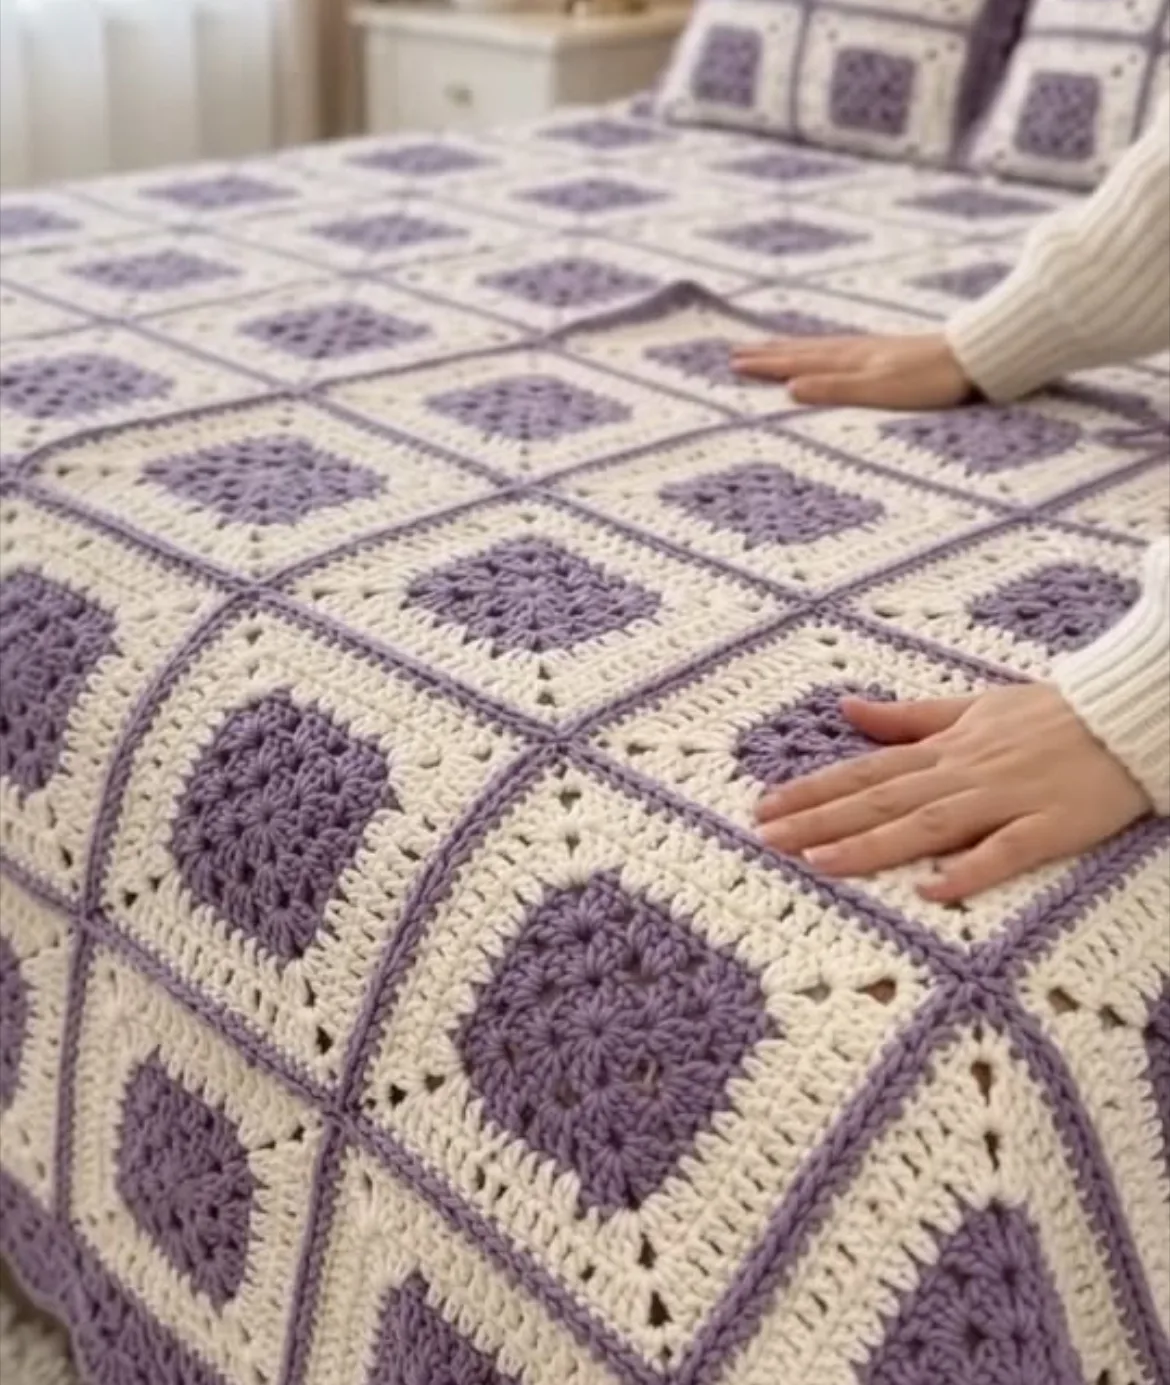
This beautiful crochet project is an elegant blanket composed of classic granny squares in a soft lavender and cream color scheme. Each square has a solid-colored center framed by a contrasting border, creating a timeless geometric look. The texture is soft and cozy, featuring clusters of double crochet stitches that form the classic openwork design of vintage granny squares. The blanket is finished with clean joins and a subtle border, making it perfect as a bedspread, throw, or even as statement pillow covers.
The predominant colors are a muted lavender and a creamy off-white, giving the work a peaceful, inviting vibe. The project’s repetitive motifs and neat, grid-like assembly make it especially eye-catching, and it’s suitable for many décor styles ranging from modern minimalism to vintage charm. Making this blanket can be a meditative, rewarding experience as you watch each modular square come together into a large, cohesive whole.
This project is incredibly versatile: use it as a bedspread, a large sofa throw, or adapt the motif for smaller accessories like cushions or coasters. The modular nature of the squares lets you customize the final size or color arrangement with ease.
Project Overview
This blanket is made by crocheting dozens of individual granny squares. Each square is worked in the round beginning from the center, starting with the lavender shade and bordered in cream, with a final join and slim outline in lavender. The squares are joined together to form rows, and then all rows are joined to produce the blanket. The modular construction makes it easy to handle in parts, and the blanket can be made as large or as small as desired. A simple, clean outer border completes the look.
Skill Level
Advanced Beginner to Intermediate. The pattern is based on classic granny square motifs utilizing basic stitches (chain, double crochet, slip stitch), color changes, and simple assembly. Joining squares and keeping edges neat may require moderate experience and attention to detail, but no advanced techniques are required.
Materials
- Yarn Weight: Worsted weight (#4) yarn
- Fiber: Soft acrylic or a cotton-blend for durability and comfort
- Main colors:
- Lavender (Color A): Approx. 900g (about 1800m/1970yds) for a queen-sized blanket
- Cream (Color B): Approx. 850g (about 1700m/1860yds)
- Crochet hook: 5.0mm (H-8 US)
- Tapestry needle (for sewing/weaving ends)
- Sharp scissors
- Stitch markers (for marking corners/rows, optional)
- Measuring tape (optional but recommended for checking square size and gauge)
Finished Size
The finished blanket in the image appears to cover a queen-sized bed. With each square measuring approximately 17 x 17 cm (6.75 x 6.75 inches) and a layout of 8 squares by 10 squares:
- Approximate blanket size: 136 x 170 cm (53.5 x 67 inches) before blocking
You can easily adjust the final size by increasing or decreasing the number of squares, or adjusting individual square dimensions.
Gauge
Gauge: 4 rounds of the square motif = 17 x 17 cm (6.75 x 6.75 inches)
Gauge is not absolutely critical for blankets, but variations may affect the final size and yarn usage. Make a square and measure it before starting mass production to check if you need to increase or decrease hook size.
Stitches and Abbreviations
- ch – chain
- sl st – slip stitch
- sc – single crochet
- dc – double crochet
- sp – space
- st(s) – stitch(es)
- MR – magic ring
Important Pattern Notes
- All rounds are joined with a slip stitch to the top of the beginning chain or first dc unless otherwise stated.
- Chains at the start of each round count as the first stitch.
- Always change color at the end of a round by finishing the last stitch with the new color for a neat transition.
- Use a stitch marker to mark the corners of your squares for easier joining and border placement.
- Work with the right side facing throughout; squares are reversible but maintain the same orientation for consistency.
Detailed Crochet Pattern
Part 1: Granny Square Motif
Each granny square is made in three sections: lavender center, cream border, and a finishing round in lavender.
With Color A (Lavender):
- Round 1: Make a MR. Ch 3 (counts as dc), 2 dc in ring, ch 2, [3 dc in ring, ch 2] three times. Join with sl st to top of beg ch-3. Fasten off Color A. (12 dc, 4 ch-2 sps)
Switch to Color B (Cream):
- Round 2: Join Color B in any ch-2 corner. Ch 3 (counts as dc), (2 dc, ch 2, 3 dc) in same corner sp, ch 1. *In next corner: (3 dc, ch 2, 3 dc) in corner sp, ch 1; repeat from * around, join with sl st to top of beg ch-3. (24 dc, 4 ch-2 sps, 4 ch-1 sps)
- Round 3: Sl st to next corner. Ch 3, (2 dc, ch 2, 3 dc) in same corner sp, [ch 1, 3 dc in ch-1 sp, ch 1], *In next corner: (3 dc, ch 2, 3 dc) in corner sp, [ch 1, 3 dc in ch-1 sp, ch 1]; repeat from * around, join with sl st to top of beg ch-3. (36 dc, 4 ch-2 sps, 8 ch-1 sps)
- Round 4: Sl st to next corner. Ch 3, (2 dc, ch 2, 3 dc) in same corner sp, [ch 1, 3 dc in next ch-1 sp, ch 1, 3 dc in next ch-1 sp, ch 1], *In next corner: (3 dc, ch 2, 3 dc) in corner sp, [ch 1, 3 dc in each of next two ch-1 sps, ch 1]; repeat from * around, join with sl st to top of beg ch-3. Fasten off Color B. (48 dc, 4 ch-2 sps, 12 ch-1 sps)
Switch to Color A (Lavender) for final outline round:
- Round 5: Join Color A in any corner ch-2 sp. Ch 3, (2 dc, ch 2, 3 dc) in same sp, then [ch 1, 3 dc in each ch-1 sp, ch 1] to next corner; repeat around. End with join to top of beg ch-3. Fasten off and secure all ends. (60 dc, 4 ch-2 sps, 16 ch-1 sps per square)
This creates a sturdy, square motif with crisp corners. Repeat these steps to create as many squares as you need, e.g., 80 squares for an 8×10 blanket.
Part 2: Arranging and Joining the Squares
Lay out your finished squares in your desired arrangement. Alternate the direction/orientation slightly for the most balanced result if you’d like; make sure the colors form a pleasing checkerboard effect.
- Straight Join: With right sides facing up, use whip stitch or slip stitch to join squares through the outer loops only along each edge.
- For a more defined join, join with your lavender yarn using a slip stitch through both loops, seam side visible as a neat raised ridge.
- Work row by row – join all squares in a row, then join adjacent rows together.
Part 3: Blanket Border
Once all squares are joined, work a simple, clean border to finish. With Lavender (Color A):
- Round 1: Attach yarn in any corner. Ch 3 (counts as dc), 2 dc in corner, ch 2, 3 dc in same sp. *[3 dc in each ch-1 sp or join seam between squares, ch 1]* across to next corner. In each corner: (3 dc, ch 2, 3 dc). Continue around, join with sl st to beg ch-3.
- Round 2 (optional): Ch 1, sc in each st and ch-1 sp around, working (sc, ch 2, sc) in each corner. Join and fasten off. This adds a neat finish and helps flatten the edges.
Part 4: Optional Decorative Elements
- Add simple single crochet or crab stitch (reverse sc) edging in cream, if desired, for definition.
- Small pompoms or tassels could be attached to the blanket corners for extra flair.
Assembly and Finishing
- Weave in all ends carefully with the tapestry needle, securing them into the body of the squares to prevent unravelling.
- After joining, gently block the entire blanket: soak in lukewarm water, lay flat on a towel, and gently stretch the blanket into shape. Pin corners for sharp definition.
- Allow to air dry thoroughly before use.
- If making pillow covers, sew a fabric lining or back piece and insert the pillow form.
Customization Ideas
- Use alternative colors such as soft gray with white, pastel blue with cream, or bold contrasting hues for dramatic effect.
- Try lighter (DK) or heavier (chunky) yarn weights for a baby blanket or winter throw.
- Create matching cushions by making sets of four or nine joined squares sized to fit pillow forms.
- Make a table runner, wall hanging, or modular scarf by joining squares in rows or strips as desired.
- Use leftover squares as coasters, pot holders, or applique patches for other projects.
Troubleshooting Tips
- If squares curl, check your tension—make sure not to crochet too tightly, and block each square lightly before joining.
- If seams are uneven, count stitches at each edge before joining, and use stitch markers in corners for guidance.
- If the blanket size is off, check your gauge and adjust hook size accordingly.
- If color changes are loose, always fasten off in the last step of the previous color, and crochet over yarn tails for extra security.
- If the blanket feels uneven or puckers, block your finished work gently for an improved shape and drape.
Care Instructions
- Machine wash gently in cold water (if using acrylic or washable cotton blend).
- Lay flat to dry, reshaping as needed. Do not wring out.
- Avoid high heat or bleach. Gentle steam blocking can help refresh and reshape the blanket after washes.
Final Notes
Be sure to check stitch counts in each round, especially on corners, to keep squares flat and uniform. Adjust your hook size to match your natural tension if necessary. Refer to your finished or in-progress squares as a visual guide, keeping your rows and joins straight for the neatest finish. This versatile project is a beautiful, classic heirloom piece that you’ll be proud to display or gift.