Crochet Christmas Tree Ornament: Just 3 Circles
📖 B. INTRODUCTION
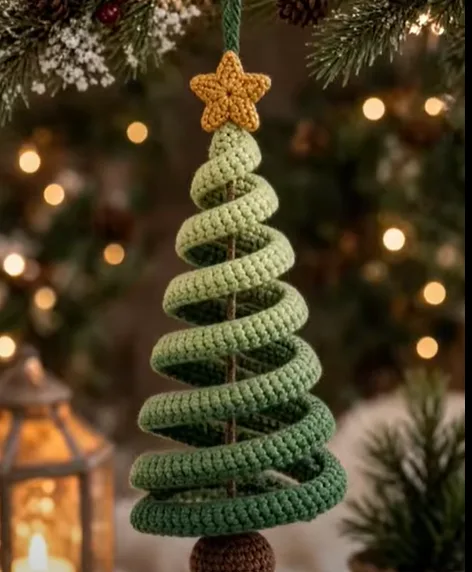
Welcome the holiday season with a charming, quick-to-make decoration that will bring handmade warmth to your tree! This original pattern, inspired by the classic Christmas silhouette, uses a simple construction technique to create a beautiful, tiered effect. If you can crochet a flat circle, you can make this delightful ornament. This project is perfect for beginners and experienced crocheters alike who are looking for a satisfying, scrap-friendly holiday project.
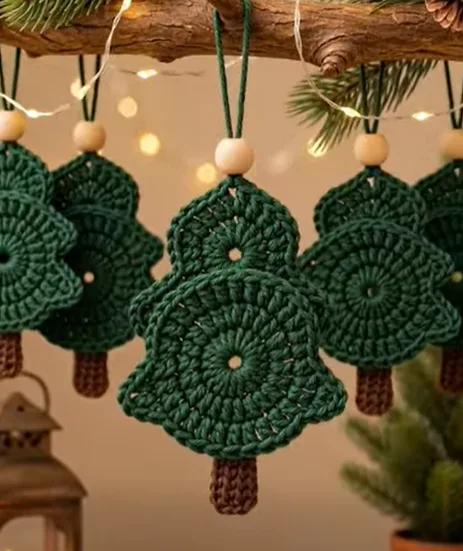
The final ornament features three distinct circular layers stacked elegantly, topped with a rustic natural wooden bead and a sturdy hanging loop. Whether you make a set for your own evergreen, whip them up as last-minute gifts, or use them to embellish holiday gift wrapping, these “Just 3 Circles” trees are sure to spread Christmas cheer. This fast pattern is ideal for craft fairs or for creating consistent, beautiful ornaments in large numbers.
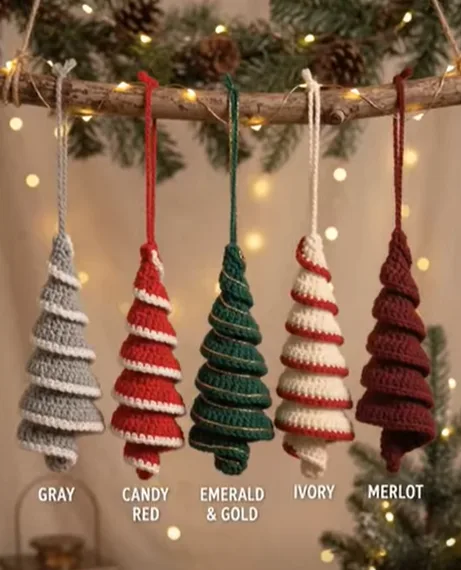
You can easily customize these trees by experimenting with different yarn colors—traditional forest greens, modern snowy whites, or even playful variegated shades. Add embroidery for tiny ornaments, sew on miniature sequins for sparkle, or change the bead color to match your decor. This simple formula for a tiered shape is highly adaptable and opens the door to endless personalization.
Let’s grab our hooks and some cozy yarn and get ready to crochet some festive magic. Follow along with the clear steps below to create your very own collection of these charming crochet Christmas tree ornaments.
🔍 C. MAIN PATTERN OVERVIEW
The 3-Circle Tiered Christmas Tree Ornament pattern is constructed by crocheting three separate, slightly overlapping circular motifs of decreasing sizes (Small, Medium, Large). These circles are then securely joined together in a stacked fashion to create the tiered, conical shape of a classic pine tree. The base of the tree is finished with a small, rectangular crocheted trunk. A decorative hanging loop is then added to the top, featuring a natural wooden bead threaded above the smallest circle for a clean, rustic finish. The resulting ornament is lightweight, holds its shape well, and has a charming, handmade aesthetic.
🎯 D. SKILL LEVEL
Level: Easy / Advanced Beginner 🟢
This pattern uses essential beginner stitches and techniques, making it achievable for those new to amigurumi or motif-based crochet.
Required Techniques:
- Magic Ring (MR)
- Chain (ch)
- Single Crochet (sc)
- Half Double Crochet (hdc)
- Double Crochet (dc)
- Slip Stitch (sl st)
- Working in continuous rounds and joined rounds
- Basic sewing/assembly for joining pieces
📏 E. FINISHED SIZE
When following the suggested yarn and hook size, your finished 3-Circle Christmas Tree Ornament will measure approximately:
- Height (excluding loop): 4.5 inches (11.5 cm)
- Width (at the widest part of the bottom circle): 3 inches (7.5 cm)
Please Note: Finished size can vary depending on your individual tension, the exact yarn weight used, the size of your wooden bead, and how tightly you stuff the trunk (if at all).
🧮 F. GAUGE
Gauge is not critical for this pattern. The most important aspect is that your circular motifs remain flat and relatively consistent in size to maintain the tiered silhouette. For reference:
- Large Circle Diameter: Approx. 3 inches (7.5 cm) after Round 3.
Tip: If your circles are curling, try a slightly larger hook or loosen your tension. If they are too floppy, try a smaller hook or tighten your tension.
🧶 G. REQUIRED YARN AMOUNTS
You will need a small amount of medium (worsted) weight yarn for this project. This is a great pattern for using up leftover scraps! The amounts are estimates.
- 🧵 Color A (Main Tree – e.g., Forest Green): Approximately 25 yards (23 meters)
- 🧵 Color B (Trunk – e.g., Medium Brown): Approximately 5 yards (4.5 meters)
🧰 H. MATERIALS
- Crochet Hook: US Size E/4 (3.5 mm) or size needed to obtain gauge/flat circles.
- Yarn: Medium weight (Worsted/Aran, #4) cotton or acrylic yarn in Forest Green and Medium Brown (as listed in Yarn Amounts). For the reference image aesthetic, we recommend a sturdy acrylic yarn with good stitch definition.
- Safety Eyes/Stuffing: Not required for this design.
- Yarn Needle: For weaving in ends and sewing components.
- Scissors: For cutting yarn.
- Stitch Marker: To mark the beginning of rounds (optional, but helpful for the trunk).
- Natural Wooden Bead: 1 bead, approximately 12mm – 14mm diameter (ensure the hole is large enough for your yarn).
- Hanging Loop Cord: 1 piece of matching green yarn, approx. 12 inches (30 cm) long, or decorative baker’s twine, jute, or leather cord.
🔤 I. ABBREVIATIONS – US TERMS
- ch: Chain
- dc: Double Crochet
- hdc: Half Double Crochet
- MR: Magic Ring
- R: Round
- sc: Single Crochet
- sc inc: Single Crochet Increase (2 single crochets in the same stitch)
- sl st: Slip Stitch
- st(s): Stitch(es)
- t-ch: Turning Chain
- ([action]) x#: Repeat the instructions within the brackets the specified number of times.
- ([count]): The total number of stitches at the end of the round or row.
📝 J. NOTES BEFORE YOU BEGIN
- Construction: This pattern is worked in separate components (3 circles and 1 trunk) which are joined during assembly. The circles are worked in joined rounds, starting each round with a chain and joining at the end with a slip stitch. The trunk is worked in rows.
- Joining: When joining a round with a slip stitch (sl st), join into the first stitch of the round (not the turning chain, unless specified otherwise).
- Turning Chain: For dc rounds, the ch-3 at the beginning counts as the first dc. For sc/hdc, the ch-1 does not count as a stitch.
- Colors: Use Color A (Green) for all tree circles and the hanging loop, and Color B (Brown) for the trunk.
- Originality: This pattern generates the tiered shape from stacked circles inspired by the reference image, but the exact stitch counts and construction logic are original.
🪡 K. COMPLETE PATTERN
🎄 The Tree Circles
You will make three separate circles in decreasing sizes. Use Color A (Green) for all three.
🧠 1. Large Circle (Bottom Tier)
Quantity: Make 1
Start: MR 10 (or ch 4, sl st to first ch to form ring).
R1: ch 3 (counts as 1st dc), work 11 dc into the MR. Join with sl st to top of ch-3. (12 dc)
R2: ch 3 (counts as 1st dc), dc in the same st. work 2 dc in each st around. Join with sl st to top of ch-3. (24 dc)
R3: ch 3 (counts as 1st dc), dc in the same st. 1 dc in the next st. [2 dc in the next st, 1 dc in the next st] x11. Join with sl st to top of ch-3. (36 dc)
Fasten off, leaving a short tail for weaving. Do NOT leave a long tail for sewing; we will use the hanging loop thread for most joining.
🧠 2. Medium Circle (Middle Tier)
Quantity: Make 1
Start: MR 10 (or ch 4, sl st to first ch to form ring).
R1: ch 3 (counts as 1st dc), work 11 dc into the MR. Join with sl st to top of ch-3. (12 dc)
R2: ch 3 (counts as 1st dc), dc in the same st. [2 dc in the next st] x11. Join with sl st to top of ch-3. (24 dc)
R3: ch 1 (does not count as st), work 1 hdc in each st around. Join with sl st to first hdc. (24 hdc)
Fasten off, leaving a short tail for weaving.
🧠 3. Small Circle (Top Tier)
Quantity: Make 1
Start: MR 8 (or ch 3, sl st to first ch to form ring).
R1: ch 3 (counts as 1st dc), work 9 dc into the MR. Join with sl st to top of ch-3. (10 dc)
R2: ch 1 (does not count as st), [2 sc in the next st, 1 sc in the next st] x5. Join with sl st to first sc. (15 sc)
Fasten off, leaving a short tail for weaving.
🪵 The Trunk
Color: Color B (Brown)
Quantity: Make 1
Start: ch 5.
Row 1: sc in the 2nd ch from hook and in each ch across. (4 sc)
Row 2-4: ch 1, turn. sc in each st across. (4 sc)
Fasten off, leaving a long tail for sewing to the bottom circle.
🎨 L. STYLING / ASSEMBLY / STABILITY / FINAL SHAPING
The magic of this ornament happens in the assembly. We will join the circles from top to bottom, using the hanging loop as the central reinforcing thread.
1. Prepare the Hanging Loop
- Take your 12-inch piece of green yarn (or chosen cord). Fold it in half to create a 6-inch loop.
- Tie a secure knot at the open end of the loop, leaving about 0.5 inches (1.5 cm) of tail below the knot.
2. Add the Bead and Small Circle
- Insert the folded loop end (the loop itself) upwards through the center MR hole of the Small Circle.
- Slide the wooden bead onto the loop and let it rest on top of the Small Circle. The knot should be hidden just below the MR hole of the Small Circle.
3. Join the Medium Circle
- Position the Medium Circle so that its top edge (Round 3) is behind the bottom half of the Small Circle. You want the Medium Circle to overlap the Small Circle slightly, about 0.5 inches (1.5 cm).
- Using a yarn needle and a length of green yarn, secure the Medium Circle to the Small Circle by sewing through both layers along the overlapping edge. Aim for the top of R3 of the Medium Circle and R1/R2 of the Small Circle. Make sure it is centered and secure.
4. Join the Large Circle
- Position the Large Circle behind the bottom half of the joined Medium Circle, overlapping in the same manner.
- Sew the Large Circle to the Medium Circle securely, following the same placement logic as step 3. Ensure all three circles are aligned vertically.
5. Attach the Trunk
- Center the Brown Trunk at the bottom edge of the Large Circle.
- Use the long tail from the Trunk to sew Row 4 of the trunk securely to the edge of Round 3 of the Large Circle. Make sure it is straight and centered.
6. Final Check
- Your structure is now complete. The hanging loop goes up through all three MR centers (Small -> Medium -> Large) and holds everything aligned. (The knot should be secured inside or just below the smallest circle MR).
- Check that all three tiers are centered and that the trunk is straight. Weave in any remaining loose ends on the back of the ornament.
💡 M. HELPFUL CROCHET TIPS
- 💡 Tight Centers: Pull your magic ring tails tightly to ensure no holes are visible in the center of the circles, keeping the ornament neat.
- 💡 Consistent Circles: Use light tension for the dc rounds so they lie flat. If your circles are bowl-shaped, they won’t stack correctly.
- 💡 Weave Securely: When weaving in ends, weave them back and forth at least three times to prevent them from coming loose with handling.
- 💡 Bead Hole: Always test your yarn or cord in the bead hole before you finish the circles to ensure it will fit easily. A bead with a slightly larger hole is easier to use.
- 💡 Joining Strength: Use several small, neat stitches to join the overlapping edges of the circles. Make sure the stitching is secure enough to hold the weight of the ornament without sagging, but not so tight that it puckers the fabric.
- 💡 Variation Idea: For an extra “snow-tipped” look, use a sparkly white yarn for Round 3 of the Large Circle, and Round 2 of the Medium and Small circles.
- 💡 Block if Needed: If your circles are slightly wavy, wet block them before assembly. Lay them flat on a towel, spray lightly with water, and let them dry completely.
🧼 N. CARE INSTRUCTIONS
To keep your handmade ornament looking beautiful for many seasons to come:
- 🧼 Spot Clean Only: Do not submerge the ornament in water, especially due to the wooden bead. Spot clean gently with a damp cloth if necessary.
- 🧼 Air Dry: If the ornament gets damp, allow it to air dry completely.
- 🧼 Storage: Store flat in a tissue-lined box to prevent the circles from becoming creased or misshapen. Avoid storing in humid environments.
- ⚠️ Safety Note: This ornament contains a small wooden bead and a hanging loop. It is intended as a decoration and is not a toy. Keep out of reach of very young children and pets who might pull at or ingest small parts.
❓ R. FAQ
Q: Can I use a different yarn weight for this pattern?
A: Yes, you can. A light worsted (DK) yarn and a smaller hook (3.0mm) will produce a smaller ornament. A bulky yarn and larger hook (5.5mm) will make a significantly larger, faster-to-make decoration. Keep in mind that a bulky yarn might make the tiered shape less defined and may not fit your bead.
Q: Do I have to make the hanging loop out of yarn?
A: Not at all! You can use jute twine, decorative ribbon, leather cord, or baker’s twine. Just ensure whatever material you use is strong enough to hold the ornament and that the knot is large enough to remain secure.
Q: My circles are not staying centered when I hang it. What can I do?
A: Make sure your internal knot on the hanging loop is large enough and positioned correctly just below the top circle’s MR. You can add a second knot below the large circle’s MR if necessary for stability, or place a few invisible stitches through the stacked circles to lock their center points relative to the hanging thread.
Q: Is gauge important? My circles look smaller than yours.
A: Gauge is only critical if you want your finished ornament to be exactly the stated dimensions. Consistency between your three circles is far more important. If all three are smaller, your ornament will just be a little smaller overall.
Q: I struggle with the magic ring. Can I use the ch-4 loop method instead?
A: Yes, absolutely. Start with ch 4, sl st to the first ch to form a ring, and then work the required number of stitches into that ring. Pull the tail of your starting chain to close the center hole as tightly as possible.
Q: I don’t have any wooden beads. Can I leave it off?
A: Certainly! The bead adds a decorative, rustic touch, but the ornament looks lovely without it too. Simply thread your loop through the Small Circle center and secure the knot as instructed, perhaps adding a small ch-loop directly above the circle to create the structure for hanging.